Introducing Hypriot Cluster Lab: Docker clustering as easy as it gets
Tue, Dec 8, 2015Today we wanna share something with you that we have been working on for the last couple of weeks. And we are pretty exited about it, too. It is based on our beloved HypriotOS and makes it dead simple to build Docker clusters.
Until now it was not exactly easy to get started with Docker clustering. You would have needed specific knowledge and lots of time to manually configure the cluster and its individual nodes.
Well, that’s now a thing of the past.
May we introduce to you the newest member of the Hypriot family: The Hypriot Cluster Lab!
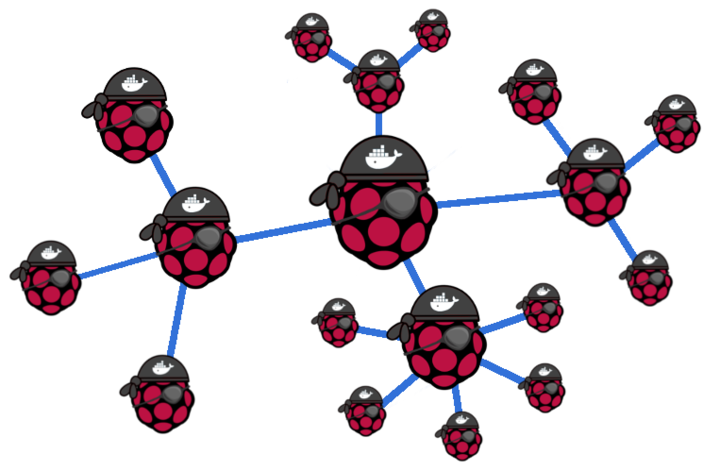
With the Hypriot Cluster Lab it is just a matter of minutes to set up your own personal Docker cluster. All you need is a couple of Raspberry Pi’s - 3, 5, 30 or even 100 - it is up to you - and our Hypriot Cluster Lab SD card image.
We designed the Cluster Lab to be completely self-configuring, so there is nothing to configure or to set up. Basically you just need to download our Cluster Lab SD card image and flash it onto a number of SD cards. Then ensure that all your Pi’s have network connectivity, insert the SD cards and switch on power. Everything else is taken care of automatically by our Cluster Lab.
Docker Clustering as easy as it gets!
When we started out to develop the Cluster Lab we wanted to be able to create complex Raspberry Pi based clusters with an arbitrary number of nodes. We wanted to directly jump to deploying all kind of interesting services on top of the cluster instead of being concerned with setting up the cluster itself.
And well - we managed to pull this off by combining a number of great technologies. For instance Avahi for announcing/managing who is a master and who is a slave node in the cluster. VLAN for isolating the cluster network from other existing networks. DHCP for automatically assigning IP addresses to slave nodes in the cluster network. Consul as a service registry and key-value-store. And of course a number of other Docker related technologies that we already provide in HypriotOS: Docker Engine, Swarm and Compose.
These technologies work together seamlessly and form what we call the Hypriot Cluster Lab. On top of it we are now able to easily deploy all kind of cluster services. We have a number of ideas where this can come in handy in the future! Think Kubernetes for instance or Redis cluster.
The Cluster Lab is still a bit rough around the edges and is more technology preview than production ready software, but we think it demonstrates the basic use case very well and shows the potential. So for the coming weeks we want to gather feedback and make it more polished and resilient. After that our main goal is to make it possible that all kind of cluster scenarios can be deployed on top of the Cluster Lab with just one command. We want to make this possible by providing a kind of plugin-mechanism so that the community can help us in enabling many more interesting cluster use cases.
The main reason that makes us really excited about the Cluster Lab, is that we think that there is great potential in using it as an educational tool in schools, universities or in commercial trainings. It can be used to teach about Linux, Networking, Clustering, Microservices and so much more!
And with the latest member of the Raspberry Pi family - the Pi Zero - it got really cheap to have your own cluster. For about 50 bucks you are able to have a two to three node physical cluster. And believe us - having physical nodes and being able to pull the network or power to simulate different cluster scenarios makes all the difference. Working with real hardware compared to a virtual environment (e.g. Vagrant) has a certain raw and primal feel about it that we really like. :)
So enough talking - let’s get our hands dirty - shall we?
Prerequisites or what you gonna need to follow along
- at least two Raspberry Pi’s: Model 1 or 2 - both will do
- for each Raspberry Pi a power supply, a MicroSD card and a network cable
- a network switch that is somehow connected to the Internet and a DHCP server; both is usually provided by your typical off-the-shelf home router
Additionally, the switch should not filter IEEE 802.1Q VLAN flags out of network packets. Usually this feature is provided even by cheap switches. If you wanna be safe, go through a small test to figure this out. The test is listed here.
Download. Flash. Boot. Enjoy!
1. Download the Hypriot Cluster Lab SD card image (hypriot_20160121-235123_clusterlab.img.zip).
2. Flash the image to your SD cards your way or use our funky flash script which makes flashing the SD cards so much easier.
Another advantage of our flash script is that it also allows you to give your cluster nodes unique hostnames:
$ flash --hostname cl-master http://downloads.hypriot.com/hypriot_20160121-235123_clusterlab.img.zip
$ flash --hostname cl-node-1 http://downloads.hypriot.com/hypriot_20160121-235123_clusterlab.img.zip
3. Put the freshly flashed SD cards in each node’s SD card slot.
4. Power on only one node. This node will automatically become the master node of the cluster. It might take up to two minutes until the master node is fully functional.
5. Find out the IP address of your master node. One way to do this is via nmap and is described here.
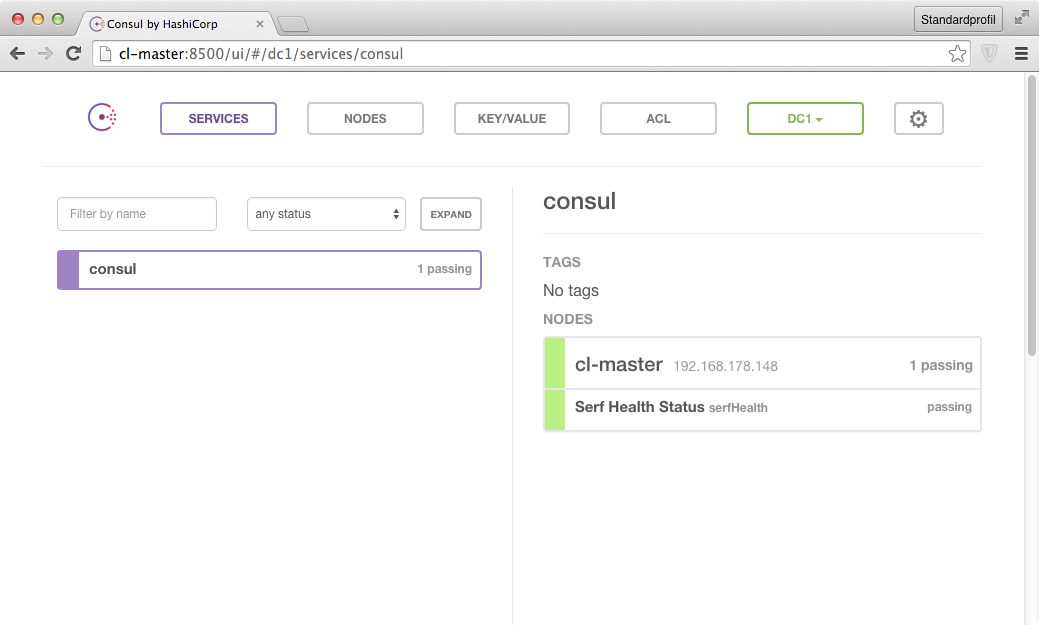
6. Use the IP (from step 5) or the hostname (from step 2) to point your browser to http://{IP or hostname of the master node}:8500. In our case http://cl-master:8500 opens the Consul web interface and our cluster master node is displayed:
7. Power on all the remaining cluster nodes only if step 5 was successful. After about 2 minutes you should see the rest of them being listed in the Consul web interface, too.
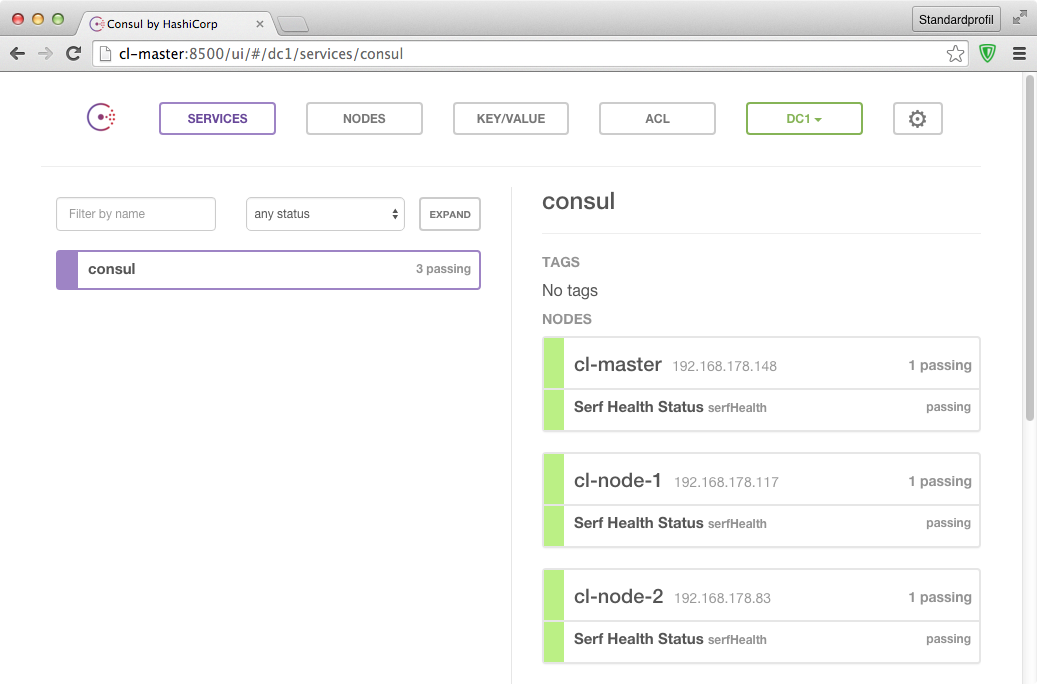
The last step makes the cluster fully operational and we are now able to work with the cluster in earnest.
Babysteps with our Cluster Lab
Congratulations, you got your Hypriot Cluster Lab up and running! That was easy, wasn’t it?
The Cluster Lab is using Docker Swarm for managing Docker containers on the nodes that make up the cluster. Docker Swarm will distribute containers based on different distribution strategies to individual nodes. Per default Docker Swarm uses the spread strategy to evenly distribute container on cluster nodes.
Working with Docker Swarm is easy. To start we first need to log into our cluster master:
$ ssh root@cl-master
There we can use the Docker Client to connect to the Swarm Manager instance. We do that by providing the ‘-H’ flag to the docker command.
This enables the Docker client to use the Docker Remote API for accessing the Swarm Manager.
To display some basic info about the Swarm Cluster run
$ docker -H cl-master:2378 info
Containers: 7
Images: 6
Role: primary
Strategy: spread
Filters: health, port, dependency, affinity, constraint
Nodes: 3
 cl-master: 192.168.200.1:2375
  └ Containers: 3
  └ Reserved CPUs: 0 / 4
  └ Reserved Memory: 0 B / 971.8 MiB
  └ Labels: executiondriver=native-0.2, kernelversion=4.1.12-hypriotos-v7+, operatingsystem=Raspbian GNU/Linux 8 (jessie), storagedriver=overlay
 cl-node-1: 192.168.200.115:2375
  └ Containers: 2
  └ Reserved CPUs: 0 / 4
  └ Reserved Memory: 0 B / 971.8 MiB
  └ Labels: executiondriver=native-0.2, kernelversion=4.1.12-hypriotos-v7+, operatingsystem=Raspbian GNU/Linux 8 (jessie), storagedriver=overlay
 cl-node-2: 192.168.200.113:2375
  └ Containers: 2
  └ Reserved CPUs: 0 / 4
  └ Reserved Memory: 0 B / 971.8 MiB
  └ Labels: executiondriver=native-0.2, kernelversion=4.1.12-hypriotos-v7+, operatingsystem=Raspbian GNU/Linux 8 (jessie), storagedriver=overlay
CPUs: 12
Total Memory: 2.84
Instead of the hostname cl-master one can also use the IP address that is always fixed for the cluster master node: 192.168.200.1.
Ok - it seems our Swarm cluster is truly up and running.
Time to get a little bit more daring.
Let’s spin up a web interface for managing our nodes called DockerUI.
docker -H cl-master:2378 run -d -p 9000:9000 --env="constraint:node==cl-master" --name dockerui hypriot/rpi-dockerui -e http://192.168.200.1:2378
51f2eb09ab48540eb4a052bbe07644487c3a0b29ca44a6217ea6aebf17b3df0c
The most interesting part here is the env parameter --env="constraint:node==cl-master" which tells the Swarm Manager that we want to start our new container on the cl-master node.
Without that the new container would be started by Docker Swarm on one of the nodes according to the spread strategy.
By using the ‘constraint:node’ label we are able to control on which node a container gets started.
So let’s open the DockerUI with the following URL: http://cl-master:9000.
If everything did work you should now see an overview of your running containers similar to this one:

Back to the command line we can see the same result by using the docker ps command:
$ docker -H cl-master:2378 ps
CONTAINER ID        IMAGE                                                              COMMAND                  CREATED             STATUS              PORTS                          NAMES
51f2eb09ab48        hypriot/rpi-dockerui                                               "./dockerui -e http:/"   12 minutes ago      Up 12 minutes       192.168.200.1:9000->9000/tcp   cl-master/dockerui
fca75c6b759a        hypriot/rpi-consul                                                 "/consul agent -serve"   About an hour ago   Up About an hour                                   cl-node-2/bin_consul_1
4bfa58ed2a07        hypriot/rpi-swarm                                                  "/swarm join --advert"   About an hour ago   Up About an hour    2375/tcp                       cl-node-2/bin_swarm_1
ec61f8f5d766        hypriot/rpi-consul                                                 "/consul agent -serve"   About an hour ago   Up About an hour                                   cl-node-1/bin_consul_1
75c7cb003639        0104b3a10aad7e9a3d38ca4dce652c73d195b87171675c7dbc114ae85a444831   "/swarm join --advert"   About an hour ago   Up About an hour    2375/tcp                       cl-node-1/bin_swarm_1
df027cd23e69        hypriot/rpi-swarm                                                  "/swarm manage consul"   2 hours ago         Up 2 hours          192.168.200.1:2378->2375/tcp   cl-master/bin_swarmmanage_1
f6b11e9e4f07        hypriot/rpi-consul                                                 "/consul agent -serve"   2 hours ago         Up 2 hours                                         cl-master/bin_consul_1
8658010a4433        hypriot/rpi-swarm                                                  "/swarm join --advert"   2 hours ago         Up 2 hours          2375/tcp                       cl-master/bin_swarm_1
By now you should have gotten the hang of it and come to expect that you can use many of the Docker command line commands with Swarm, too.
And you are right - you just need to remember to use the -H flag as part of the Docker command.
Getting to the grown-up stuff
After we did our first babysteps successfully it is now time for some serious grown-up stuff. Certainly Docker multi-host networking can be considered serious stuff - don’t you think?
First let’s see if we already have any networks:
$ docker -H cl-master:2378 network ls
NETWORK ID          NAME                DRIVER
d88253054dd4        cl-node-1/none      null
e78f9fc77a31        cl-node-2/bridge    bridge
12d2cb0e387d        cl-node-2/none      null
020bdb74ea43        cl-node-1/host      host
b39702828ebf        cl-node-1/bridge    bridge
c24764cf7077        cl-master/host      host
480319fbca22        cl-node-2/host      host
e5d7f7a69313        cl-master/bridge    bridge
7153745ef548        cl-master/none      null
These are the networks that are already present by default.
Let’s add our own overlay network:
$ docker -H cl-master:2378 network create -d overlay my-net
54583b74b0c5b678678db18b99a1148049640e3c4e6ac6f5cdfa0938b1399f3a
HypriotOS: root@cl-master in ~
$ docker -H cl-master:2378 network ls
NETWORK ID          NAME                DRIVER
7153745ef548        cl-master/none      null
c24764cf7077        cl-master/host      host
54583b74b0c5        my-net              overlay
480319fbca22        cl-node-2/host      host
e5d7f7a69313        cl-master/bridge    bridge
b39702828ebf        cl-node-1/bridge    bridge
d88253054dd4        cl-node-1/none      null
e78f9fc77a31        cl-node-2/bridge    bridge
12d2cb0e387d        cl-node-2/none      null
020bdb74ea43        cl-node-1/host      host
As you can see we now have successfully created our first Docker multi-node overlay network. This overlay network is really useful. Any container started in this network can talk to any other container in the network by default.
In order to see how this works we are going to start two containers on different cluster nodes that will talk to each other.
$ docker -H cl-master:2378 run -itd --name=webserver --net=my-net --env="constraint:node==cl-node-1" hypriot/rpi-nano-httpd
378ddbe05781360f57f869f9aec7ad4c2cd703047cb5da11a9a7f395501bc533
Listing the running containers in our cluster we now have:
$ docker -H cl-master:2378 ps
CONTAINER ID        IMAGE                                                              COMMAND                  CREATED             STATUS              PORTS                          NAMES
378ddbe05781        hypriot/rpi-nano-httpd                                             "/httpd 80"              26 seconds ago      Up 23 seconds       80/tcp                         cl-node-1/webserver
51f2eb09ab48        hypriot/rpi-dockerui                                               "./dockerui -e http:/"   41 minutes ago      Up 40 minutes       192.168.200.1:9000->9000/tcp   cl-master/dockerui
fca75c6b759a        hypriot/rpi-consul                                                 "/consul agent -serve"   About an hour ago   Up About an hour                                   cl-node-2/bin_consul_1
4bfa58ed2a07        hypriot/rpi-swarm                                                  "/swarm join --advert"   About an hour ago   Up About an hour    2375/tcp                       cl-node-2/bin_swarm_1
ec61f8f5d766        hypriot/rpi-consul                                                 "/consul agent -serve"   About an hour ago   Up About an hour                                   cl-node-1/bin_consul_1
75c7cb003639        0104b3a10aad7e9a3d38ca4dce652c73d195b87171675c7dbc114ae85a444831   "/swarm join --advert"   2 hours ago         Up 2 hours          2375/tcp                       cl-node-1/bin_swarm_1
df027cd23e69        hypriot/rpi-swarm                                                  "/swarm manage consul"   3 hours ago         Up 3 hours          192.168.200.1:2378->2375/tcp   cl-master/bin_swarmmanage_1
f6b11e9e4f07        hypriot/rpi-consul                                                 "/consul agent -serve"   3 hours ago         Up 3 hours                                         cl-master/bin_consul_1
8658010a4433        hypriot/rpi-swarm                                                  "/swarm join --advert"   3 hours ago         Up 3 hours          2375/tcp                       cl-master/bin_swarm_1
Everything so far looks good. So let’s get the final piece working by starting a web client that talks to our webserver.
$ docker -H cl-master:2378 run -it --rm --net=my-net --env="constraint:node==cl-node-2" hypriot/armhf-busybox wget -O- http://webserver/index.html
Connecting to webserver (10.0.0.2:80)
<html>
<head><title>Pi armed with Docker by Hypriot</title>
  <body style="width: 100%; background-color: black;">
    <div id="main" style="margin: 100px auto 0 auto; width: 800px;">
      <img src="pi_armed_with_docker.jpg" alt="pi armed with docker" style="width: 800px">
    </div>
  </body>
</html>
-                    100% |*******************************|   304   0:00:00 ETA
As you can see we have been able to spin up a busybox container on another node.
We used it to fetch the index.html page with the wget command from our webserver container.
The simplicity of this illustrates how powerful Docker networking has become. Creating this kind of a setup with - for example OpenVSwitch - was way more complicated in the past.
It is possible to create far more complex scenarios with our Cluster Lab, but hopefully we were able to demonstrate a bit of the potential it has. We will write more about those in some future blog posts.
Until then we hope that it was fun to follow along and that we could infect you a little bit with our passion for Docker clustering.
You can find the source code of the Hypriot Cluster Lab at Github.
As always, use the comments below to give us feedback, discuss this post on HackerNews and share this post on Twitter, Google or Facebook.
Andreas & Mathias
comments powered by Disqus