The Pine A64 is about to become the cheapest ARM 64-bit platform to run Docker
Mon, Jan 25, 2016
Last Saturday one of the more promising Kickstarter campaigns that piqued our curiosity ended after 44 days and was able to raise 1.7 million dollars. It was a campaign to fund the cheapest 64-bit ARM board that can currently be bought for money.
The Pine A64 sells for 15 bucks.
So why is that noteworthy when there are boards like the Pi Zero around that sell for $5?
It very much is, when you put that price into perspective. The cheapest 64-bit ARM board we knew before the Pine was the NVIDIA ShieldTV, which sells for about $200. Next comes the much more expensive AMD Opteron A1100 series where an individual chip alone starts with a price tag of $150.
All in all that means that the Pine A64 is the most affordable way to lay your hands on real 64-bit ARM hardware - and that by a long shot! So what can you actually do with such a device?
Lots of things of course, but for us at Hypriot, the first thing we think about anything is: Can we run Docker on it? And the short answer is: probably yes. But more about that later.
The Hardware
Before we deep dive into the nitty gritty details, let’s first take a step back and see what the Pine A64 has to offer hardware-wise.
The Pine A64 does have
- a quad-core Cortex A53 CPU with 1,2 Ghz
- a 64-bit processor architecture
- up to 2 GB of DDR3 memory
- a version with Gigabit Ethernet
- the ability to play 4K video
What excites us the most here, is the 64-bit architecture combined with 2 GB of memory and Gigabit Ethernet.
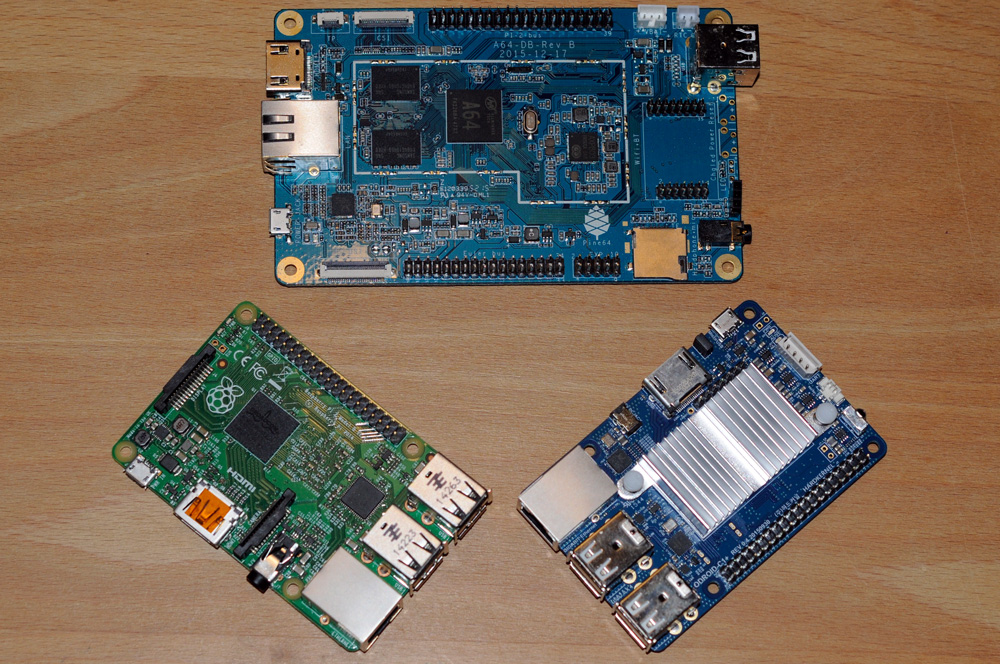
Those specs set the Pine A64 distinctly apart from the Raspberry Pi 2, which much to our regret only provides 100 Megabit Ethernet. Just be aware that you’ll get these specs only with the high-end version of the Pine. It is called the A64+ and costs a bit more with $19 (1 GB version) or $29 (2 GB version). Even at $19 for the 1 GB version that’s nearly half of the price of a Raspberry Pi 2.
If it turns out that the build quality and support of the board is on par with that of the Raspberry Pi that could indeed considered an impressive accomplishment.
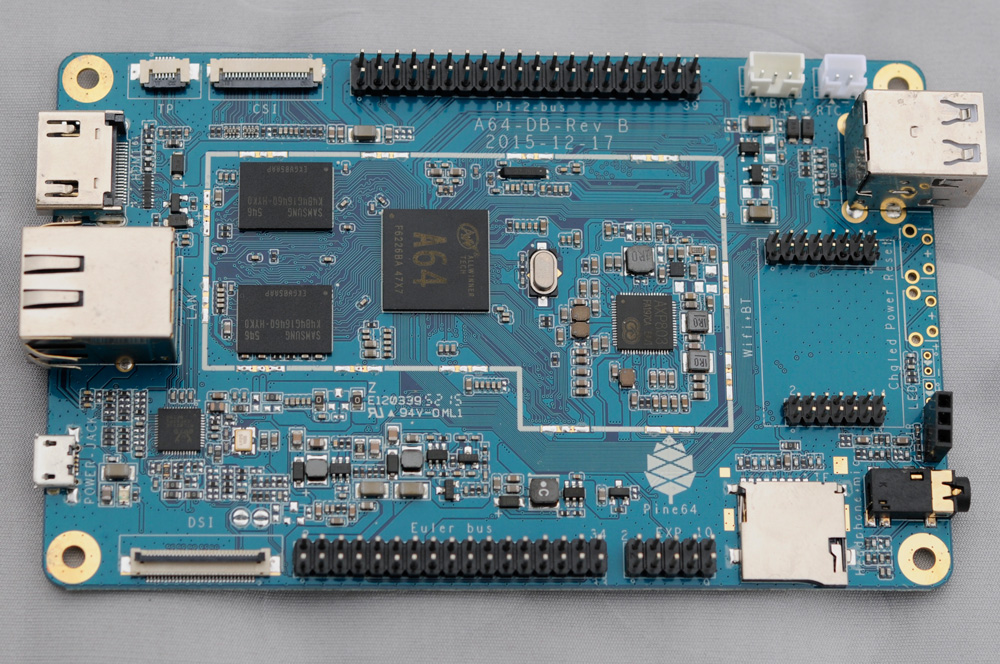
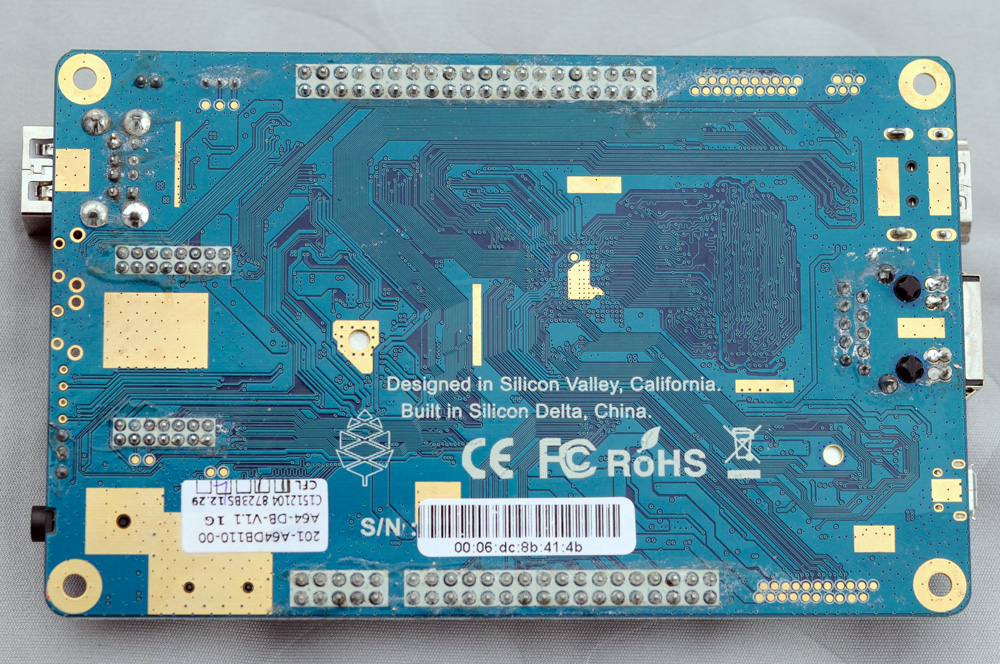
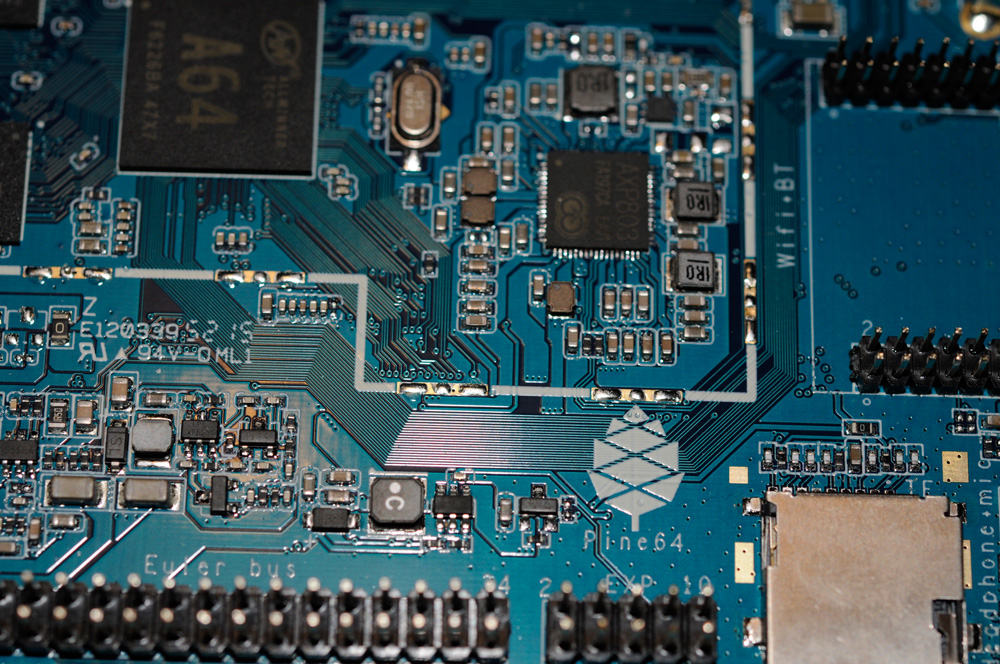
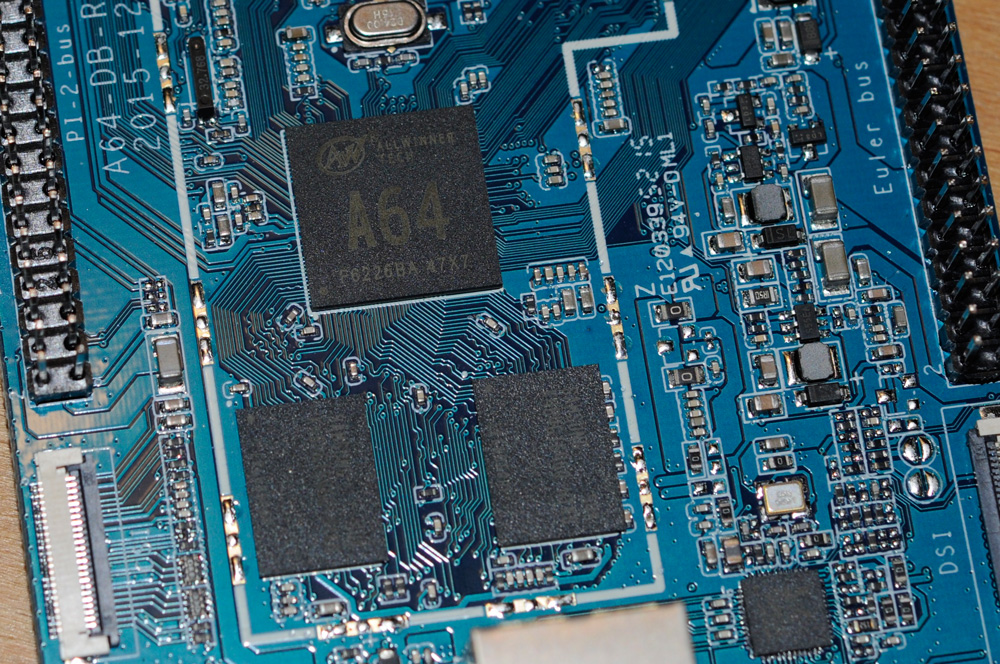
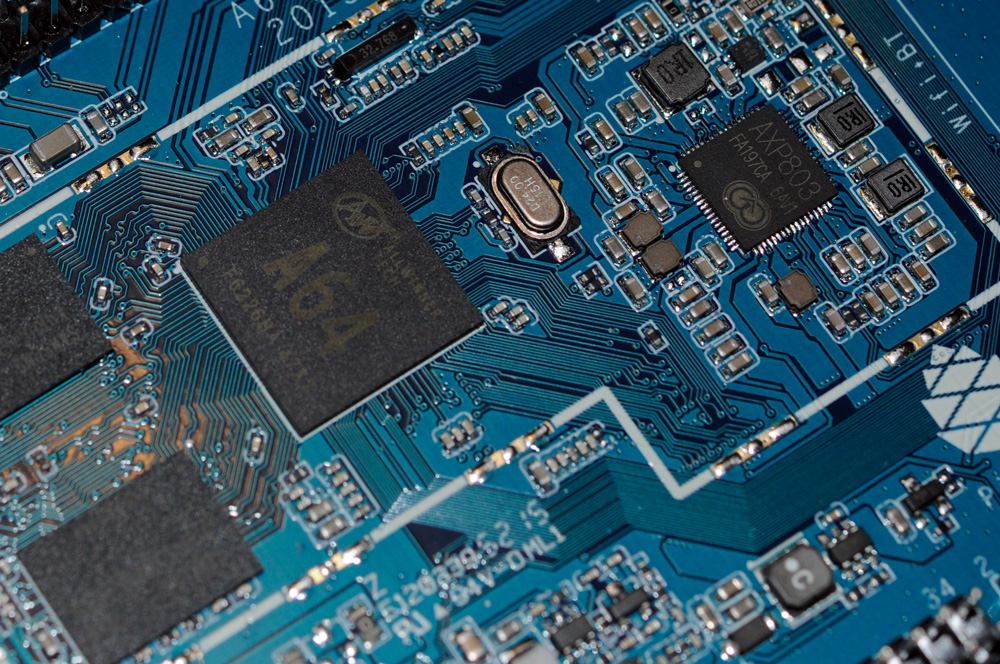
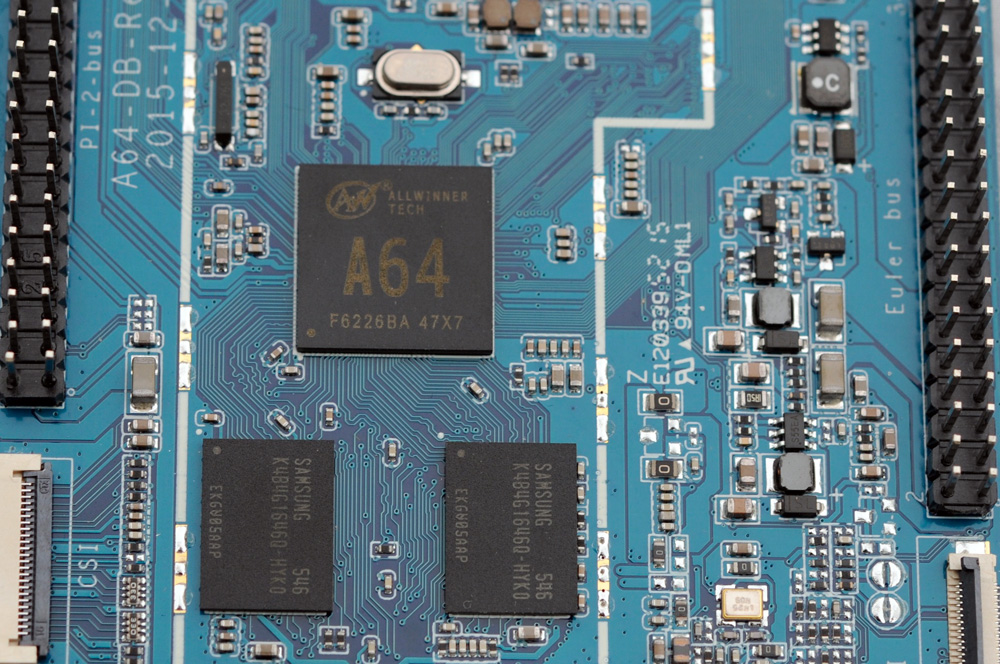
We were lucky enough to secure an early developer version of the device, which arrived a couple of days ago. Seeing is believing and as such we prepared a couple of photos that we made from our own Pine A64+ board with 1 GB.
The Software
One of the current limitations of the Pine A64 is that it only runs with Android. The Pine makers assured us that Linux support will come, too. Still for us it is a tad annoying that Android is first instead of Linux.
Impatient as we are, once we got the device, we immediately started out to rectify this by getting HypriotOS to run on it. Relatively soon it became obvious that this would not be an easy task.
Why? Well, it seems that the relationship between Allwinner Technology and the Open-Source community has not always been the best in the past. That basically meant that the existing friendly and supportive Open-Source community for the Allwinner related SoC’s often had to work with limited information and support when they tried to come up with proper Linux support for Allwinner based devices. Still despite that some members of the Linux Sunxi Community are already busy working with the Pine A64.
A long journey (down the rabbit hole) begins with the first step
The rest of this blog post describes our preliminary journey to create Linux & Docker bliss for the Pine A64. And consider yourself sufficiently warned - this journey is not for the faint of heart… :)
Down the rabbit hole: Output foo with the UART0 console
So let’s get our hands on this new beauty. First thing you should know is how you can power the Pine A64 board. It has a standard microUSB port, which you can use with a power adapter of 5V/2A. That’s the same you might use for a Raspberry Pi.
For our first low-level steps with the board we prefer to connect to the UART0 console via an UART-to-USB connector cable. We recommend to use one such as the USB to TTL Serial Cable from Adafruit. Adafruit also has a great tutorial on how to install the drivers for such a cable on different operating systems.
For connecting via UART0 to the Pine there are basically two ways. Either via the pins of the Euler bus or via the EXT connectors.
The location of each can be seen on the following images. Consult the Linux-sunxi Wiki: Serial port / UART for more details.
Serial Console with Euler Bus:

Serial Console with Ext connector:

To actually work with the UART0 console you have to connect the UART-to-USB cable to your Linux or Mac computer and start your preferred terminal program.
Here is the command for Mac OS X:
$ sudo screen /dev/cu.usbserial 115200
Don’t be surprised that there is absolutely no sign of booting on your console screen when you connect the UART-to-USB cable to the Pine. The only thing you will see is that the power LED on the board has turned green.
This is due to the fact that the A64 SOC is reading its initial bootloader from the microSD card into memory and starts it. Among other things this initializes the UART0 port and prints out the first boot messages.
There might be two reasons if your Pine stays silent: either there is no SD card present or there is no working bootloader program found on the SD card.
So let’s make sure that we have both.
Grab a working SD card and flash an appropriate image on it. Thanks to Andre Przywara there already is a first experimental Linux image that we can use.
# replace sdx with the name of your SD card device file

$ xzcat pine64_linux-20160121.img.xz | dd of=/dev/sdx bs=1M
$ sync
This SD card image is a hybrid that combines components from the original Pine 64 Android image with a recent Linux 4.4.0-rc8 kernel and initrd. All this is more or less just cobbled together to get a first prototypical SD card image with Linux running.
As this image does not include a full root file system one of the first ideas that came to our mind was to include our HypriotOS root filesystem for ARM64. Alright, lets see if this really works.
Inserting the SD card into the Pine A64 and booting produced the expected boot messages. After some seconds the following boot Linux prompt was visible:
BusyBox v1.22.1 (Debian 1:1.22.0-9+deb8u1) built-in shell (ash)
Enter 'help' for a list of built-in commands.

/ #
/ #
/ #
/ # uname -a
Linux (none) 4.4.0-rc8 #20 SMP PREEMPT Mon Jan 18 01:05:25 GMT 2016 aarch64 GNU/Linux
/ # df -h
Filesystem                Size      Used Available Use% Mounted on
none                     78.5M     72.0K     78.4M   0% /run
devtmpfs                381.8M         0    381.8M   0% /dev
/ #
Okay, that was the first step, but now we would like to see, if it’s really possible to boot into a HypriotOS root filesystem. So let’s reboot the Pine. As soon as the U-Boot messages appear, hit a random key to stop the automatic boot process. This drops us into an interactive U-Boot prompt.
Next we just have to follow Andre’s documentation and tell U-Boot to boot into the root filesystem on /dev/sda10, which contains our generic HypriotOS for ARM64:
sunxi# run load_env
sunxi# run load_dtb
sunxi# run set_cmdline
sunxi# setenv kernel_part mainline
sunxi# run load_kernel
sunxi# run boot_kernel
Bingo! It works.

Here are a few snippets of the boot log from the UART0 console. We have stored the complete boot log for you as a GitHub gist.
HELLO! BOOT0 is starting!
boot0 commit : 045061a8bb2580cb3fa02e301f52a015040c158f

boot0 version : 4.0.0
set pll start
set pll end
...
NOTICE:  BL3-1: v1.0(debug):045061a
NOTICE:  BL3-1: Built : 14:30:28, Dec  3 2015
NOTICE:  BL3-1 commit: 045061a8bb2580cb3fa02e301f52a015040c158f

INFO:    BL3-1: Initializing runtime services
INFO:    BL3-1: Preparing for EL3 exit to normal world
INFO:    BL3-1: Next image address = 0x4a000000
INFO:    BL3-1: Next image spsr = 0x1d3


U-Boot 2014.07 (Dec 03 2015 - 14:30:33) Allwinner Technology
...
Starting kernel ...

INFO:    BL3-1: Next image address = 0x41080000
INFO:    BL3-1: Next image spsr = 0x3c5
Booting Linux on physical CPU 0x0
Initializing cgroup subsys cpu
Linux version 4.4.0-rc8 (aprzywara@slackpad) (gcc version 4.9.3 (GCC) ) #21 SMP PREEMPT Wed Jan 20 22:43:20 GMT 2016
Boot CPU: AArch64 Processor [410fd034]
...
Welcome to Debian GNU/Linux 8 (jessie)!
...
[  OK  ] Reached target Multi-User System.
[  OK  ] Reached target Graphical Interface.

Debian GNU/Linux 8 black-pearl ttyS0

black-pearl login: pirate
Password:
Linux black-pearl 4.4.0-rc8 #21 SMP PREEMPT Wed Jan 20 22:43:20 GMT 2016 aarch64

The programs included with the Debian GNU/Linux system are free software;
the exact distribution terms for each program are described in the
individual files in /usr/share/doc/*/copyright.

Debian GNU/Linux comes with ABSOLUTELY NO WARRANTY, to the extent
permitted by applicable law.
HypriotOS/arm64: pirate@black-pearl in ~
$ uname -a
Linux black-pearl 4.4.0-rc8 #21 SMP PREEMPT Wed Jan 20 22:43:20 GMT 2016 aarch64 GNU/Linux
$ cat /etc/os-release
PRETTY_NAME="Debian GNU/Linux 8 (jessie)"
NAME="Debian GNU/Linux"
VERSION_ID="8"
VERSION="8 (jessie)"
ID=debian
HOME_URL="http://www.debian.org/"
SUPPORT_URL="http://www.debian.org/support/"
BUG_REPORT_URL="https://bugs.debian.org/"
HYPRIOT_OS="HypriotOS/arm64"
HYPRIOT_TAG="dirty"
HypriotOS/arm64: root@black-pearl in ~
Success! The first boot of HypriotOS/arm64 on a Pine A64 board.
Even deeper into the rabbit hole: Using the FEL mode to communicate with the the Pine A64
OK. That was fun, wasn’t it? Our small experiment with the UART-to-USB connector cable and the SD card image from Andre did give us a first taste of Linux on the Pine. But that of course is not the real deal. There is still a rocky path to walk before we will have proper Linux support.
Our path towards more knowledge leads us even deeper into the rabbit hole.
In order to gain that deeper knowledge we will introduce you to another powerful tool called FEL mode. The FEL mode is a low-level subroutine in the Boot ROM of all Allwinner devices that can be used to gather valuable insights about the Pine. We will show you shortly how this works.
Besides gathering intel FEL has another useful application. It allows you to directly boot images via an USB cable from your development computer. As such it makes the annoying process of flashing and inserting SD cards over and over again obsolete.
Booting the Pine A64 into FEL mode is really easy. Just leave the SD card slot empty and connect the Pine A64 with an appropriate USB cable to your computer. Then power on the Pine. It’s important to know that you have to connect to the Pine with a special USB cable to the upper USB port. That is because only this USB port is wired for using the FEL signals.

You can buy such a special USB A-male/A-male cable at Amazon or build it on your own.
Once the Pine A64 is booted, it can be discovered on your host computer as a new USB device with the USB ID 1f3a:efe8.
Running lsusb should show the device:
$ lsusb
Bus 001 Device 004: ID 1f3a:efe8
For further access via FEL mode, we need to install and compile the very latest version of the sunxi-tools. As our development computer we are using a Raspberry Pi running HypriotOS. So let’s install all the development dependencies we need and then clone the sunxi-tools repo and compile them from source.
$ sudo apt-get update
$ sudo apt-get install -y make gcc pkg-config libusb-1.0-0-dev
$ makedir -p ~/code
$ cd ~/code
$ git clone https://github.com/linux-sunxi/sunxi-tools
$ cd sunxi-tools
$ make
$ sudo make install
Now let’s see if we can use the sunxi-tools to extract some version information about the Pine.
$ sudo sunxi-fel version
AWUSBFEX soc=00001689(unknown) 00000001 ver=0001 44 08 scratchpad=00017e00 00000000 00000000
Bingo! The Pine A64 board is connected and we are already getting some basic version info.
The the SOC ID #1689 tells us it is an Allwinner A64 SOC.
The device itself is classified as “unknown” because it is too new to be recognized by the sunxi-fel tool.
What can we do now with this low-level access via FEL mode?
Well, for instance we could read 128 bytes of the device memory and display it as hex dump on the screen. Let’s start from address 0x0000:
$ sudo sunxi-fel hexdump 0x0000 128
00000000: 08 00 00 ea 06 00 00 ea 05 00 00 ea 04 00 00 ea  ................
00000010: 03 00 00 ea 02 00 00 ea 11 00 00 ea 00 00 00 ea  ................
00000020: 13 00 00 ea fe ff ff ea 01 00 a0 e3 00 10 a0 e3  ................
00000030: 00 20 a0 e3 00 30 a0 e3 00 40 a0 e3 00 50 a0 e3  . [email protected]..
00000040: 00 60 a0 e3 00 70 a0 e3 00 80 a0 e3 00 90 a0 e3  .`...p..........
00000050: 00 a0 a0 e3 00 b0 a0 e3 00 c0 a0 e3 00 d0 a0 e3  ................
00000060: e8 f0 9f e5 04 e0 4e e2 ff 5f 2d e9 1f 07 00 eb  ......N.._-.....
00000070: ff 9f fd e8 d2 20 a0 e3 02 f0 21 e1 d0 d0 9f e5  ..... ....!.....
Or we could just copy the device memory into a file to our development computer and display the content with the hexdump command locally.
$ sudo sunxi-fel dump 0x0000 128 > memory-dump.bin
$ hexdump -C memory-dump.bin
00000000  08 00 00 ea 06 00 00 ea  05 00 00 ea 04 00 00 ea  |................|
00000010  03 00 00 ea 02 00 00 ea  11 00 00 ea 00 00 00 ea  |................|
00000020  13 00 00 ea fe ff ff ea  01 00 a0 e3 00 10 a0 e3  |................|
00000030  00 20 a0 e3 00 30 a0 e3  00 40 a0 e3 00 50 a0 e3  |. [email protected]..|
00000040  00 60 a0 e3 00 70 a0 e3  00 80 a0 e3 00 90 a0 e3  |.`...p..........|
00000050  00 a0 a0 e3 00 b0 a0 e3  00 c0 a0 e3 00 d0 a0 e3  |................|
00000060  e8 f0 9f e5 04 e0 4e e2  ff 5f 2d e9 1f 07 00 eb  |......N.._-.....|
00000070  ff 9f fd e8 d2 20 a0 e3  02 f0 21 e1 d0 d0 9f e5  |..... ....!.....|
00000080
As we already explained, the Allwinner SOC is starting it’s boot process by loading the Boot ROM (BROM)
and detects wether it should run a normal boot or start the FEL subroutine.
With the help of FEL mode and the sunxi-fel tool we can also copy and analyze the BROM boot code itself.
So, let’s download the BROM directly from the Pine and save it into a local file on our development computer for later inspection. In order to do so, we need to know the memory address where the BROM starts.
Unfortunately the memory address that works for existing Allwinner SoC’s like the A10 or A20 does not work here.
But there is an important clue in the Linux-Sunxi wiki that tells us
that we need to search for a unique string eGON.BRM near the starting address of the BROM.
Armed with this knowledge and the sunxi-fel hexdump command we can now scan the memory until we will find this string.
And luckily we were able to locate the BROM starting at address 0x2c00:
$ sudo sunxi-fel hexdump 0x2c00 128
00002c00: 07 00 00 ea 07 00 00 ea 65 47 4f 4e 2e 42 52 4d  ........eGON.BRM
00002c10: 24 00 00 00 31 31 30 30 31 31 30 30 31 36 33 33  $...110011001633
00002c20: 00 00 00 00 00 00 00 ea 01 00 00 ea 00 60 a0 e3  .............`..
00002c30: 03 00 00 ea 5c 60 a0 e3 0e 00 00 ea e8 01 9f e5  ....\`..........
00002c40: 00 f0 90 e5 b0 0f 10 ee 03 10 00 e2 00 00 51 e3  ..............Q.
00002c50: f9 ff ff 1a ff 1c 00 e2 00 00 51 e3 f6 ff ff 1a  ..........Q.....
00002c60: c8 11 9f e5 c8 21 9f e5 00 30 91 e5 03 00 52 e1  .....!...0....R.
00002c70: 00 00 00 1a f0 ff ff ea 50 00 a0 e3 01 00 50 e2  ........P.....P.
Now let’s download the complete 32 KByte of the BROM binary blob and have a look at it:
$ sudo sunxi-fel dump 0x2c00 32768 > pine64-a64-brom.bin
$ head -c 128 pine64-a64-brom.bin | hexdump -C
00000000  07 00 00 ea 07 00 00 ea  65 47 4f 4e 2e 42 52 4d  |........eGON.BRM|
00000010  24 00 00 00 31 31 30 30  31 31 30 30 31 36 33 33  |$...110011001633|
00000020  00 00 00 00 00 00 00 ea  01 00 00 ea 00 60 a0 e3  |.............`..|
00000030  03 00 00 ea 5c 60 a0 e3  0e 00 00 ea e8 01 9f e5  |....\`..........|
00000040  00 f0 90 e5 b0 0f 10 ee  03 10 00 e2 00 00 51 e3  |..............Q.|
00000050  f9 ff ff 1a ff 1c 00 e2  00 00 51 e3 f6 ff ff 1a  |..........Q.....|
00000060  c8 11 9f e5 c8 21 9f e5  00 30 91 e5 03 00 52 e1  |.....!...0....R.|
00000070  00 00 00 1a f0 ff ff ea  50 00 a0 e3 01 00 50 e2  |........P.....P.|
00000080
All these examples were based on the FEL mode and the sunxi-fel tool.
They illustrated how to gather information about a device.
In the introduction about the FEL mode we did mention another application of the FEL mode: You can have a faster development cycle where one does not have to flash and boot SD cards.
To make this mode work for the Pine we first have to patch the sunix-fel tool.
Thanks to the work of Siarhei Siamashka from Linux-Sunxi community this is easy:
$ cd ~/code/sunxi-tools
$ mv fel.c fel.c.org
$ wget https://github.com/ssvb/sunxi-tools/raw/dc77476014669a6f9010a3160357391450a5196e/fel.c
$ make
$ sudo make install
Wow, it works. The sunxi-fel tool now correctly detects the Pine A64 and the Allwinner A64 SOC.
$ sudo sunxi-fel version
AWUSBFEX soc=00001689(A64) 00000001 ver=0001 44 08 scratchpad=00017e00 00000000 00000000
With this preparation in place our work on things like the Secondary Program Loader (SPL or boot0), U-Boot, the Linux kernel and its modules get much more convenient.

Inside wonderland: Combining UART0 console and FEL mode
Now it is time to put the various things together we have learned thus far. Using both an USB A-male/A-male cable and an UART-to-USB connector cable at the same time we are able to send software to the Pine and see how it gets executed. This allows for fast feedback cycles.
We will attempt this by uploading and starting a boot0 bootloader.
Instead of creating our own boot0 bootloader for the sake of simplicity we are going to extract the existing one from Andre’s Linux SD card image. It is located at sector 16 (or 8 KByte) and has a total size of 64 sectors or 32 KByte.
$ xzcat pine64_linux-20160121.img.xz | dd of=pine64-boot0.bin bs=512 count=64 skip=16
Let’s double-check if this file is really the correct boot0 binary blob we’re looking for. The file should start with the string “eGON.BT0” at byte #5. Here we are:
$ hexdump -C pine64-boot0.bin
00000000  cc 00 00 ea 65 47 4f 4e  2e 42 54 30 31 7a f6 a8  |....eGON.BT01z..|
00000010  00 80 00 00 30 00 00 00  00 00 00 00 00 00 01 00  |....0...........|
00000020  00 00 01 00 00 00 00 00  00 00 34 2e 30 2e 30 00  |..........4.0.0.|
00000030  00 00 00 00 01 00 00 00  a0 02 00 00 03 00 00 00  |................|
...
With the help of sunxi-fel this boot0 program can now be sent directly to the Pine A64.
$ sudo sunxi-fel spl pine64-boot0.bin
Looking at our UART0 console output we can see that the upload and start of the program works as expected.
HELLO! BOOT0 is starting!
boot0 commit : 045061a8bb2580cb3fa02e301f52a015040c158f

boot0 version : 4.0.0
set pll start
set pll end
rtc[0] value = 0x00000000
rtc[1] value = 0x00000000
rtc[2] value = 0x00000000
rtc[3] value = 0x00000000
rtc[4] value = 0x00000000
rtc[5] value = 0x00000000
DRAM driver version: V1.1
rsb_send_initseq: rsb clk 400Khz -> 3Mhz
PMU: AXP81X
ddr voltage = 1500 mv
DRAM Type = 3 (2:DDR2,3:DDR3,6:LPDDR2,7:LPDDR3)
DRAM clk = 672 MHz
DRAM zq value: 003b3bbb
DRAM single rank full DQ OK
DRAM size = 1024 MB
DRAM init ok
dram size =1024
card boot number = 0, boot0 copy = 0
card no is 0
sdcard 0 line count 4
[mmc]: mmc driver ver 2015-05-08 20:06
[mmc]: sdc0 spd mode error, 2
[mmc]: Wrong media type 0x00000000
[mmc]: ***Try SD card 0***
[mmc]: mmc 0 cmd 8 timeout, err 00000100
[mmc]: mmc 0 cmd 8 err 00000100
[mmc]: mmc 0 send if cond failed
[mmc]: mmc 0 cmd 55 timeout, err 00000100
[mmc]: mmc 0 cmd 55 err 00000100
[mmc]: mmc 0 send app cmd failed
[mmc]: ***Try MMC card 0***
[mmc]: mmc 0 cmd 1 timeout, err 00000100
[mmc]: mmc 0 cmd 1 err 00000100
[mmc]: mmc 0 send op cond failed
[mmc]: mmc 0 Card did not respond to voltage select!
[mmc]: ***SD/MMC 0 init error!!!***
[mmc]: mmc 0 register failed
Fail in Init sdmmc.
Ready to disable icache.
By verifying that we can send code to the Pine and execute it, we opened up the door for further steps. For instance working on a new U-Boot bootloader.
A few days ago Siarhei was able to create a first working U-Boot for the A64 SOC and could upload and start it on his Pine A64 board. He published the full boot log of this work-in-progress U-Boot bootloader.
Here you can see a snippet from the boot log that shows what is already working:
U-Boot SPL 2016.01-00352-ge77e0e4-dirty (Jan 24 2016 - 10:26:33)
DRAM:DRAM driver version: V1.0
DRAM Type = 3 (2:DDR2,3:DDR3,6:LPDDR2,7:LPDDR3)
DRAM clk = 672 MHz
DRAM zq value: 3b3bbb
DRAM single rank full DQ OK
DRAM size = 1024 MB
DRAM init ok
 1024 MiB
Trying to boot from MMC


U-Boot 2016.01-00352-ge77e0e4-dirty (Jan 24 2016 - 10:26:33 +0200) Allwinner Technology

CPU:   Allwinner A64 (SUN50I)
DRAM:  1 GiB
MMC:   SUNXI SD/MMC: 0
...
The preliminary end
This brings us (somewhat sadly) to the end of our blog post.
Our goal was to give a first impression of the current state of Linux support for the Pine A64. And we also wanted to give you an introduction to the tools and knowledge that are necessary to make it happen.
This blogpost would not be possible without the great guys from the Linux-Sunxi community. Especially the help of Andre Przywara (apritzel) and Siarhei Siamashka (ssvb) was invaluable. It demands lots of respect seeing how they have to reverse engineer this stuff with only little support from Allwinner Technology. We really hope that the announced support from the Pine team will help to move things forward.
We will follow this development closely and hope to publish an initial support for HypriotOS rather sooner than later. By this Docker will gain access to a really powerful developer board - and we will support it early on.
We hope you enjoyed this whirlwind tour through the Pine Linux Wonderland!
As always, use the comments below to give us feedback, discuss this post on HackerNews and share this post on Twitter, Google or Facebook.
Dieter @Quintus23M and Govinda @_beagile_
comments powered by Disqus