Setting up 100 nodes Jenkins cluster with Docker Swarm in less than 10 minutes
Sun, Mar 20, 2016A week ago Scaleway announced their new C2 server. I was so excited to see that they were introducing new ARM C2 servers with 8 CPUs and 32 GB of RAM. Wow!
Not until I logged in and did lscpu did I realize that those servers were “just” Intel Atom servers.
A bit disappointed I thought what to do now? In my enthusiasm I had spun up 3 servers with 82 GB of RAM and 24 CPUs. Still with my thoughts firmly rooted in the Docker #SwarmWeek I could not resist to find out how easy it would be to set up a Swarm Cluster on those servers.
But a Swarm Cluster on its own is like a container ship without any containers - so I decided to run a Jenkins Cluster on top of the Swarm Cluster.
You might not believe me, but I was able to set up a 100 node Jenkins Cluster in less than 10 minutes. And you can do that, too.

There are couple of reasons why it was so simple.
Meet the new Scaleway C2 servers
The first reason is that I was using the new Scaleway Cloud servers.
You might think “well, just ordinary cloudservers like those Amazon EC2 instances”, but the Scaleway offering is really quite different. By buying a Scaleway server you get access to real hardware that only belongs to you. It is not a virtual machine running on shared hardware. Still you have all the flexibilty of an - say Amazon EC2 instance - you can start and stop the instance on demand and pay as you go on an hourly rate. Furthermore you can completely control the Scaleway servers with an API and a great command line interface.
Did I already talk about the pricing model?
As the Scaleway offering feels quite similar to Amazons AWS EC2 offering I looked for an instance type that was more or less comparable to the top model from Scaleway. I ended up with an m4.2xlarge instance type.
| Product | CPU | RAM | Hourly Price | Price per Month |
|---|---|---|---|---|
| Amazon EC2 m4.2xlarge | 8 vCore | 32 GB | € 0,5059 | € 364,24 |
| Scaleway Baremetal C2L | 8 Core | 32 GB | € 0,0333 | € 23,99 |
As you can see the EC2 instance costs roughly 15 times what the Scaleway server costs. Even if those two offerings are not 100% comparable I find the pricing of the Scaleway server very impressive.
After introducing the new Scaleway C2 server let’s get started by setting up a couple of the C2 servers.
If you do not have an account with Scaleway you need to sign up with them first. Afterwards you can use the Scaleway Command Line Interface to create the servers.
Download the latest version for your operating system from the release page. For working with the new C2 server you need at the latest version 1.8.0 of the Scaleway CLI.
For Mac user the easiest way to install it is via Homebrew.
$ brew install scw
==> Downloading https://homebrew.bintray.com/bottles/scw-1.7.1.mavericks.bottle.tar.gz
Already downloaded: /Library/Caches/Homebrew/scw-1.7.1.mavericks.bottle.tar.gz
==> Pouring scw-1.7.1.mavericks.bottle.tar.gz
==> Caveats
Bash completion has been installed to:
  /usr/local/etc/bash_completion.d

zsh completion has been installed to:
  /usr/local/share/zsh/site-functions
==> Summary
🍺  /usr/local/Cellar/scw/1.7.1: 4 files, 10.7
Check if the Scaleway CLI works with
$ scw --version
scw version v1.7.1, build homebrew
Looks good.
To be able to do anything meaningful with the CLI we need first to log into our account. Use the email and password you got when you registered as credentials.
$ scw login
Login (cloud.scaleway.com): [email protected]
Password:
Do you want to upload an SSH key ?
[0] I don't want to upload a key !
[3] id_rsa.pub
Which [id]:
When you are asked to upload the public part of your SSH key you should do so. This allows us later to securely connect to our Scaleway ARM servers via SSH.
After a successful login we are now able to interact with our Scaleway account remotely.
So let’s create three servers for our Swarm Cluster. The C2 server type is currently in preview which means there is a quota that allows only to spin up a limited number of each instance type. So I settled for two C2L and one C2M.
$ scw create --commercial-type=C2L --name=cl-leader Docker
16ca1b31-f94e-4d6c-be46-ade4641054e4

$ scw create --commercial-type=C2L --name="cl-follower1" Docker
16ca1b31-f94e-4d6c-be46-ade4641052e4

$ scw create --commercial-type=C2M --name="cl-follower2" Docker
16ca1b31-f94e-4d6c-be46-ade4641053e4
That was easy, right?
We can list our current servers by using
$ scw ps
SERVER ID           IMAGE               COMMAND             CREATED             STATUS              PORTS               NAME
f20a3a57            Docker_1_10_0                           1 days              running             212.47.235.237      cl-leader
8cae4fd4            Docker_1_10_0                           1 days              running             163.172.135.05      cl-follower1
6al5b4e4            Docker_1_10_0                           1 days              running             163.172.135.28      cl-follower2
Let’s check what we have by logging into one of our new servers:
$ scw exec cl-leader

root@cl-leader:~# docker info
root@cl-leader:~# docker info
Containers: 0
 Running: 0
 Paused: 0
 Stopped: 0
Images: 0
Server Version: 1.10.3
Storage Driver: aufs
 Root Dir: /var/lib/docker/aufs
 Backing Filesystem: extfs
 Dirs: 0
 Dirperm1 Supported: true
Execution Driver: native-0.2
Logging Driver: json-file
Plugins:
 Volume: local
 Network: bridge null host
Kernel Version: 4.4.5-docker-1
Operating System: Ubuntu 15.10
OSType: linux
Architecture: x86_64
CPUs: 8
Total Memory: 31.34 GiB
Name: cl-leader
ID: GUOI:LSEY:LASQ:XACT:M7D2:DVA3:LYLV:5YGT:6M7O:2P7T:5VXX:HKMO
Labels:
 provider=scaleway
Codename:wily
As you can see we do have up-to-date software:
- Ubuntu 15.10
- a 4.4 Linux Kernel
- Docker 1.10.3
Seems the Scaleway servers are a perfect place to run Docker and we have everything ready to move forward.
The next step is setting up a private network between those three servers. I am going to use a VPN solution called tinc for that. It is a really great peer-to-peer Mesh VPN solution, but basically you can use any VPN solution that works for you. I am not going into the details of the tinc configuration now, because I am going to write about it in another blog post soon.
So after configuring tinc we do have an additional network device on each server that is part of our private tinc network:
scw exec cl-leader " ip a | grep tun"
92: tun0: <POINTOPOINT,MULTICAST,NOARP,UP,LOWER_UP> mtu 1500 qdisc noqueue state UNKNOWN group default qlen 500
    inet 10.0.0.2/24 scope global tun0
Make sure that you can ping all the other nodes in your private network like this:
$ scw exec cl-follower1 "ping 10.0.0.2"
That we have the name of tinc network device is important for the configuration of the Hypriot Cluster Lab which we gonna use in the next section.
Easy swarming with the Hypriot Cluster Lab
The Hypriot Cluster Lab is the second reason why it is so easy to set up our 100 node Jenkins cluster. The Cluster Lab helps us to set up a Docker Swarm Cluster without any manual configuration in minutes.
So let’s configure the Hypriot package repository and install the Hypriot Cluster Lab.
$ for server in cl-leader cl-follower1 cl-follower2; do
  scw exec $server "curl -s https://packagecloud.io/install/repositories/Hypriot/Schatzkiste/script.deb.sh | sudo bash; apt-get install -y hypriot-cluster-lab"
done
As the Cluster Lab itself can be used in different scenarios we still need to configure some settings of the Cluster Lab to make it play nice with a VPN solution:
$ for server in cl-leader cl-follower1 cl-follower2; do
  scw exec $server \"sed -i -e 's|ENABLE_VLAN="true"|ENABLE_VLAN="false"|g' -e 's|ENABLE_DHCP="true"|ENABLE_DHCP="false"|g' -e 's|INTERFACE="eth0"|INTERFACE="tun0"|g' /etc/cluster-lab/cluster.conf\"
done
We are changing the Cluster Lab configuration to disable VLAN and DHCP support and we are also changing the Cluster Lab network interface to ‘tun0’ which we created with tinc before. Those settings ensure that the Cluster Lab uses our private tinc network for all cluster communication. That means also that all the Docker networks are created on top of the encrypted tinc network.
The last thing we need to adjust is the Avahi daemon configuration. We need to adjust it for the peer-to-peer nature of the tinc network and restart the Avahi daemon:
$ for server in cl-leader cl-follower1 cl-follower2; do
  scw exec $server "sed -i 's|#allow-point-to-point=no|allow-point-to-point=yes|g' /etc/avahi/avahi-daemon.conf; systemctl restart avahi-daemon"
done
OK. Now we are ready to start the Cluster Lab on the leader node:
$ scw exec cl-leader "VERBOSE=true cluster-lab start"

Internet Connection
  [PASS]   tun0 exists
  [PASS]   tun0 has an ip address
  [PASS]   Internet is reachable
  [PASS]   DNS works

Networking
  [PASS]   tun0 exists
  [PASS]   Cluster leader is reachable
  [PASS]   tun0 has exactly one IP
  [PASS]   tun0 has no local link address
  [PASS]   Avahi process exists
  [PASS]   Avahi is using tun0

Docker
  [PASS]   Docker is running
  [PASS]   Docker is configured to use Consul as key-value store
  [PASS]   Docker is configured to listen via tcp at port 2375
  [PASS]   Docker listens on 10.0.0.2 via tcp at port 2375 (Docker-Engine)

Consul
  [PASS]   Consul Docker image exists
  [PASS]   Consul Docker container is running
  [PASS]   Consul is listening on port 8300
  [PASS]   Consul is listening on port 8301
  [PASS]   Consul is listening on port 8302
  [PASS]   Consul is listening on port 8400
  [PASS]   Consul is listening on port 8500
  [PASS]   Consul is listening on port 8600
  [PASS]   Consul API works
  [PASS]   Cluster-Node is pingable with IP 10.0.0.3
  [PASS]   Cluster-Node is pingable with IP 10.0.0.4
  [PASS]   Cluster-Node is pingable with IP 10.0.0.2
  [PASS]   No Cluster-Node is in status 'failed'
  [PASS]   Consul is able to talk to Docker-Engine on port 7946 (Serf)

Swarm
  [PASS]   Swarm-Join Docker container is running
  [PASS]   Swarm-Manage Docker container is running
  [PASS]   Number of Swarm and Consul nodes is equal which means our cluster is healthy scw exec cl-leader "VERBOSE=true cluster-lab start"
With the VERBOSE=true environment variable we tell the Cluster Lab to print out all the self-tests when it starts up.
If you see any failed tests it is usually a good idea to run a cluster-lab health command, which does just the self-tests again.
Usually those should be green now and have only failed the first time because of timing issues.
If you still have problems check our trouble shooting section of the Cluster Lab project.
It is important that the leader is started up first because the other nodes need him for the self-configuration.
So let’s start the Cluster Lab on the rest of the nodes:
$ for server in cl-follower1 cl-follower2; do
  scw exec $server "VERBOSE=true cluster-lab start"
done
We can now check if our Swarm Cluster is fully functional by running a docker info against the Docker Swarm port:
$ scw exec cl-leader
root@cl-leader:~# DOCKER_HOST=tcp://10.0.0.2:2378 docker info
Containers: 20
 Running: 9
 Paused: 0
 Stopped: 11
Images: 27
Role: replica
Primary: 10.0.0.3:2378
Strategy: spread
Filters: health, port, dependency, affinity, constraint
Nodes: 3
 cl-follower1: 10.0.0.3:2375
  └ Status: Healthy
  └ Containers: 7
  └ Reserved CPUs: 0 / 8
  └ Reserved Memory: 0 B / 32.91 GiB
  └ Labels: executiondriver=native-0.2, hypriot.arch=x86_64, hypriot.hierarchy=follower, kernelversion=4.4.5-docker-1, operatingsystem=Ubuntu 15.10, storagedriver=overlay
  └ Error: (none)
  └ UpdatedAt: 2016-03-20T15:07:55Z
 cl-follower2: 10.0.0.4:2375
  └ Status: Healthy
  └ Containers: 7
  └ Reserved CPUs: 0 / 8
  └ Reserved Memory: 0 B / 16.4 GiB
  └ Labels: executiondriver=native-0.2, hypriot.arch=x86_64, hypriot.hierarchy=leader, kernelversion=4.4.5-docker-1, operatingsystem=Ubuntu 15.10, storagedriver=overlay
  └ Error: (none)
  └ UpdatedAt: 2016-03-20T15:08:09Z
 cl-leader: 10.0.0.2:2375
  └ Status: Healthy
  └ Containers: 6
  └ Reserved CPUs: 0 / 8
  └ Reserved Memory: 0 B / 32.91 GiB
  └ Labels: executiondriver=native-0.2, hypriot.arch=x86_64, hypriot.hierarchy=follower, kernelversion=4.4.5-docker-1, operatingsystem=Ubuntu 15.10, storagedriver=overlay
  └ Error: (none)
  └ UpdatedAt: 2016-03-20T15:07:52Z
Plugins:
 Volume:
 Network:
Kernel Version: 4.4.5-docker-1
Operating System: linux
Architecture: amd64
CPUs: 24
Total Memory: 82.22 GiB
Name: 4b3fd589316c
As the docker info command now runs against the Swarm TCP port we get plenty of information about the Swarm cluster.
For instance we can see the number of nodes we have as well as the total number of CPUs and RAM we do have in the cluster: 24 CPUs and a whopping amount of 82 GB of RAM.
That’s nice isn’t it?
Starting a 100 Nodes Jenkins cluster with Docker-Compose
Ok, now comes the last reason why it is so fast and easy to set up 100 node Jenkins cluster. The reason is called Docker-Compose and makes it ridiculous easy to get multi-container applications up and running.
To use it we need to first install it on our cluster leader node:
scw exec cl-leader "curl -L https://github.com/docker/compose/releases/download/1.6.2/docker-compose-`uname -s`-`uname -m` > /usr/local/bin/docker-compose; chmod +x /usr/local/bin/docker-compose"
Create a file called “docker-compose.yml” on the cluster leader with the following content:
version: "2"

networks:
  jenkins_swarm:
    driver: overlay
    ipam:
      driver: default
      config:
        - subnet: 10.10.2.0/16
          ip_range: 10.10.2.0/24

services:
  jenkins:
    image: csanchez/jenkins-swarm
    expose:
      - 8080
      - 50000
    ports:
      - 8080:8080
    restart: always
    networks:
      - jenkins_swarm
    environment:
      - "constraint:NODE==cl-leader"

  worker:
    image: csanchez/jenkins-swarm-slave
    command: -username jenkins -password jenkins -executors 1
    networks:
      - jenkins_swarm
    environment:
      - "JENKINS_PORT_8080_TCP_ADDR=jenkins"
      - "JENKINS_PORT_8080_TCP_PORT=8080"
Important: Replace the ‘subnet’ and ‘ip_range’ attributes in the file with configuration values that fit your private network configuration. This is a Docker-Compose file that describes an overlay network and two services: a Jenkins Master and a Jenkins worker. The overlay network will stretch across our Swarm Cluster and runs on top of our private network. Because of IP adress conflicts between our private tinc network and the standard network configuration we had to add the ‘ipam’ part.
Now we are nearly finished and can start some Jenkins nodes:
root@cl-leader:~# DOCKER_HOST=tcp://10.0.0.3:2378 docker-compose -p jenkins up -d
Starting jenkins_jenkins_1
Starting jenkins_worker_1
Here the important part is that the docker-compose command is running against our Swarm Cluster. ‘-p’ option creates a project namespace and the ‘-d’ option tell Docker-Compose to start the container in the background. This command initally created two container: one Jenkins master node and one worker.
We now need to scale the worker nodes to 99 to finally reach our goal of a 100 nodes Jenkins Cluster.
And that is really easy with Docker-Compose:
root@cl-leader:~# COMPOSE_HTTP_TIMEOUT=180 DOCKER_HOST=tcp://10.0.0.3:2378 docker-compose -p jenkins scale worker=20
Creating and starting 2 ...
Creating and starting 3 ...
Creating and starting 4 ...
 ...
If those twenty nodes are up repeat the command with 40, 60, 80 until you reach 99. You could of course go for 99 at once but I experienced errors and timeouts so I prefer to take it slowly.
To visit the GUI of the Jenkins master server we need to find out the IP address of our cluster leader node.
We can do that with the inspect subcommand of the Scaleway CLI:
$ scw inspect leader | grep address
   "address": "212.47.225.127",
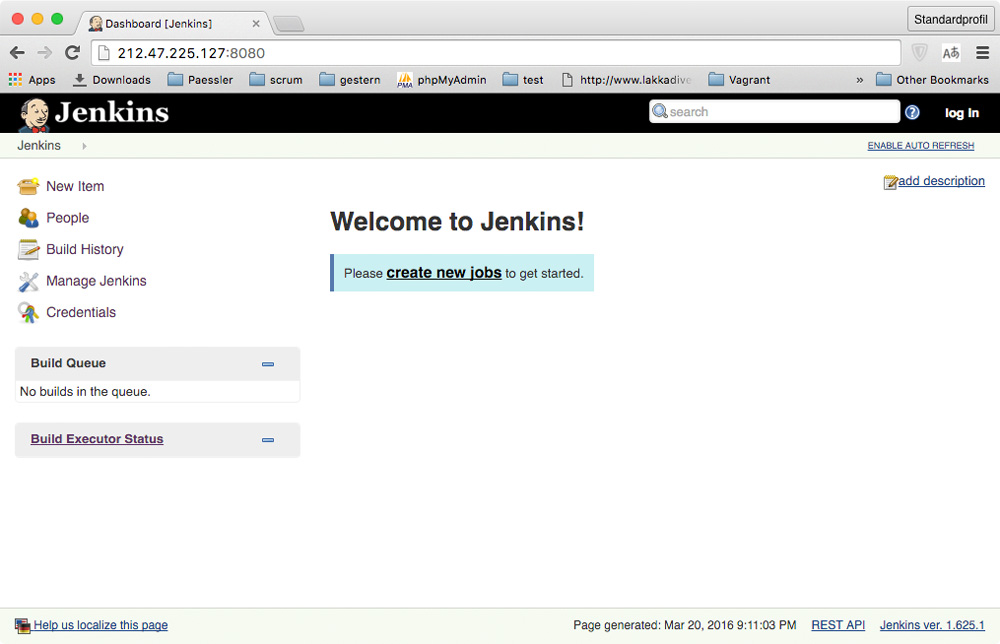
So the Jenkins master can be found at: http://212.47.225.127:8080
You should see a page similar to
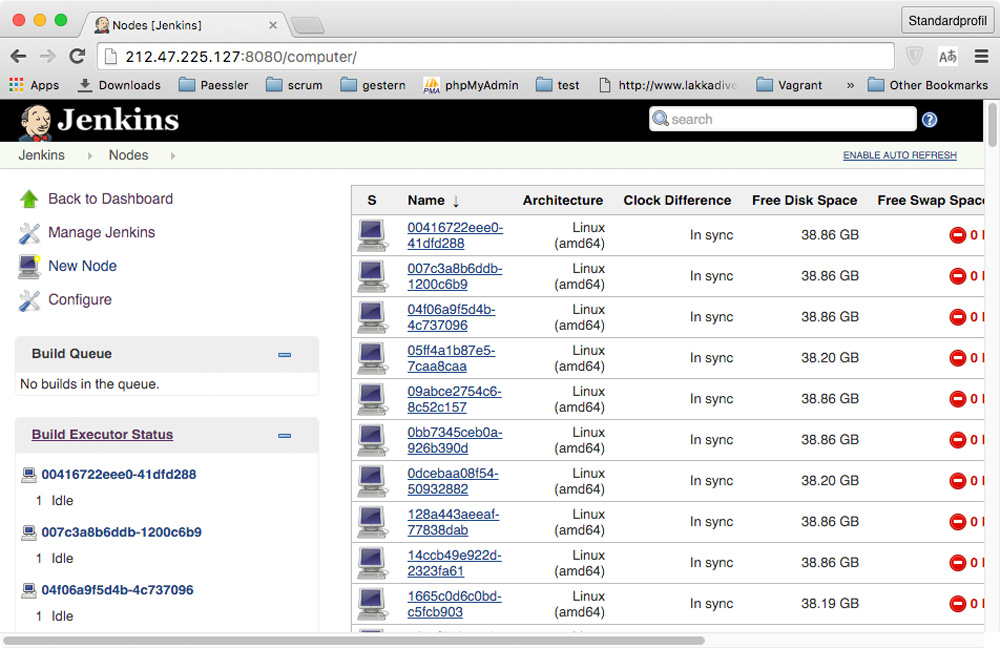
And at http://212.47.225.127:8080/computer we can find all the slave nodes, too:
So to wrap it up I can say that the combination of
- the on-demand Scaleway Servers
- the Hypriot Cluster Lab
- Docker-Compose
allowed me to get the Jenkins Cluster running in a really short time.
It might not be 10 minutes for you - especially if you first need to set up the Scaleway account and the CLI tool. But if everything is in place it can be done in 5 to 10 minutes.
Hope you had some fun following along….
As always, use the comments below to give us feedback and share this post on Twitter, Google or Facebook.
Govinda @_beagile__
comments powered by Disqus