Run your own GitHub-like service with the help of Docker
Sat, Jun 27, 2015Git and GitHub have taken the world by storm. No serious developer today can afford not to know how to work with Git.
But what if you do not want to have your code in the cloud? What if you want to host your code repositories yourself? For most of us this meant to go with Gitlab. The biggest downside in the past was that Gitlab had so many different parts that the installation could be very tedious. With the Omnibus Gitlab Installer the installation did get a lot easier but this does not change the fact that Gitlab is compromised of so many different parts.
Why does this matter?
It really starts to matter when you want to put your apps/services into something like Docker. Putting all parts of Gitlab (Postgres, Ruby, Ruby on Rails, Redis, Git, etc.) into one container is certainly not the Docker way of doing things, but puttings these parts into different containers makes it really complicated and involved to set up, too.
Fortunately we did find another solution for your Git needs - one that really works well with Docker. It is called Gogs and is written in Go and has no additional dependencies with the exception of a SSH server. Gogs is such a lightweight solution that it only needs about 5 MB of RAM and very few CPU resources while running. This makes it a perfect candidate for a home-grown GitHub alternative that can easily run on a - you guessed it - Raspberry Pi.
In this post, we show you how to set up Gogs in just a couple of minutes. Thanks to Docker it will be fast and easy.
To follow along you gonna need a Raspberry Pi with Docker. In case you do not have Docker running on your Raspberry Pi our Getting-Started guide will cover everything you need to know to get up and running in a snap.

If you wanna dive more deeply into Gogs there is a official Gogs documentation.
How to set up Gogs
First, log into your Raspberry Pi via SSH. Please refer to our Getting-Started guide if you are not sure about how to do this.
After logging in successfully pull and run Gogs by executing the following command:
docker run -d --name my-go-git-server --publish 8022:22 --publish 3000:3000 --volume `pwd`/gogs-data/:/data hypriot/rpi-gogs-raspbian
Let’s see what each of these options means
–name gives the Docker container a name
–publish (first) instructs Docker to open port 8022. We will use this port to access Gogs via git/ssh.
–publish (second) defines 3000 as the port at which you will be able to access the web interface of Gogs.
When the Gogs container is running you can point your browser to the IP address of your Pi. Make sure you use the port you defined in the docker run command.
In our example we have to type the following address into the browser:
http://172.16.254.149:3000
As a result you should see the setup page of Gogs:
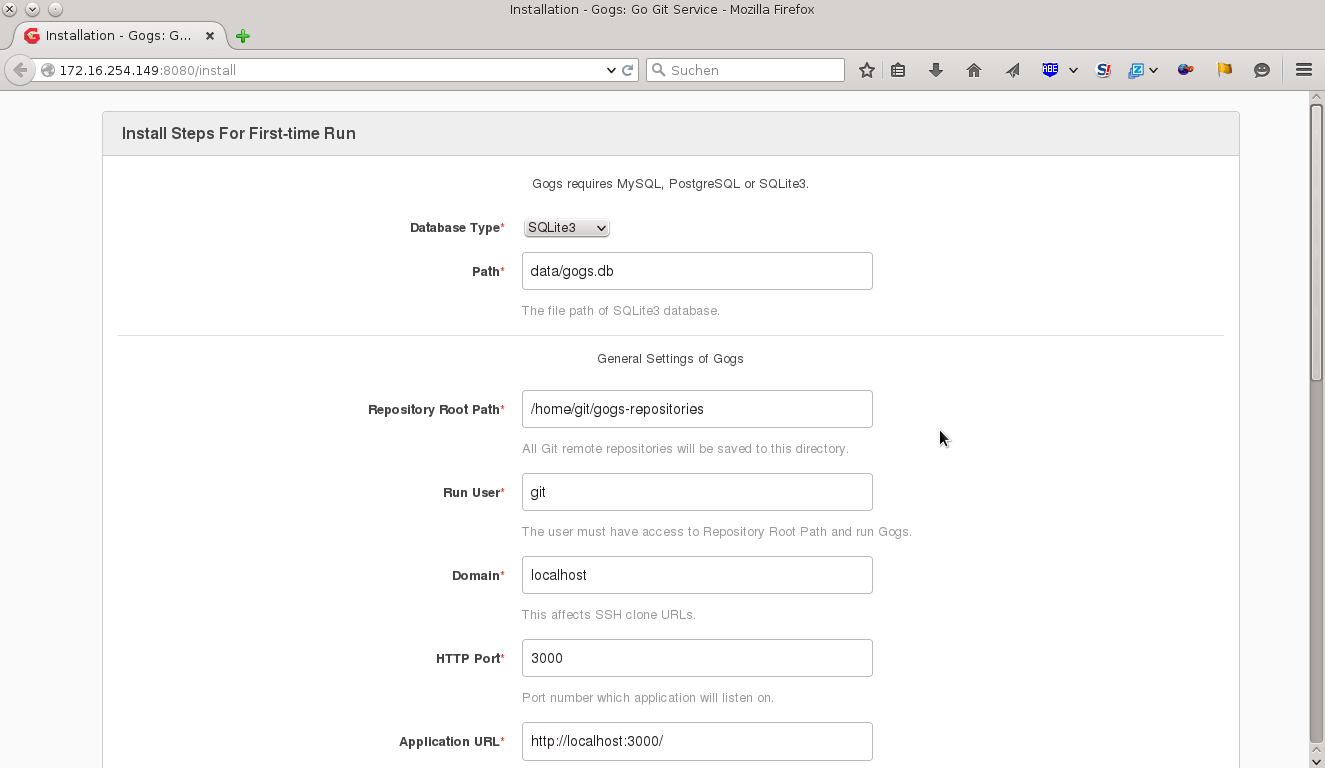
In this setup page we need to adapt the default settings to the settings we defined in the docker run command we executed previously. Thus, please change the input fields according to this table:
| Input field | Description |
|---|---|
| Domain | Replace localhost with the IP address of your Raspberry Pi |
| Application URL | In the predefined string, replace only localhost with the IP address of your Raspberry Pi, such that you have e.g. http://172.16.254.149:3000/ |
| Username | Set an your username |
| Password | Set an your password with at least 8 characters |
| Set your email adress |
After you filled all required fields, it should look like this:
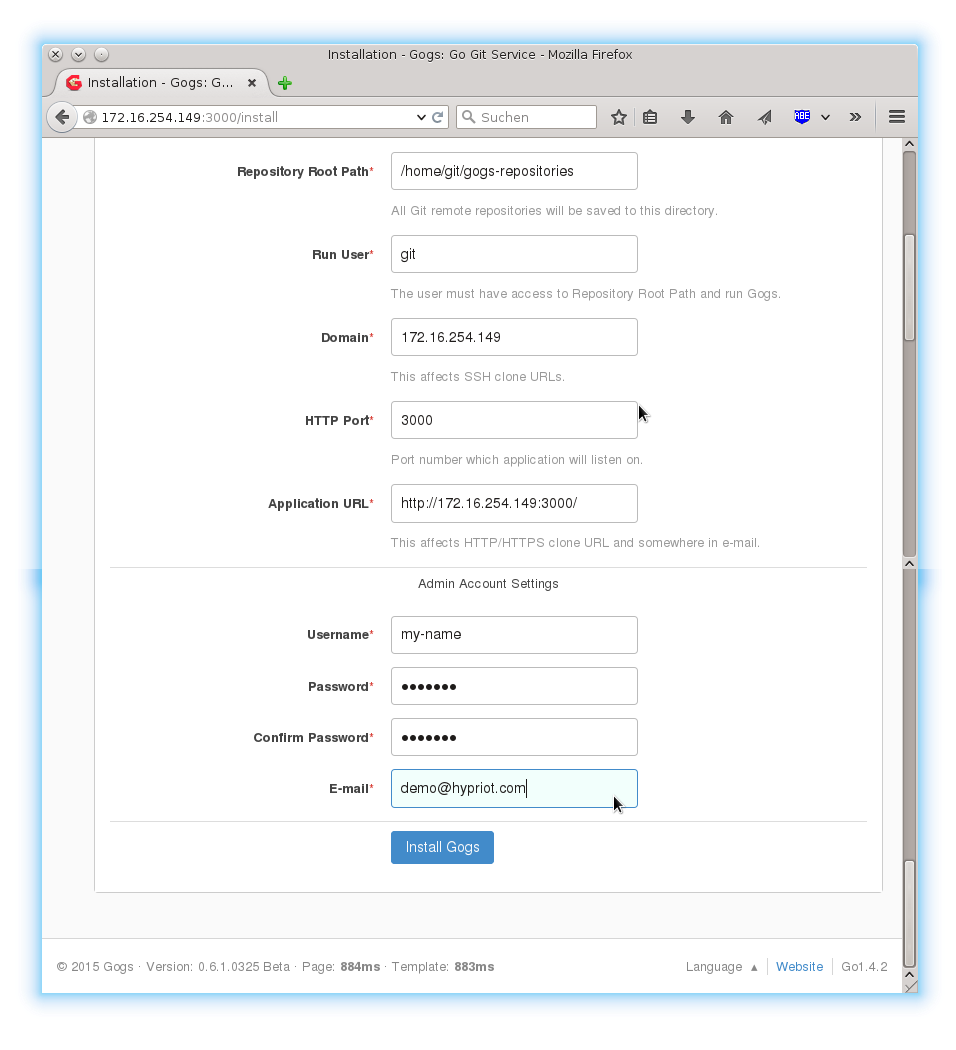
To finish the setup, click on install at the bottom of the page. Afterwards you will be forwarded to the login page of Gogs. Please login with the credentials you just specified.
After logging in you should see the start page of the Gogs service.
Nice, you successfully installed Gogs! Now let’s start using it! Please continue with the next section to learn how.
How to create a Git repository in Gogs
Before we will be able to git push, we need to
- create a Git repository in Gogs
- configure your public SSH key in Gogs
- clone the Git repository in Gogs to your local workstation
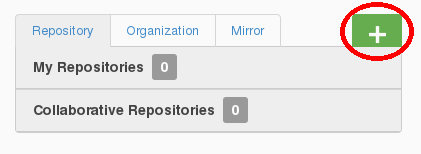
Let’s start by creating a new repository. Click on the green button in the top right corner of the page and choose New Repository.
You should see a setup page for your new repository. Please fill out the two text input fields.
At the bottom of the page you will find a checkbox. We recommend to enable this checkbox since it automatically will initialize this repository with a README.md. The following screenshot shows an example of how the setup page might look like after you provided all the necessary information.

Finish the setup by clicking on Create Repository.
Before you can actually use the new repository, you need to add your SSH key. Click on The settings button in the top right corner of the page. Then, go to SSH Keys -> Add Key.
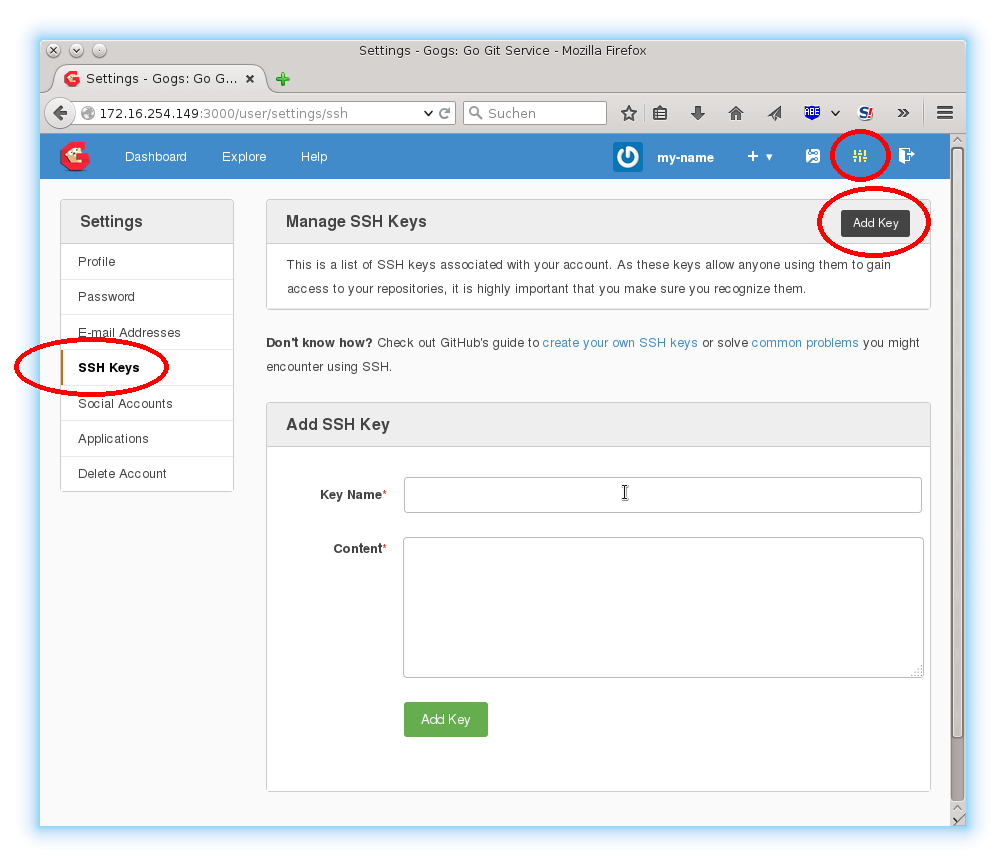
Paste your public SSH key into this field and set an arbitrary Key Name.
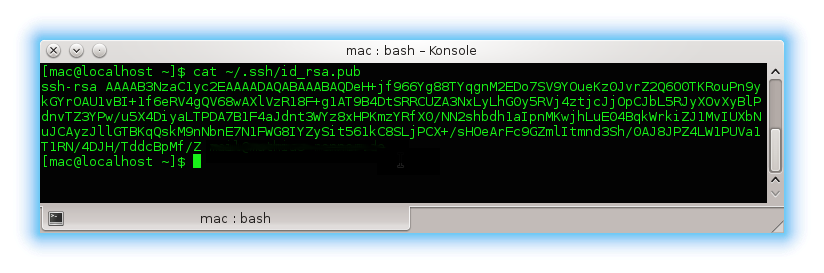
If you don’t know where to find your SSH key, execute the following command in your terminal.
cat ~/.ssh/id_rsa.pub
As you can see in the following screenshot, you should see your SSH key as result.
Finally, back in the Gogs website, click the green button Add Key to add your public SSH key. Afterwards you should see a message confirming that the key has been added successfully.
At this point, Gogs should be set up properly to receive your first commit! As a last step, we will git clone the new repo to your workstation.
Start using Git with the new repository
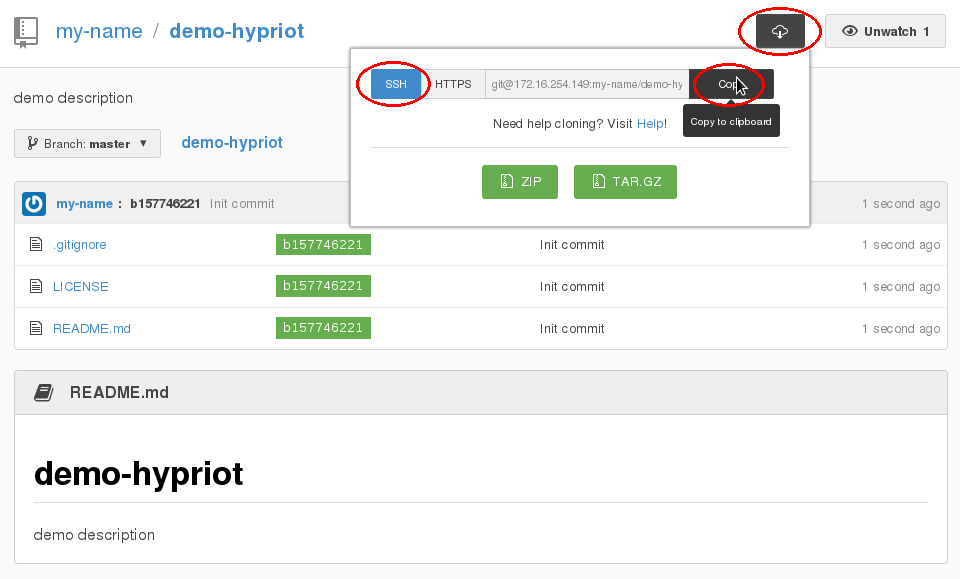
Gogs helps us in constructing the proper git clone command.
Navigate inside your new repository in the Gogs Web-GUI and click on the black cloud symbol.
Make sure that the SSH button in front of the command is activated and copy the string in the text field via the black copy button on the right edge.
Now open a terminal at your workstation and navigate to the location where you want to create the folder for the repository.
Paste the command you just copied from Gogs Web-GUI. Before executing add git clone ssh:// in front of the command and put port 8022 in front of your user name.
In our case 8022 is the port Gogs listens on for SSH.
In the end the command should look similar to this one:
git clone ssh://[email protected]:8022/my-name/demo-hypriot.git
After this command has been executed confirm the fingerprint prompt and navigate into the new directory that has been created by this command.
Within the repository folder execute a git pull. If the command returns Already up-to-date the repository is properly set up.
Congratulations!! You now have your own Git service running on your Raspberry Pi!
Note: Gogs will only be available within your local network. To make your Git service available outside of your home you need to do use a Dynamic DNS service like no-ip and configure some port forwarding in your router.
We hope setting up your own Gogs has been a painless experience for you.
As always use the comments below to give us feedback and share the blog post on Twitter or Facebook.
Mathias, Andreas & Govinda
comments powered by Disqus