Let's build a PicoCluster for Docker Swarm
Wed, Mar 23, 2016As we love to use Docker Swarm on a cluster of Raspberry Pi’s, we’d like to cover in this hands-on tutorial how to build such a cluster easily with a hardware kit from PicoCluster.
All you need is a PicoCluster kit for a 3-node or 5-node cluster, a couple of Raspberry Pi’s and the time to assemble all the parts together. The project can be completed within an hour only, and makes so much fun, too - especially when you can share this as quality time with your kids.
PicoCluster had just sent us two different kits of their cool Raspberry Pi clusters. Of course, we are eager to build these new clusters so you can get a first impression.
What’s in the box
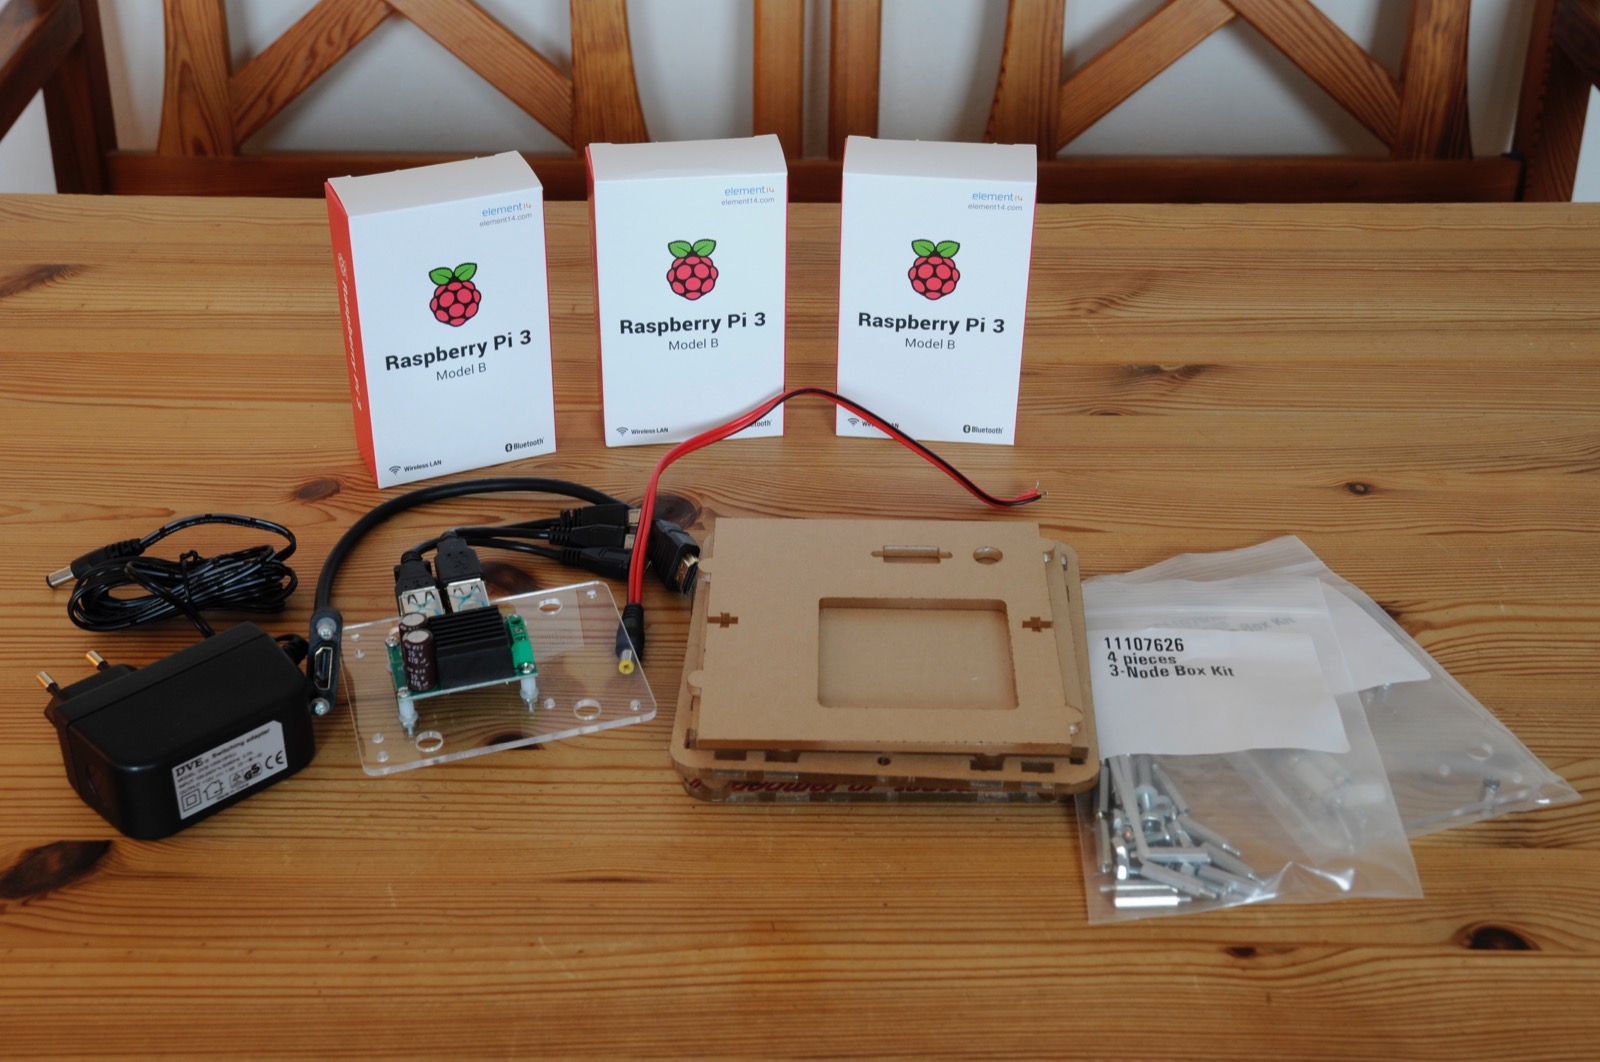
3-node PicoCluster kit:
- acrylic case, all parts
- PDU (12V input, 4x USB 5V output), including all wires
- wiring for 3x microUSB power
- case wiring for 1x HDMI
- case wiring for 1x 12V power plug
- base mounting for Pi tower, including all crews, nuts & bolts, spacers
5-node PicoCluster kit:
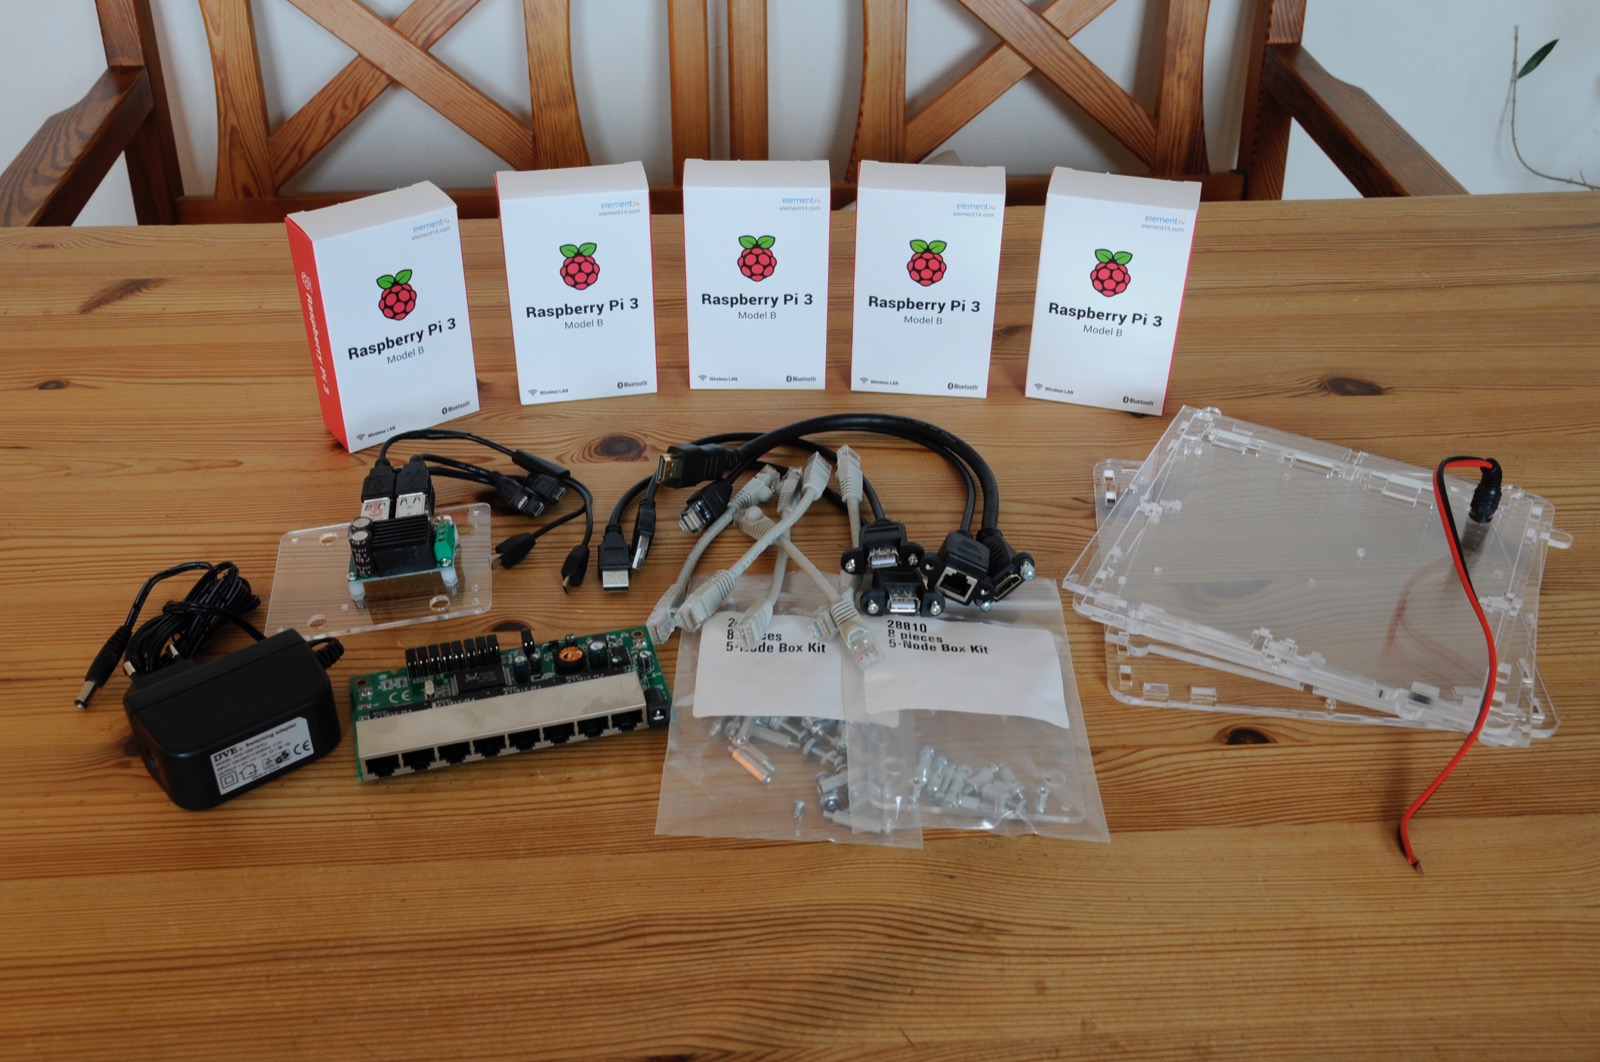
- acrylic case, all parts
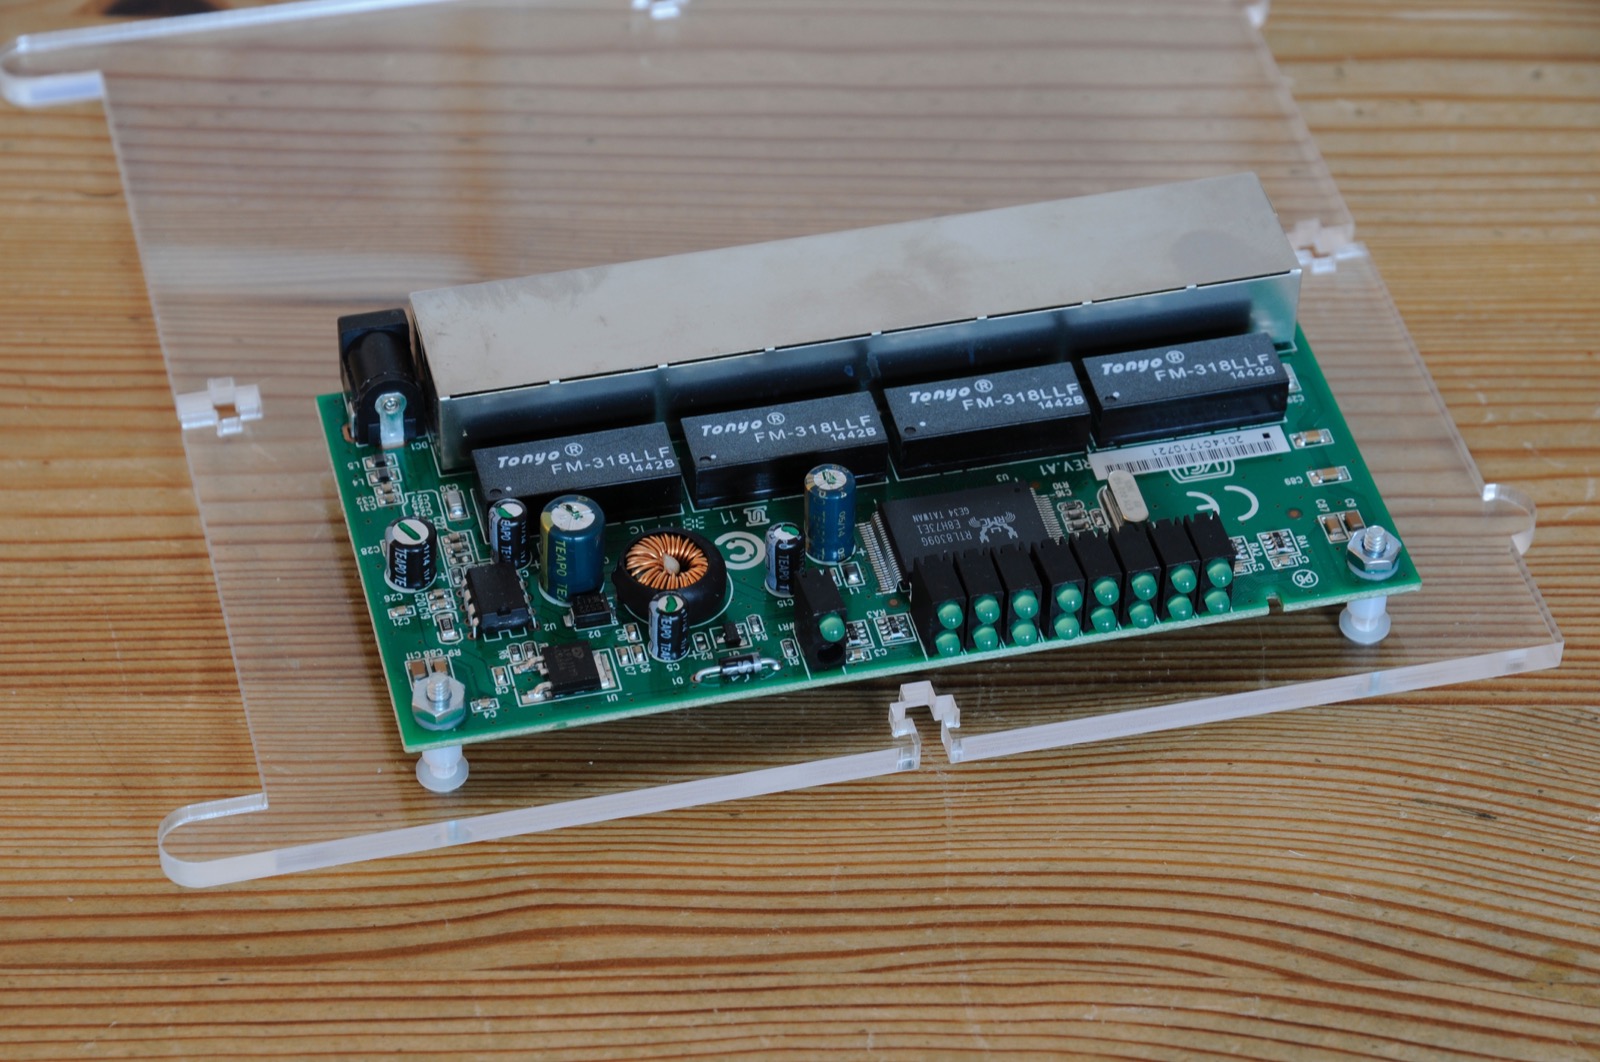
- internal 8-port Ethernet switch
- PDU (12V input, 5x USB 5V output), including all wires
- wiring for 5x microUSB power
- wiring for network (Raspberry Pi to Ethernet switch)
- case wiring for 1x Ethernet
- case wiring for 1x HDMI
- case wiring for 2x USB
- case wiring for 1x 12V power plug
- base mounting for Pi tower, including all crews, nuts & bolts, spacers
Not included in the kits: (so you have to buy it separately)
- Raspberry Pi’s and microSD cards
- AC adapter (12V, 1.5A, barrel plug 5.5x2.1mm)
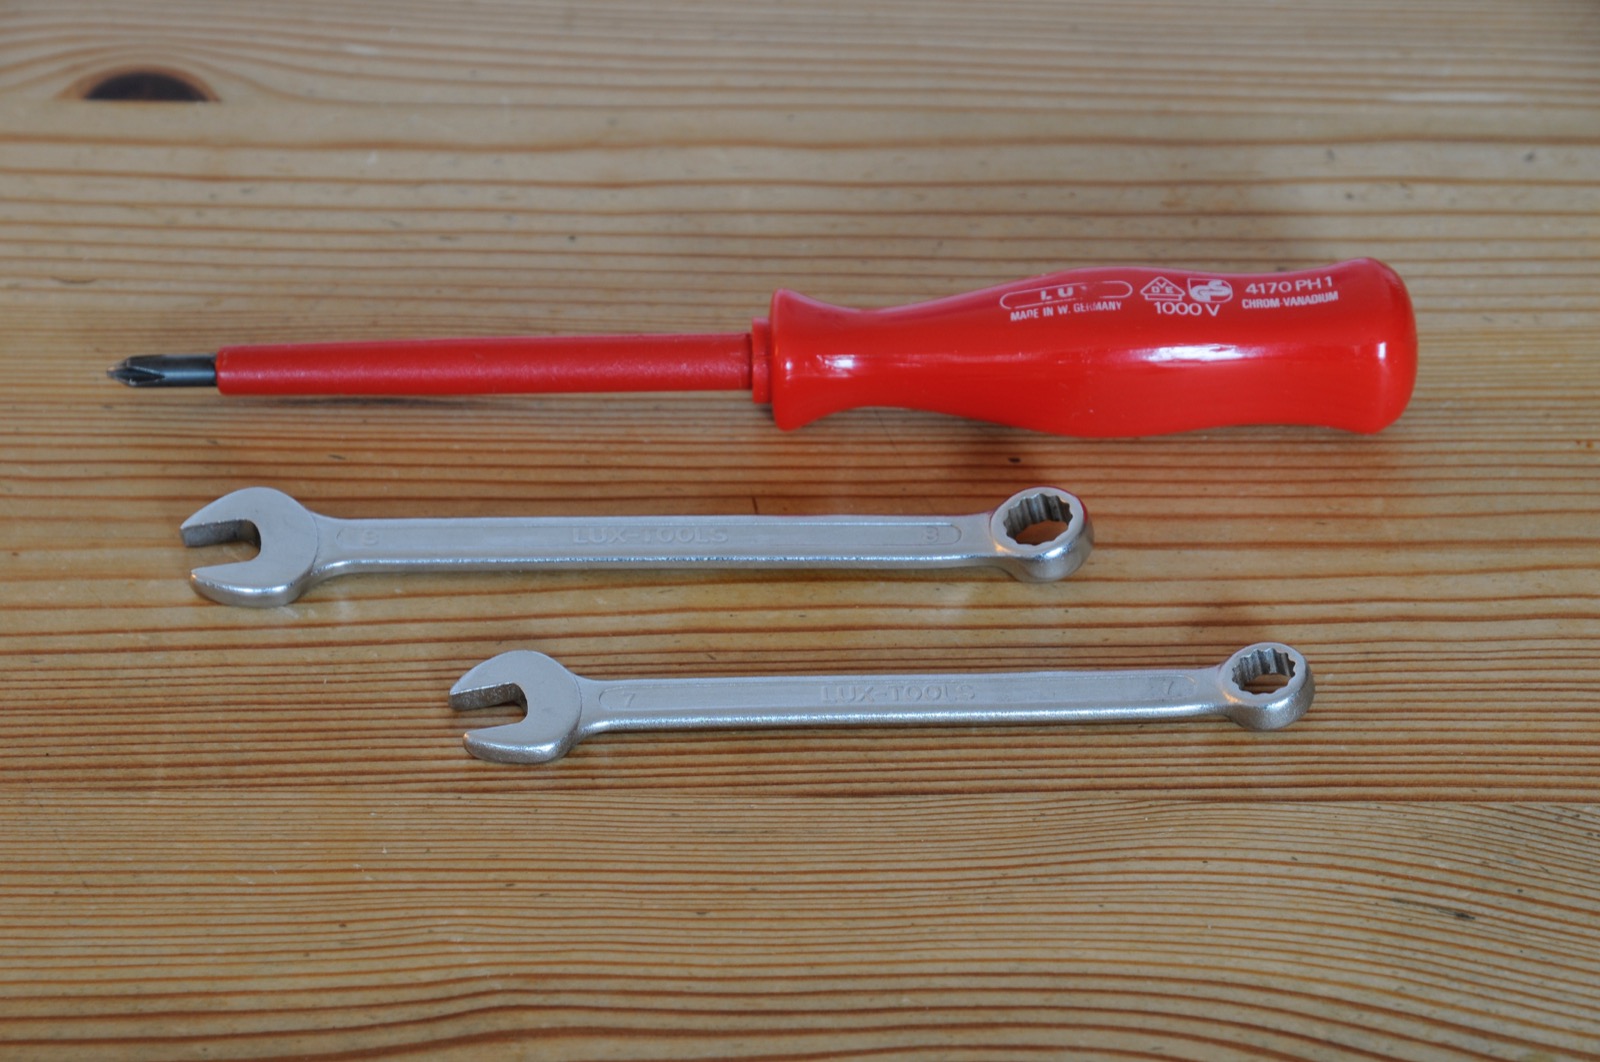
Additionally we’ll need some common tools for the mechanical assembling:
- philips screw driver
- 7mm wrench (or a pliers)
Assembling the 3-node PicoCluster
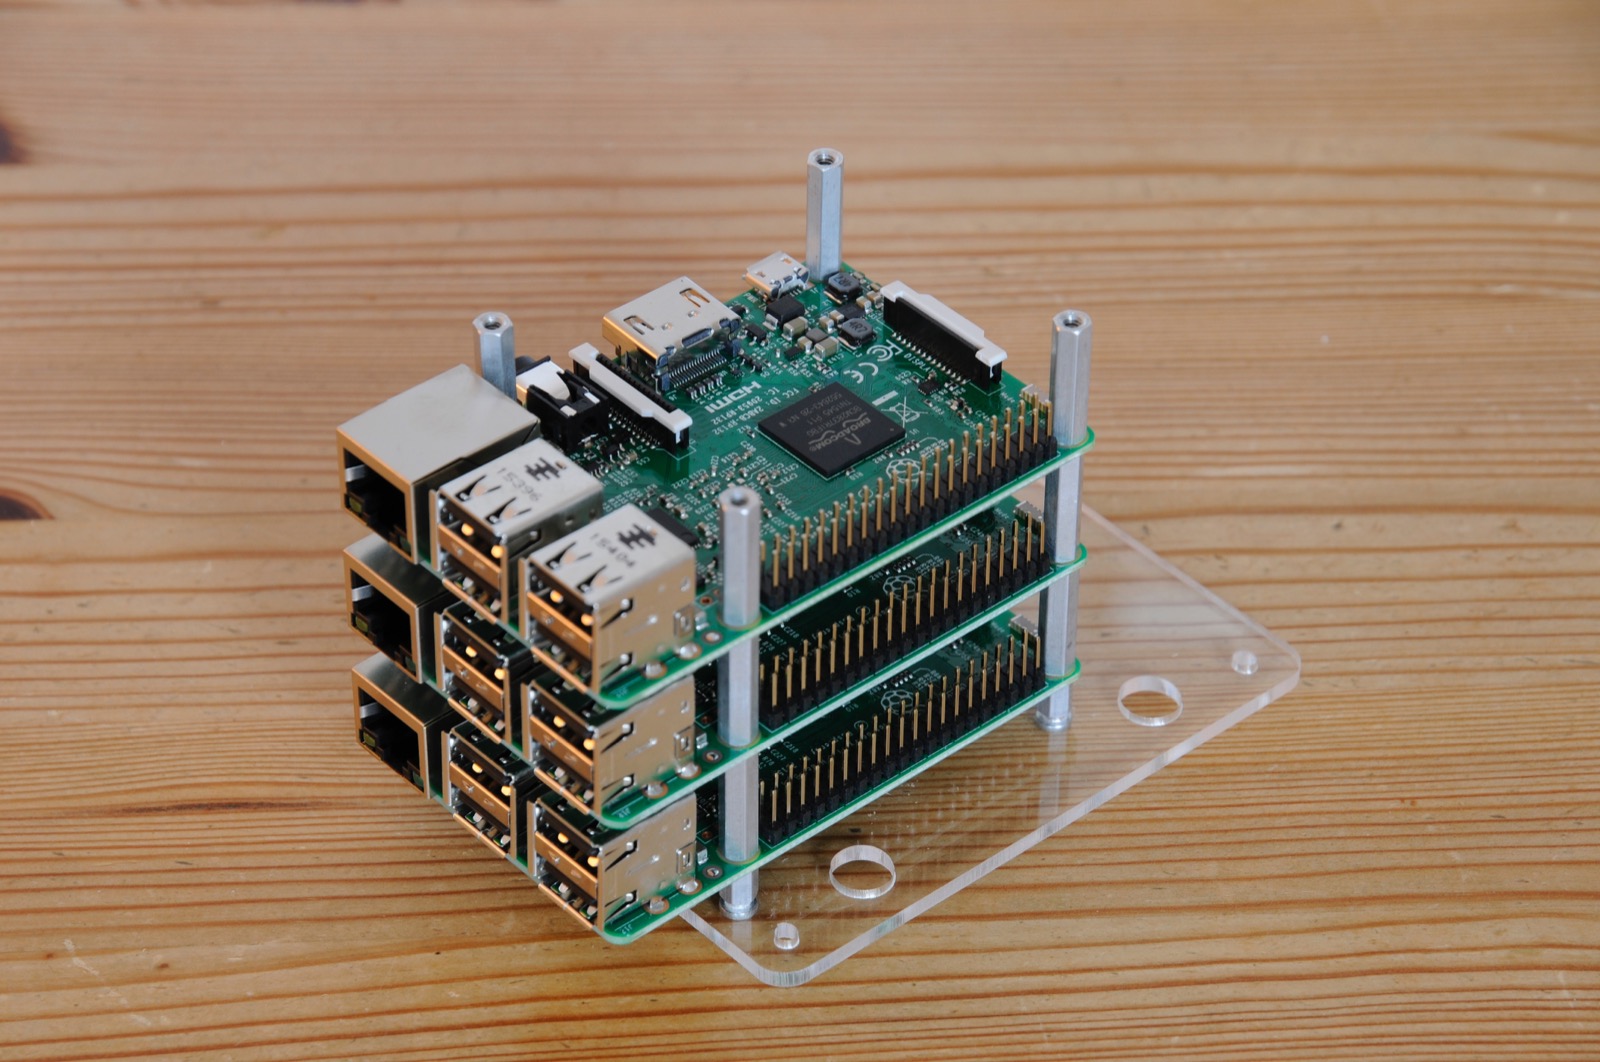
Towering the Raspberry Pi’s
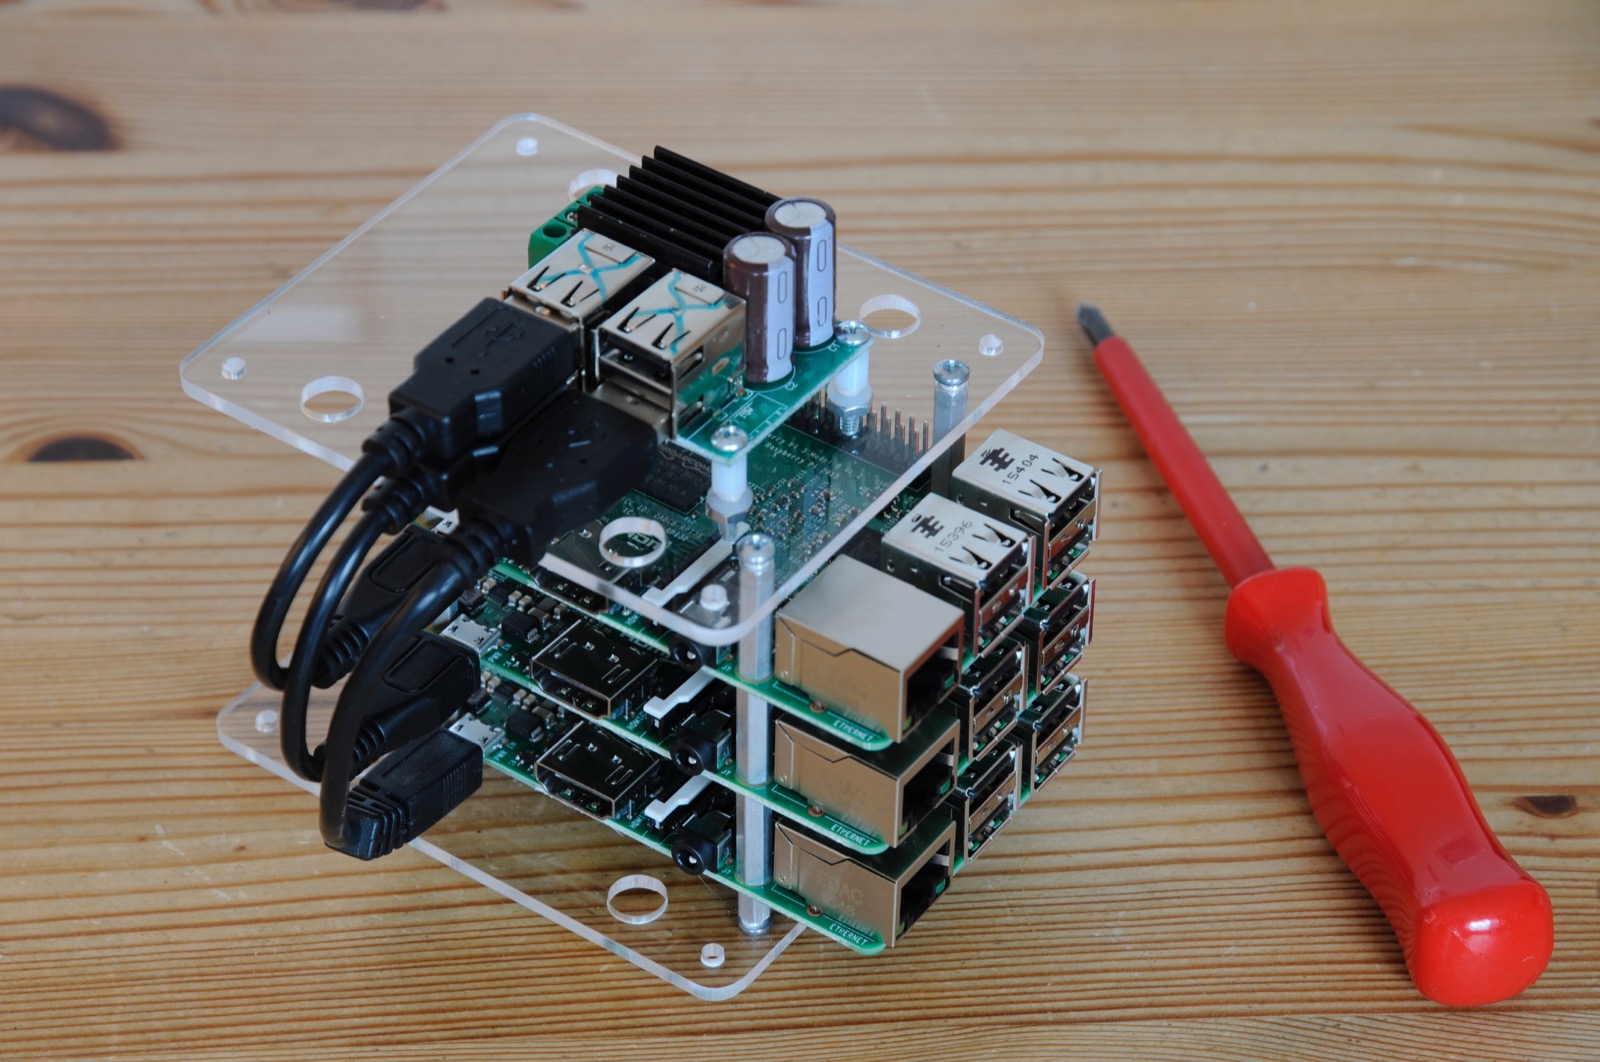
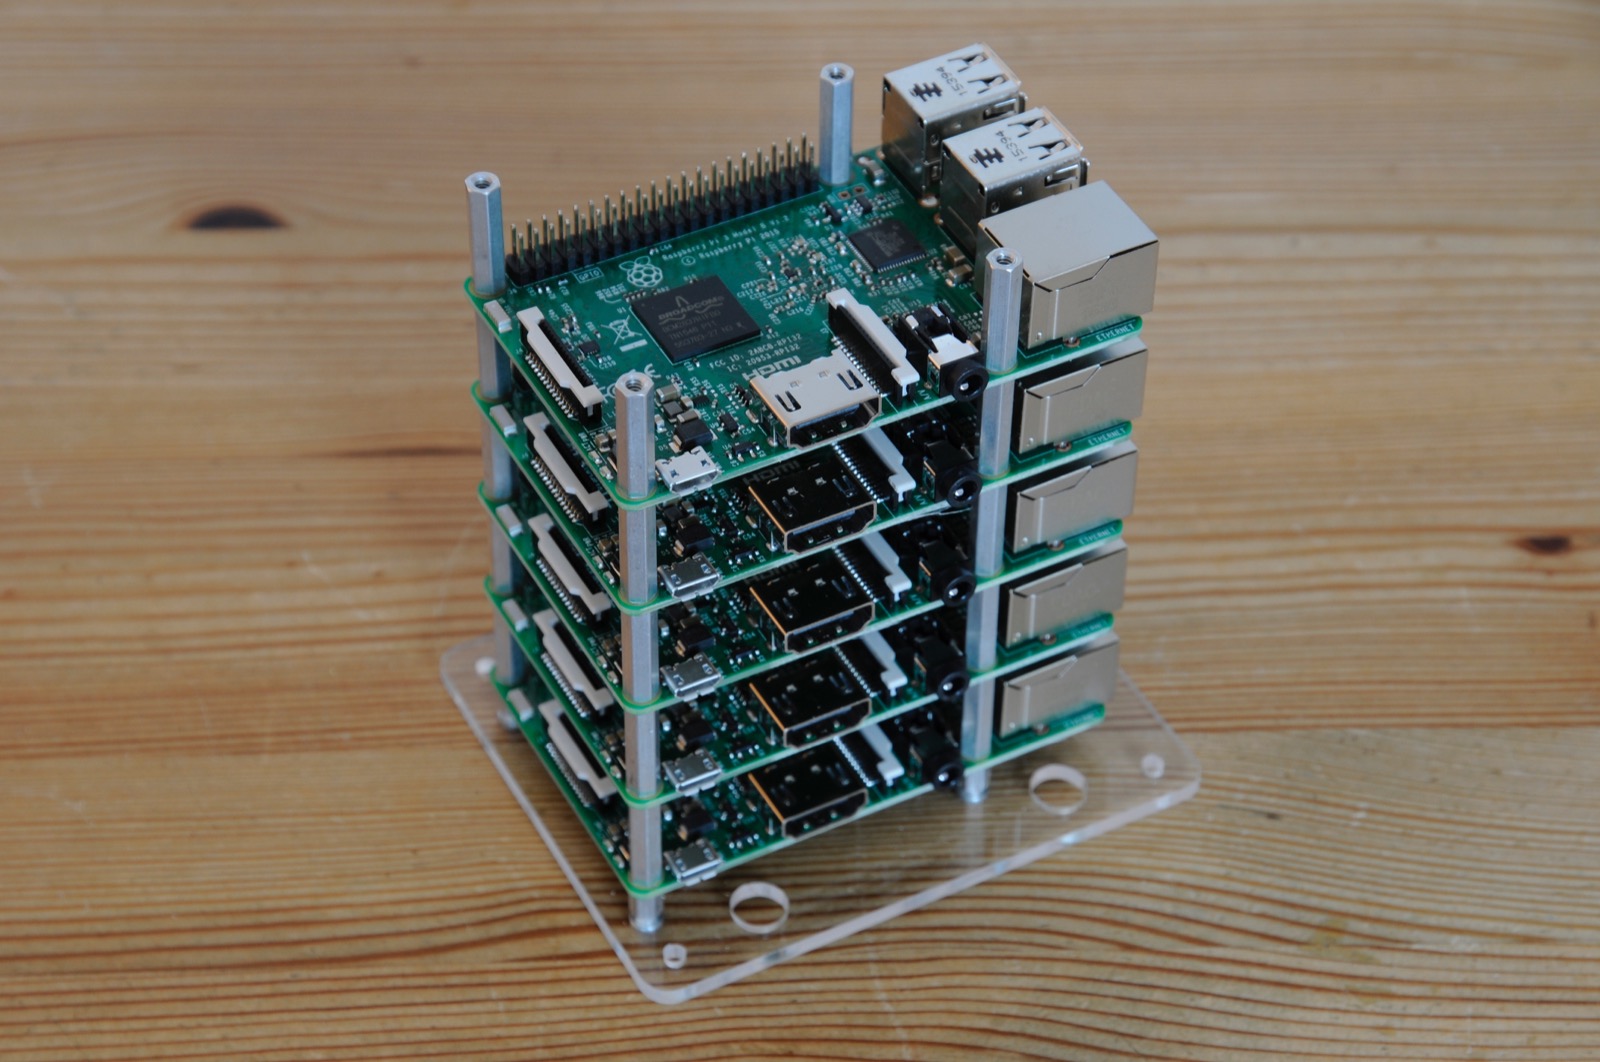
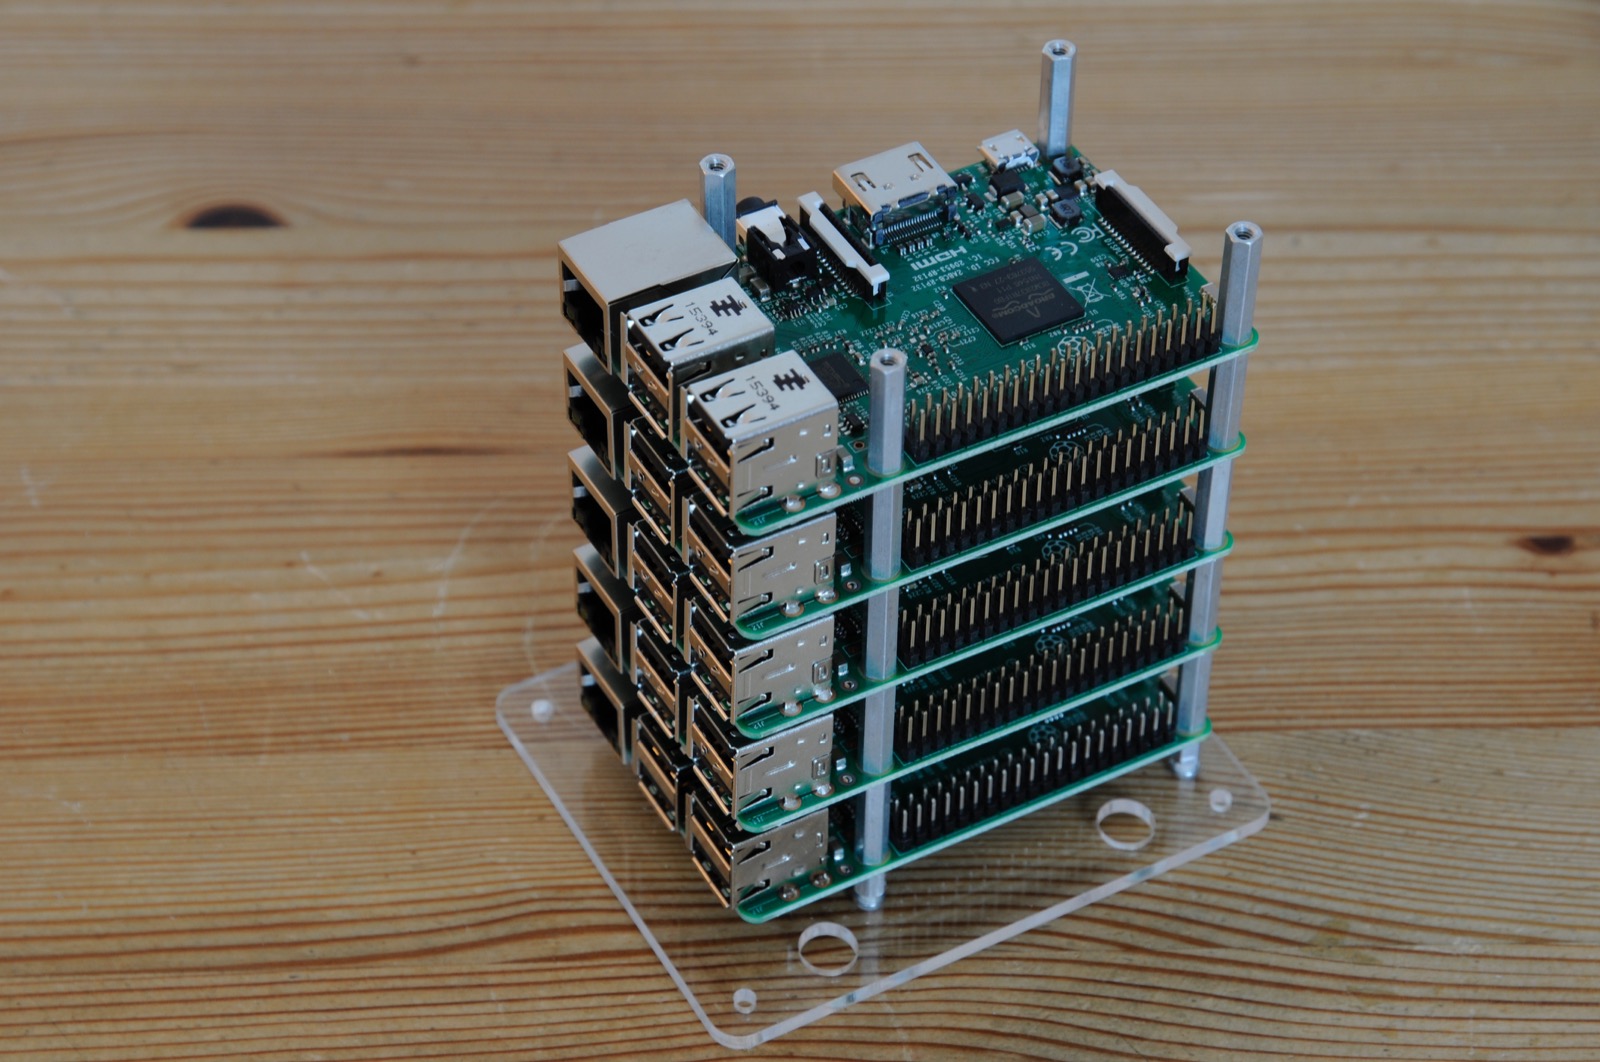
First we take the mounting plate for the Pi tower and stack all three Raspberry Pi’s with the help of the included spacers.
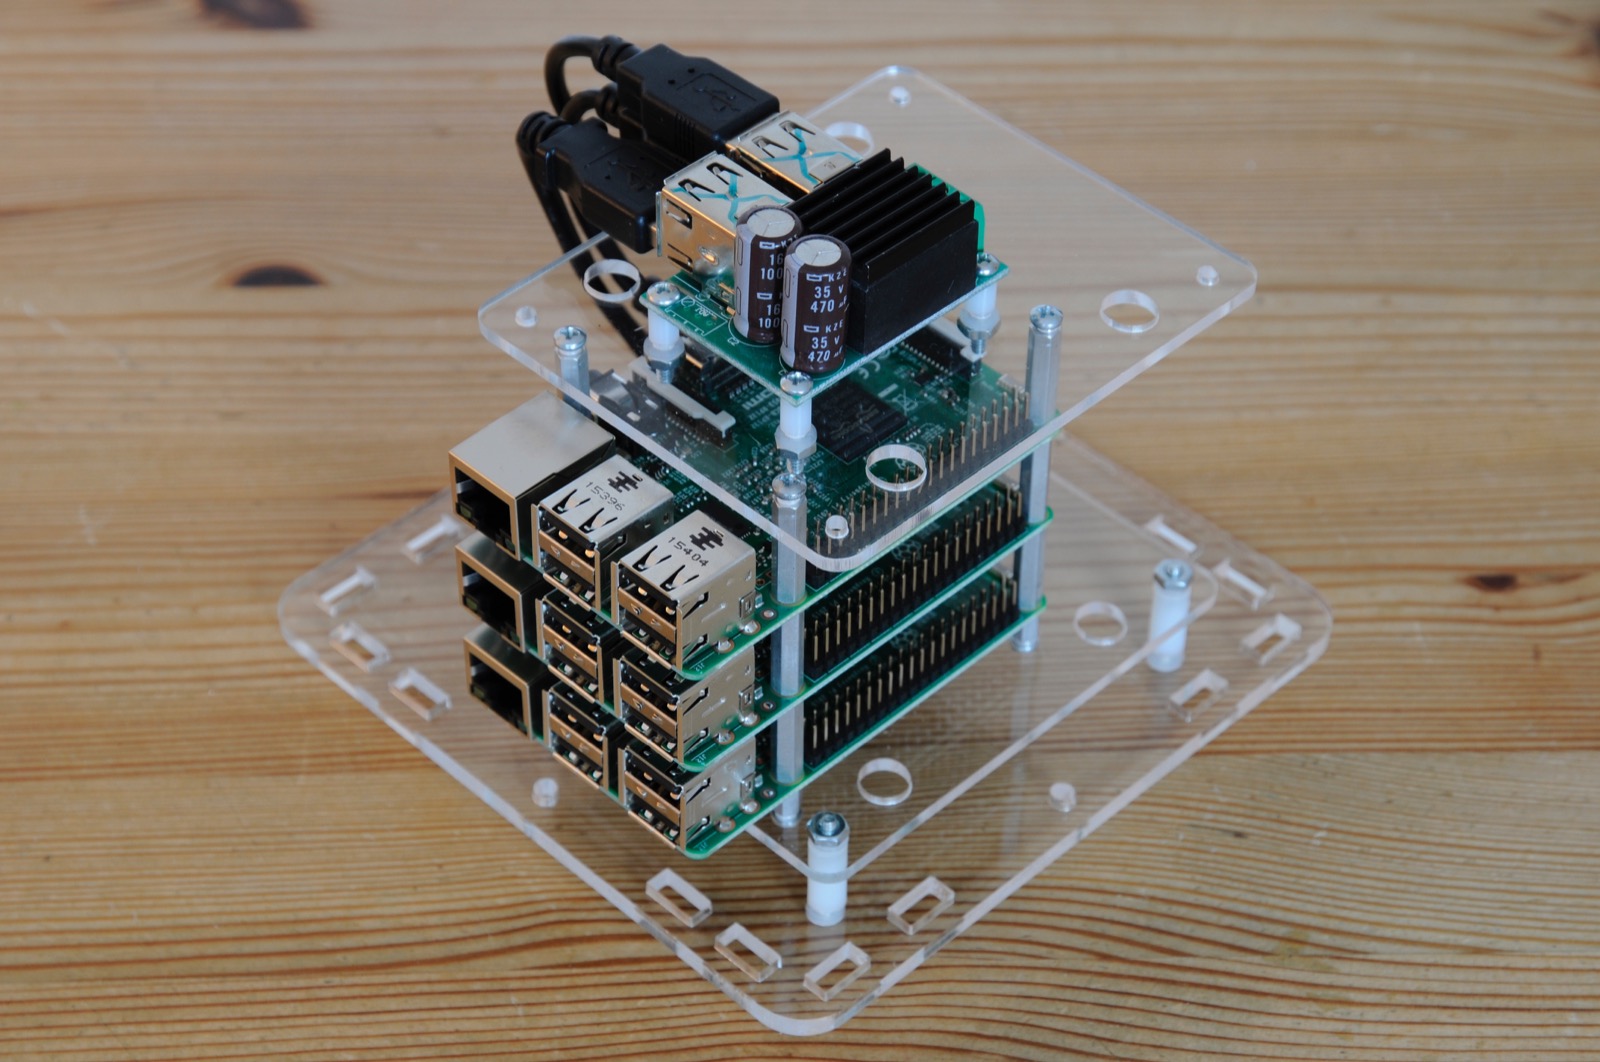
Wiring all together
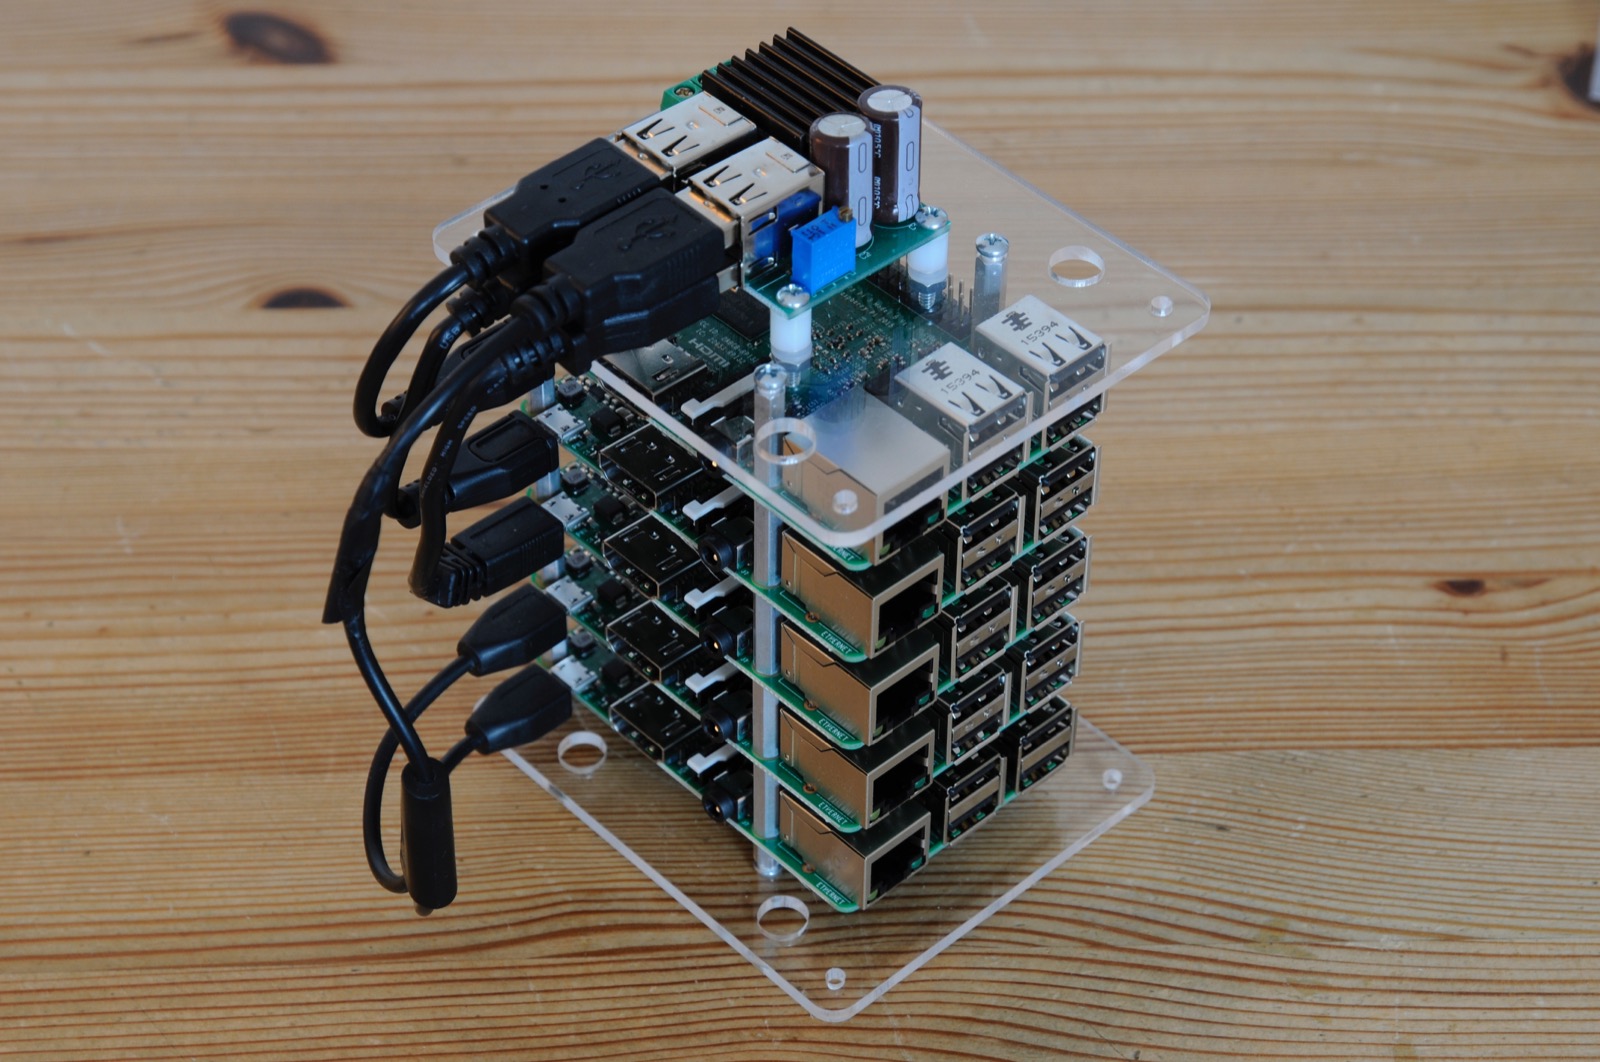
Now it’s easy to mount the PDU on top of the Pi tower with 4 screws and attaching the USB power cables to the three Raspberry Pi’s.
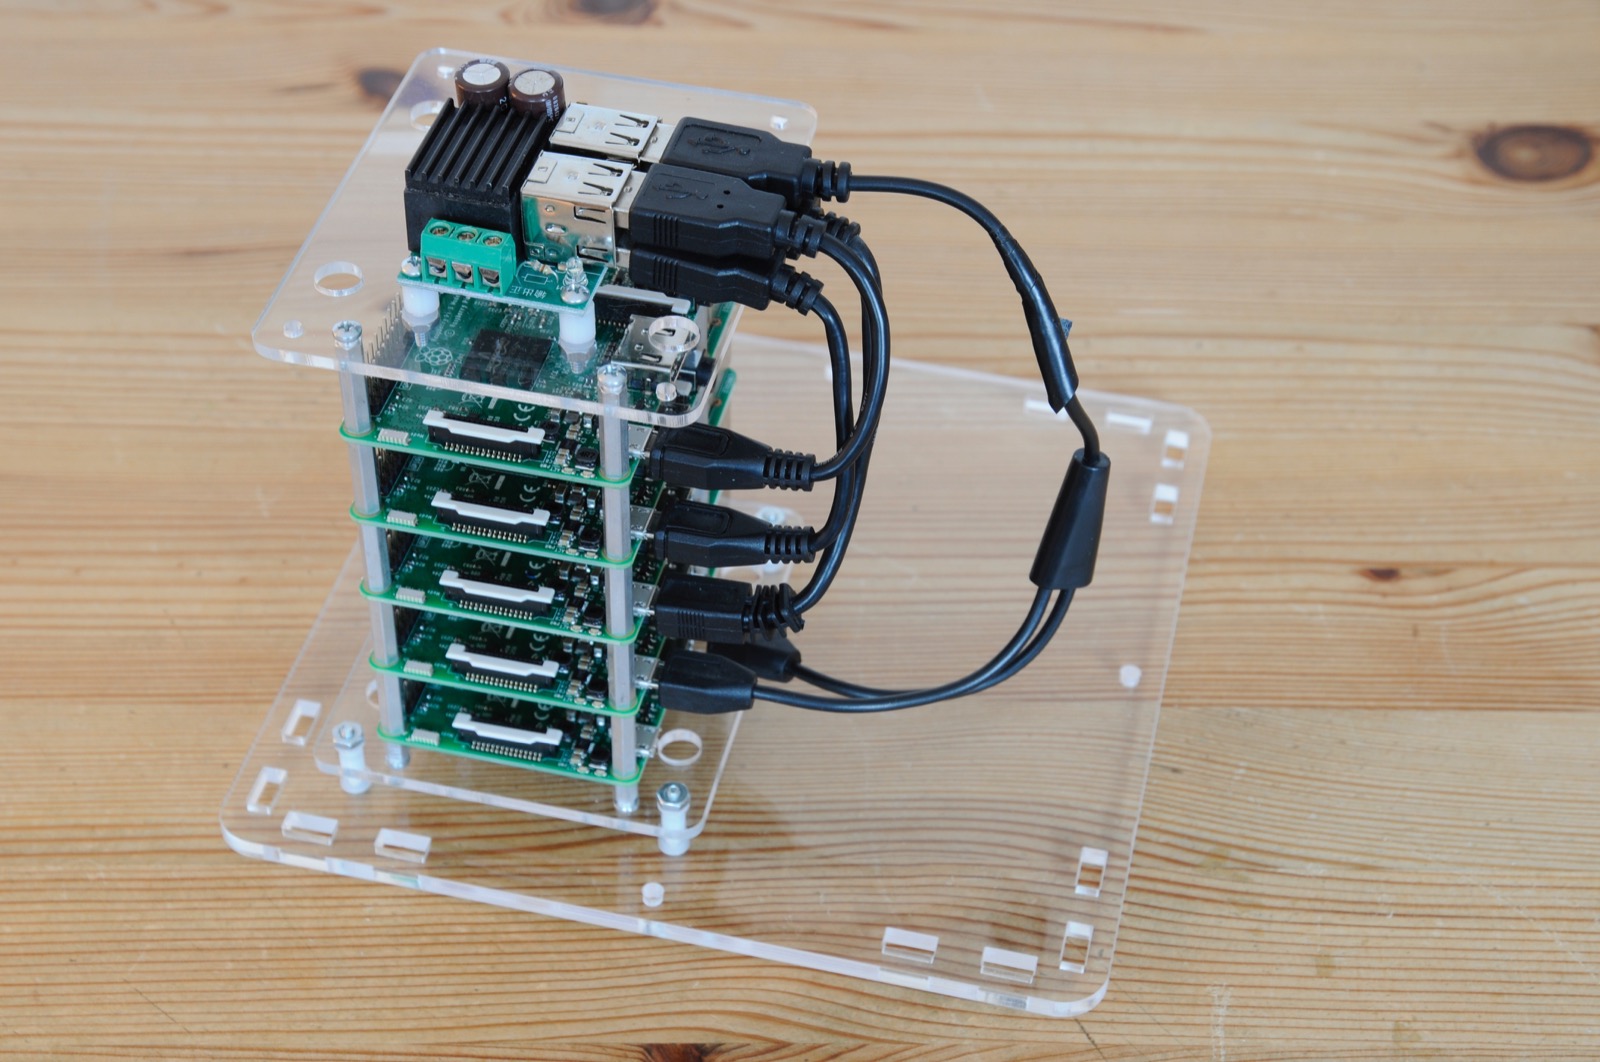
Next we mount the tower on the base plate, which makes our new cluster look even better.
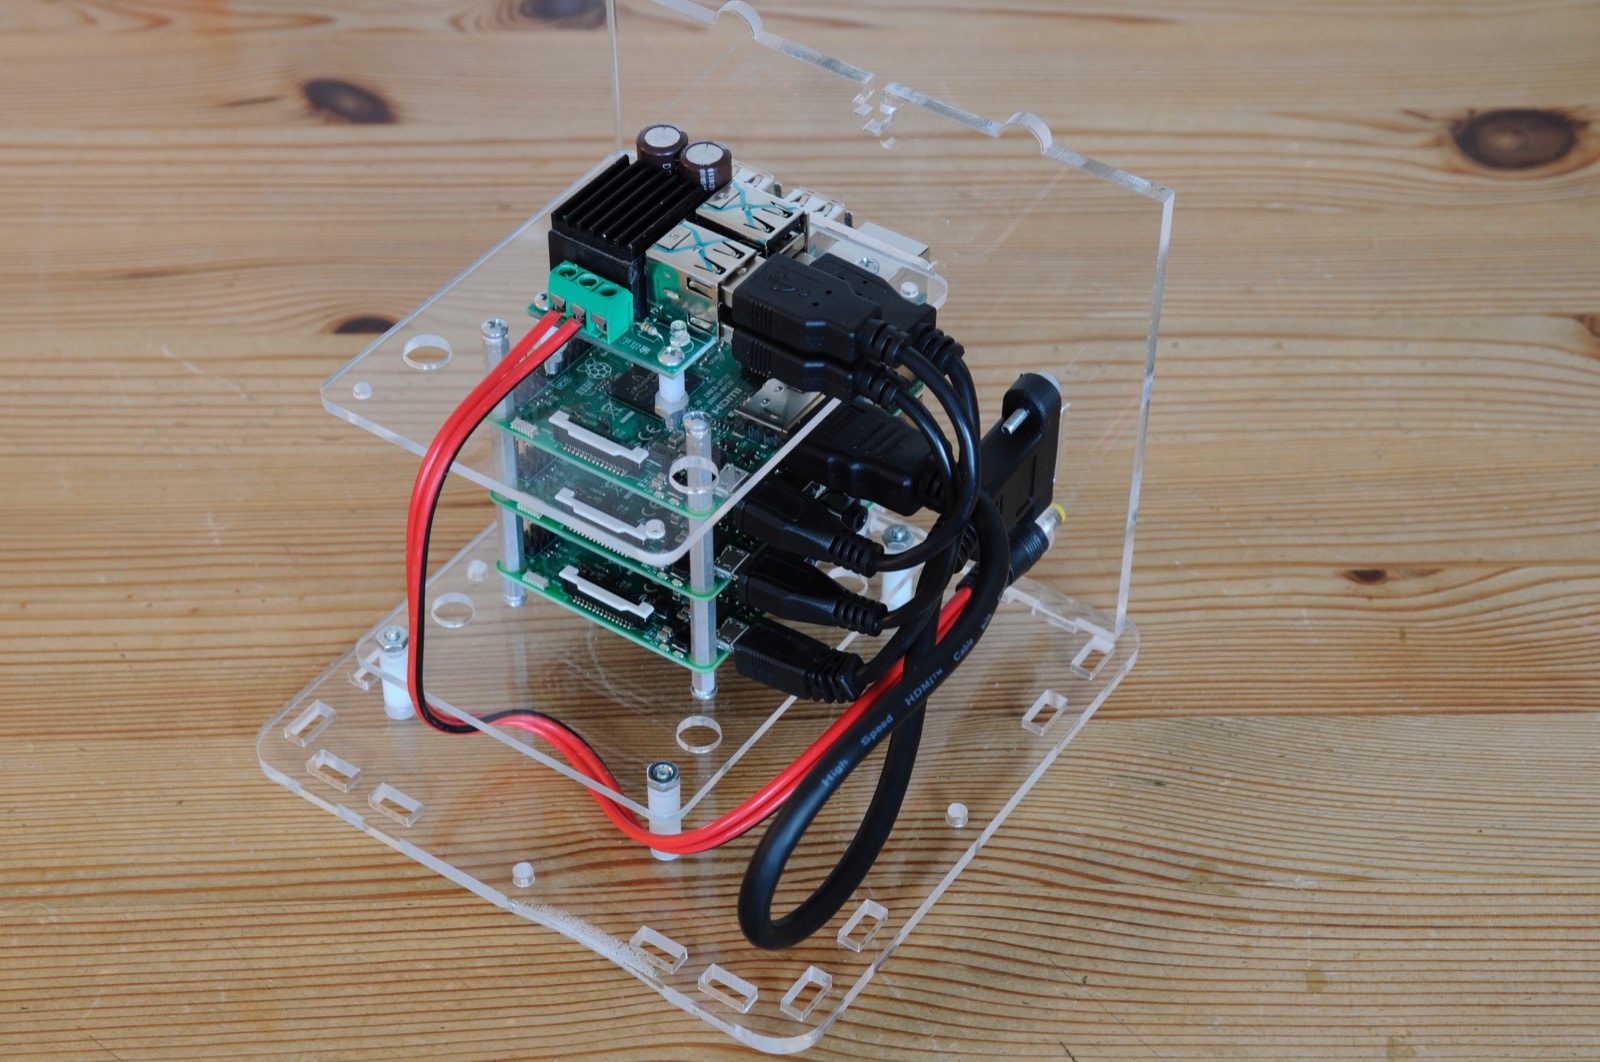
From now on, it’s easy to complete the cluster installation: We connect the 12V power cable to the PDU and front cover. We can also attach the HDMI cable to the upper Raspberry Pi and mount the other end to the front cover, too.
Assembling the case
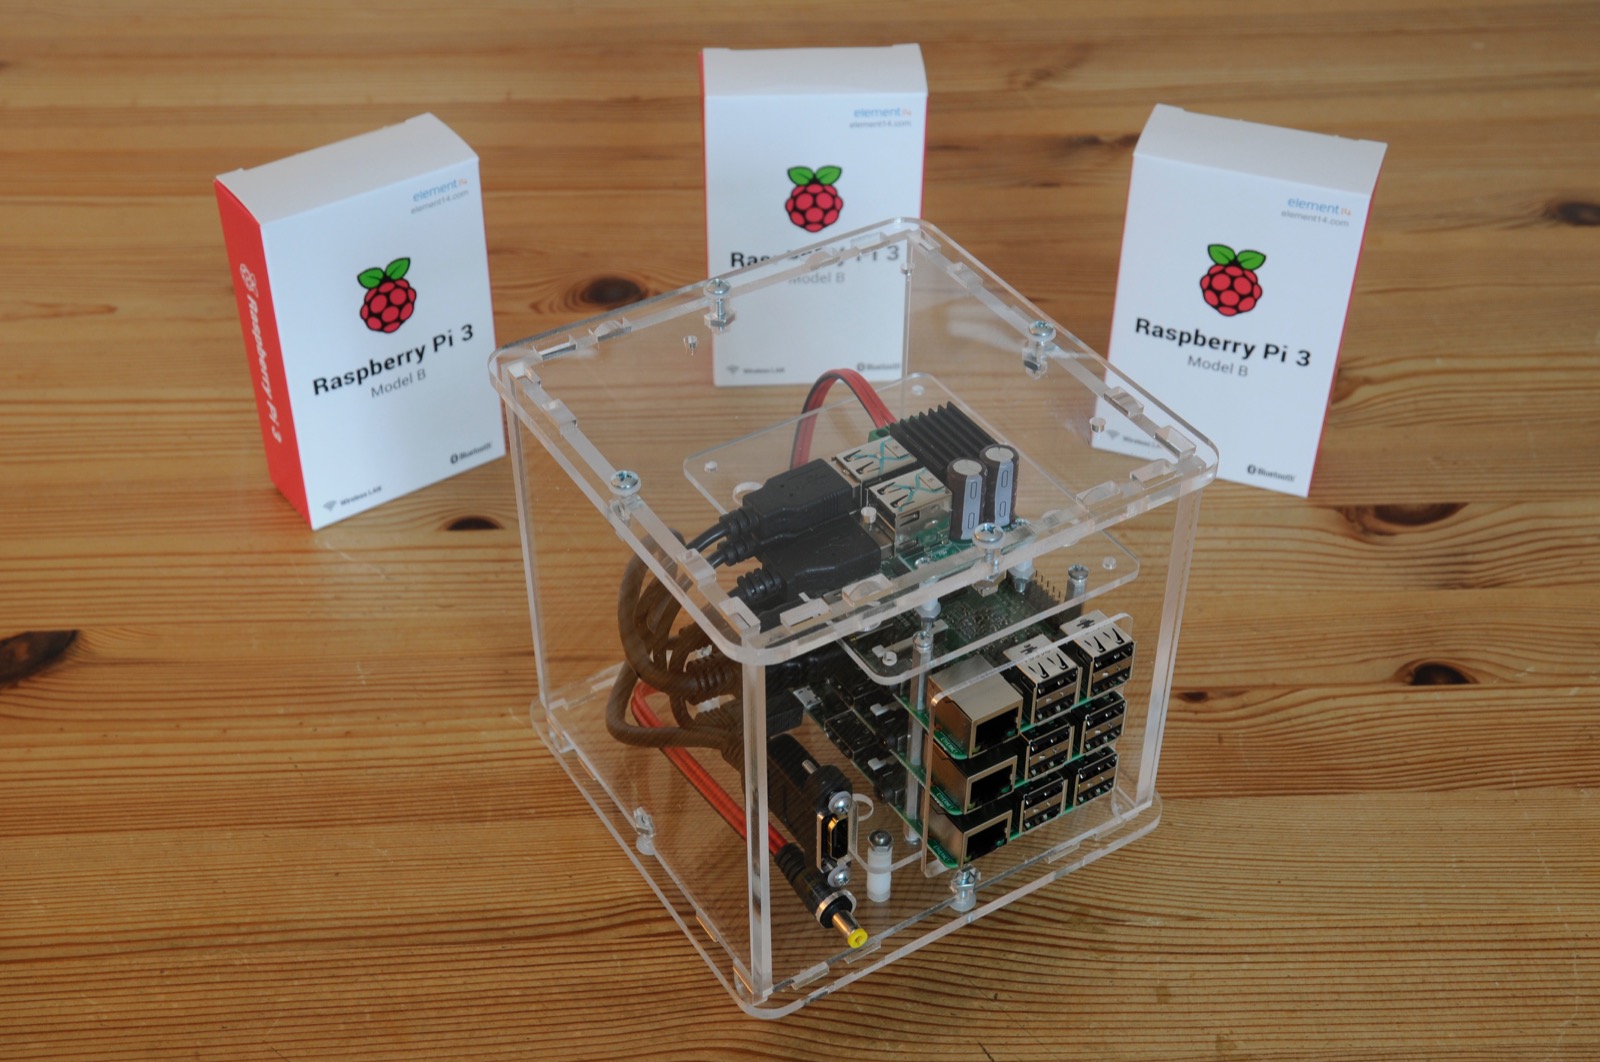
Finally, we mount the side and back cover and put on the top plate. Mounting with nuts & bolts and the PicoCluster is ready.
Note: Don’t forget to flash your microSD cards and insert them into the Pi’s, because as soon as we close the cluster case, it’s a little bit harder to change the SD cards.
Assembling the 5-node PicoCluster
Towering the Raspberry Pi’s
With the 5-node cluster we start similar as with the 3-node. We take the mounting plate for the Pi tower and stack all five Raspberry Pi’s with the spacers.
Wiring all together
Next, we mount the PDU on top of the Pi tower with 4 screws and attach the USB power cables to the five Raspberry Pi’s.
As soon as we mount the tower on the base plate, we see that we do have a lot more parts left.
For the 5-node cluster we have an internal dedicated 8-port switch, which we’ll install inside the case and wire all the ethernet cables to the Pi’s.
From now on, it’s easy to complete the cluster installation: We connect the 12V power cable to the PDU and front cover. We can also attach the HDMI cable to the upper Raspberry Pi and mount the other end to the front cover, too.
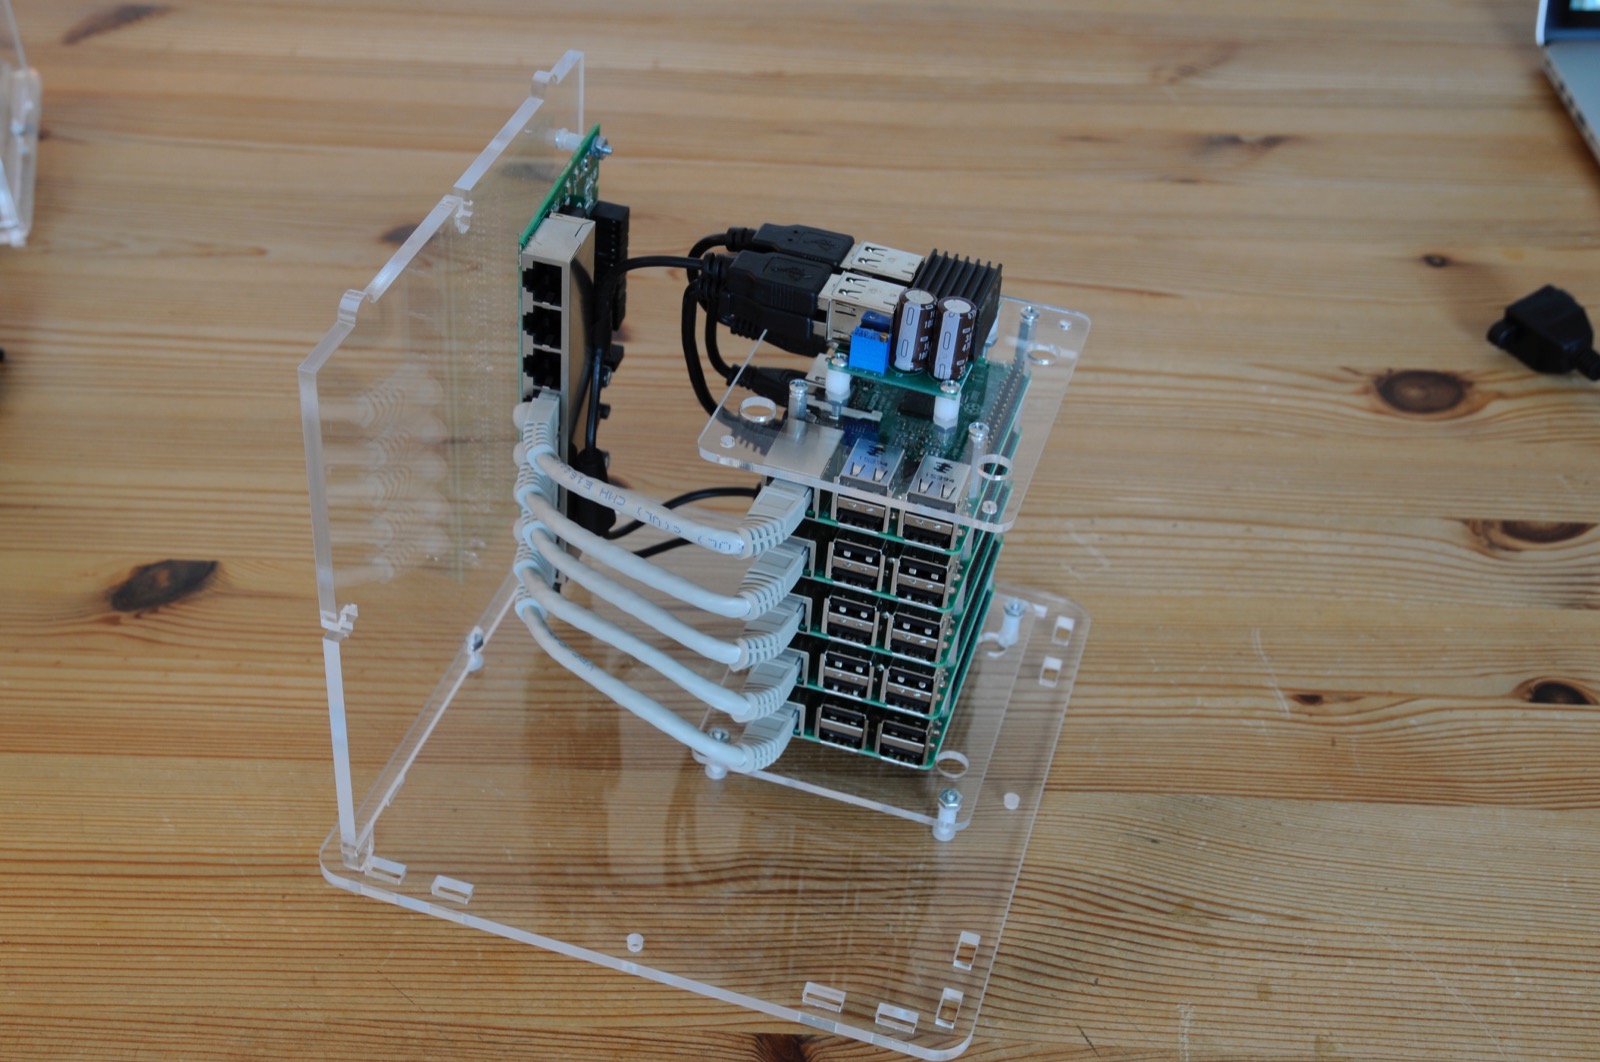
You’ll also find two USB cables in the kit, which you can connect to one or two different Pi’s and mount the plug to the front panel as well. Attaching HDMI and USB plugs to the case is really optional.
Assembling the case
Finally, we mount the side and back cover and put on the top plate. Mounting with nuts & bolts and our second PicoCluster is almost ready. As there are a few more parts to assemble the 5-node cluster, it will take a little bit longer than building the smaller cluster.
Finally, we have two new clusters
At the end we have now built two new Raspberry Pi clusters, a 3-node and a 5-node from PicoCluster. Both are looking really neat and everything is stowed away in a perfect way. Only accessing the microSD cards is not optimal once after the case is closed. You just have to remove only a few screws and dismounting the rear side panel of the case and then you can easily access the SD card slots.
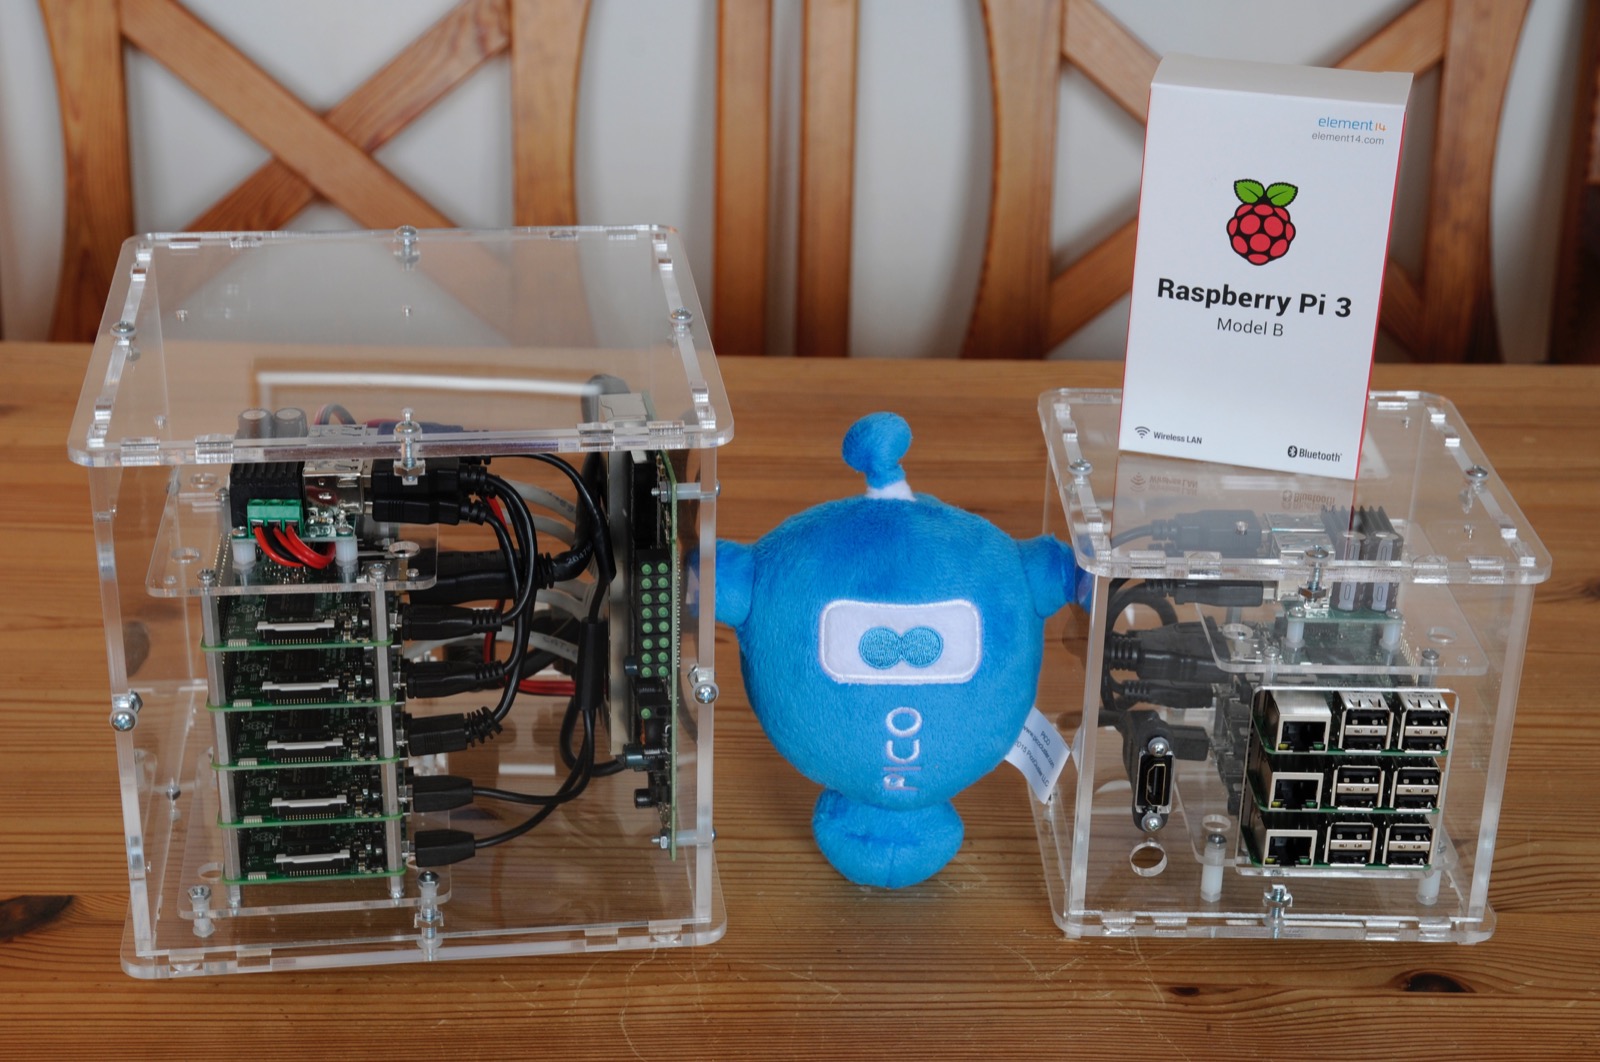
Because the 5-node cluster includes an integrated 8-port Ethernet switch, we’d recommend it to use as a standalone Pi cluster for experimenting with Docker Swarm and other cluster related tutorials and demos. You just have to attach a 12V power source and a single network link. This is all you need to start playing with it right away.
Now, you can go ahead and install software on your new PicoCluster. However, this isn’t within the scope of this hands-on project, so we’ll point you to one of our latest tutorials where you learn how to setup a Docker Swarm cluster with Raspberry Pi’s.
Where can you get it ?
You can order your own ready-to-use and tiny data center directly at PicoCluster with the Raspberry Pi’s included. The hardware kits we used in this post should be available soon, too. PicoCluster is currently optimizing a few parts like the PDU to get more power for the new Raspberry Pi 3, so we expect the next version will get some changes and improvements compared to these beta units.
Please send us your feedback on our Gitter channel or tweet your thoughts and ideas on this project at @HypriotTweets.
Dieter @Quintus23M
comments powered by Disqus