Install Docker 1.12 on the $9 C.H.I.P. computer
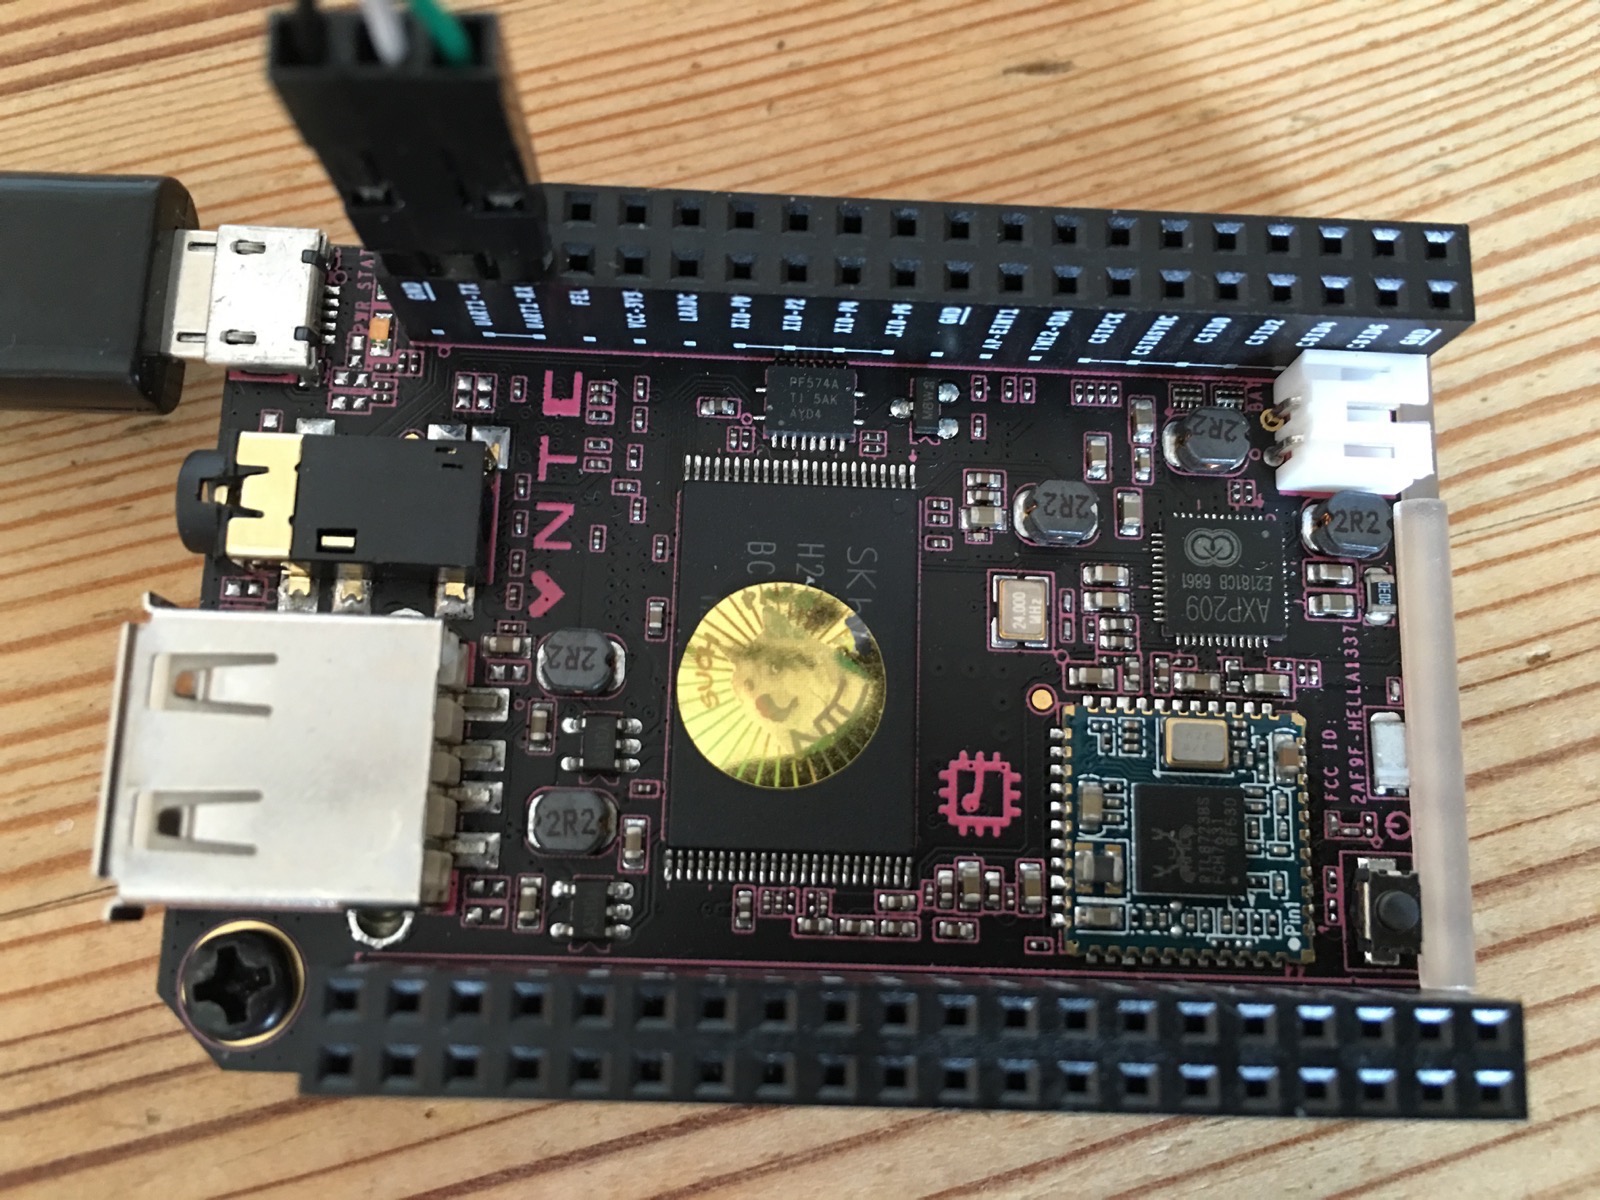
Sat, Sep 3, 2016Did you see the successfully launch of a really cheap ARM board for $9 only - the C.H.I.P. computer? It has an ARMv7 CPU with 512 MByte of main memory, 4 GByte flash memory as disk storage and is equipped with onboard WiFi and bluetooth as well.

With these awesome features built-in it would be really a great device to run Docker containers if only the recent Linux kernel 4.4 has the correct modules included, but it doesn’t - what a bummer!
But with spending a lot of time in building a custom Linux kernel and tweaking & testing I was finally able to install the latest Docker Engine for ARM on the C.H.I.P. — and as a result you can easily follow this tutorial and within a few minutes only you can run your first Docker container on this cute ARM board…
Background
Preparing your operating system and your Linux kernel to be able to run the Docker Engine efficiently can be a hard thing and can consume a lot of labor time.
Fortunately in this tutorial I’ll show you the basic steps to get Docker running on the $9 C.H.I.P. computer, so every normal user should be able to do it on her own within a short time only - even without the need being an expert in this area. And if you’re in a hurry you can skip most of the tutorial and go straight ahead to the Lessons learned - TL;DR section and install Docker with just two single commands.
Necessary steps to install Docker
- Flash the latest available firmware
- Connect to the C.H.I.P. via USB or UART console cable
- Configure WiFi connection
- Configure SSH to access the C.H.I.P.
- Checking the OS and Linux kernel version
- Install the Docker Engine 1.12.1 the easy way
- Upgrade the Linux kernel to a custom built version
- Run your first Docker Container on the C.H.I.P.
Step 1: Flash the latest available firmware
Use a Chrome browser and flash the latest firmware and OS on your C.H.I.P. computer. For detailed instructions go to the appropriate web site at http://flash.getchip.com/.

To run Docker on the C.H.I.P. we’re using the OS image for Debian Headless 4.4, which is a server installation without any GUI and thus it’s quite smaller is size, so we do have more space left for running apps and Docker containers.
Pro Tip: You can even see all the detailed log messages while flashing via an UART console cable:
...
Starting download of 6291508 bytes
................................................
downloading of 6291508 bytes finished
Flashing sparse image on partition UBI at offset 0x26800000 (ID: 10)
start 0x9a00 blkcnt 0x180 partition 0x400 size 0x7fc00
Writing at offset 0x26800000
New offset 0x27400000
........ wrote 384 blocks to 'UBI'

*****************[ FLASHING DONE ]*****************

Step 2: Connect to the C.H.I.P. via USB or UART console cable
Once the C.H.I.P. is successfully flashed you can connect it directly with an USB cable to a Mac or Linux machine. The C.H.I.P. is getting power over the USB cable and connects via an USB serial console driver, so you can easily connect to.
Let’s see if we can find the booted C.H.I.P. on the USB wire:
ls -al /dev/cu.usb*
crw-rw-rw-  1 root  wheel   20, 159 Sep  3 16:52 /dev/cu.usbmodem141113
Note 1: you have to wait a few minutes until the device can be detected as the C.H.I.P. has to be fully booted.
Note 2: it’s strongly recommended to use a powered USB hub, otherwise you’ll hit some power problems and the C.H.I.P. can’t access or can immediately shuts off
Now we can connect to the ARM device via the screen utility:
sudo screen /dev/cu.usbmodem141113
Alternatively, and this is my preferred way, you can attach an UART console cable (e.g. from AdaFruit) which is typically shown as a device on the Mac like /dev/cu.usbserial. With this setup you can even watch the complete boot logs of the C.H.I.P. computer and you are able to see all early boot messages from U-Boot and from loading and starting the Linux kernel. This gives you all details in case there are any problems and issues with a homegrown kernel.
sudo screen /dev/cu.usbserial 115200
Once you get to the login message, you can use username root and password chip to login:
Debian GNU/Linux 8 chip ttyS0

chip login: root
Password:
Linux chip 4.4.11-ntc #1 SMP Sat May 28 00:27:07 UTC 2016 armv7l

The programs included with the Debian GNU/Linux system are free software;
the exact distribution terms for each program are described in the
individual files in /usr/share/doc/*/copyright.

Debian GNU/Linux comes with ABSOLUTELY NO WARRANTY, to the extent
permitted by applicable law.
root@chip:~#
Step 3: Configure WiFi connection
Following the instruction here http://docs.getchip.com/chip.html#wifi-connection you can list all the available WiFi networks and then connect the C.H.I.P. to your preferred network.
nmcli device wifi list
*  SSID         MODE   CHAN  RATE       SIGNAL  BARS  SECURITY
   HITRON-FEE0  Infra  11    54 Mbit/s  67      ▂▄▆_  WPA2
   WLAN-R46VFR  Infra  1     54 Mbit/s  65      ▂▄▆_  WPA2
   My ASUS      Infra  6     54 Mbit/s  64      ▂▄▆_  WPA2
   WLAN-718297  Infra  1     54 Mbit/s  59      ▂▄▆_  WPA2
   WLAN-MCQYPS  Infra  1     54 Mbit/s  30      ▂___  WPA2
   Telekom_FON  Infra  1     54 Mbit/s  27      ▂___  --

*  SSID  MODE  CHAN  RATE  SIGNAL  BARS  SECURITY
Connect to the WiFi station with the SSID mySSID and password myPASSWORD, please insert you own SSID and PASSWORD. In this example I’m using the SSID WLAN-R46VFR:
nmcli device wifi connect 'WLAN-R46VFR' password '**********' ifname wlan0
Once you are connected you can see the ‘*’ in front of your connected WiFi network:
nmcli device wifi list
*  SSID         MODE   CHAN  RATE       SIGNAL  BARS  SECURITY
   HITRON-FEE0  Infra  11    54 Mbit/s  67      ▂▄▆_  WPA2
   My ASUS      Infra  6     54 Mbit/s  64      ▂▄▆_  WPA2
   WLAN-718297  Infra  1     54 Mbit/s  59      ▂▄▆_  WPA2
   WLAN-MCQYPS  Infra  1     54 Mbit/s  30      ▂___  WPA2
   Telekom_FON  Infra  1     54 Mbit/s  27      ▂___  --
*  WLAN-R46VFR  Infra  1     54 Mbit/s  100     ▂▄▆█  WPA2

*  SSID  MODE  CHAN  RATE  SIGNAL  BARS  SECURITY
And the C.H.I.P. should have got an IP address from the DHCP server:
ifconfig wlan0
wlan0     Link encap:Ethernet  HWaddr cc:79:cf:20:6d:d8
          inet addr:192.168.2.112  Bcast:192.168.2.255  Mask:255.255.255.0
          inet6 addr: fe80::ce79:cfff:fe20:6dd8/64 Scope:Link
          inet6 addr: 2003:86:8c18:1a37:ce79:cfff:fe20:6dd8/64 Scope:Global
          UP BROADCAST RUNNING MULTICAST  MTU:1500  Metric:1
          RX packets:119 errors:0 dropped:1 overruns:0 frame:0
          TX packets:102 errors:0 dropped:0 overruns:0 carrier:0
          collisions:0 txqueuelen:1000
          RX bytes:24656 (24.0 KiB)  TX bytes:16973 (16.5 KiB)
Now we’re connected to the network and can access the internet and the C.H.I.P. can be reached from our Mac or Linux machine.
Step 4: Configure SSH to access the C.H.I.P.
Here we have to use the same username root and password chip to login via SSH:
ssh-add
ssh-keygen -R 192.168.2.112
ssh-copy-id [email protected]
Finally we can login to the C.H.I.P. computer via SSH:
ssh [email protected]

The programs included with the Debian GNU/Linux system are free software;
the exact distribution terms for each program are described in the
individual files in /usr/share/doc/*/copyright.

Debian GNU/Linux comes with ABSOLUTELY NO WARRANTY, to the extent
permitted by applicable law.
Last login: Thu Jan  1 00:32:25 1970
-bash: warning: setlocale: LC_ALL: cannot change locale (en_US.UTF-8)
root@chip:~#
Step 5: Checking the OS and Linux kernel version
As a first step we’d like to check the current Linux kernel version and operating system.
Kernel version:
uname -a
Linux chip 4.4.11-ntc #1 SMP Sat May 28 00:27:07 UTC 2016 armv7l GNU/Linux
Operating system:
cat /etc/os-release
PRETTY_NAME="Debian GNU/Linux 8 (jessie)"
NAME="Debian GNU/Linux"
VERSION_ID="8"
VERSION="8 (jessie)"
ID=debian
HOME_URL="http://www.debian.org/"
SUPPORT_URL="http://www.debian.org/support"
BUG_REPORT_URL="https://bugs.debian.org/"
BUILD_ID=Wed Jun  1 05:34:36 UTC 2016
VARIANT="Debian on C.H.I.P"
VARIANT_ID=SERVER
Step 6: Install the Docker Engine 1.12.1 the easy way
In order to install Docker I’ve prepared a complete installation script which can be downloaded and executed in a single command line. I’ve you’re interested into the details you should check the script at GitHub.
# install Docker
curl -sSL https://github.com/DieterReuter/arm-docker-fixes/raw/master/002-fix-install-docker-on-chip-computer/apply-fix-002.sh | bash
At the end of running the install script we’ll see some errors occurred and the start of the Docker Engine has failed.
...
Errors were encountered while processing:
 docker-engine
E: Sub-process /usr/bin/dpkg returned an error code (1)
This is OK for now as it just indicates the default Linux kernel isn’t able to run Docker on the C.H.I.P. and we have to build and install a custom Linux kernel which has all the necessary kernel settings for Docker enabled.
If you’re interested in analyzing these errors in more detail you can run the command systemctl status docker.service and you’ll get more detailed log messages from systemd.
root@chip:~# systemctl status docker.service -l
● docker.service - Docker Application Container Engine
   Loaded: loaded (/etc/systemd/system/docker.service; enabled)
   Active: failed (Result: exit-code) since Sat 2016-09-03 13:20:49 UTC; 2min 23s ago
     Docs: https://docs.docker.com
 Main PID: 10840 (code=exited, status=1/FAILURE)

Sep 03 13:20:48 chip dockerd[10840]: time="2016-09-03T13:20:48.580271961Z" level=info msg="libcontainerd: new containerd process, pid: 10848"
Sep 03 13:20:49 chip dockerd[10840]: time="2016-09-03T13:20:49.652832502Z" level=error msg="'overlay' not found as a supported filesystem on this host. Please ensure kernel is new enough and has overlay support loaded."
Sep 03 13:20:49 chip dockerd[10840]: time="2016-09-03T13:20:49.656854332Z" level=fatal msg="Error starting daemon: error initializing graphdriver: driver not supported"
Sep 03 13:20:49 chip systemd[1]: docker.service: main process exited, code=exited, status=1/FAILURE
Sep 03 13:20:49 chip systemd[1]: Failed to start Docker Application Container Engine.
Sep 03 13:20:49 chip systemd[1]: Unit docker.service entered failed state.
Sep 03 13:20:50 chip systemd[1]: [/etc/systemd/system/docker.service:24] Unknown lvalue 'Delegate' in section 'Service'
Sep 03 13:20:52 chip systemd[1]: [/etc/systemd/system/docker.service:24] Unknown lvalue 'Delegate' in section 'Service'
Sep 03 13:20:53 chip systemd[1]: [/etc/systemd/system/docker.service:24] Unknown lvalue 'Delegate' in section 'Service'
Sep 03 13:20:54 chip systemd[1]: [/etc/systemd/system/docker.service:24] Unknown lvalue 'Delegate' in section 'Service'
Step 7: Upgrade the Linux kernel to a custom built version
In order to keep this tutorial short and easy to follow, I’d like to use an already prepared custom kernel which has nearly all the possible kernel modules and settings enabled to run the Docker Engine in an optimized way on the C.H.I.P. computer.
Therefore we only have to install our new Linux kernel and have to reboot the system to activate it.
# install custom Linux Kernel and reboot
curl -sSL https://github.com/hypriot/binary-downloads/releases/download/chip-kernel-4.4.11/4.4.11-hypriotos.tar.bz2 | tar xvfj - -C /
reboot
After rebooting we’re going to check the kernel version again:
uname -a
Linux chip 4.4.11-hypriotos #1 SMP Mon Aug 29 19:18:49 UTC 2016 armv7l GNU/Linux
Check the Docker client version:
docker -v
Docker version 1.12.1, build 23cf638
Check the Docker server version:
docker version
Client:
 Version:      1.12.1
 API version:  1.24
 Go version:   go1.6.3
 Git commit:   23cf638
 Built:        Thu Aug 18 05:31:15 2016
 OS/Arch:      linux/arm

Server:
 Version:      1.12.1
 API version:  1.24
 Go version:   go1.6.3
 Git commit:   23cf638
 Built:        Thu Aug 18 05:31:15 2016
 OS/Arch:      linux/arm
Getting the detailed informations about the Docker Engine:
docker info
Containers: 0
 Running: 0
 Paused: 0
 Stopped: 0
Images: 0
Server Version: 1.12.1
Storage Driver: overlay
 Backing Filesystem: <unknown>
Logging Driver: json-file
Cgroup Driver: cgroupfs
Plugins:
 Volume: local
 Network: null host bridge overlay
Swarm: inactive
Runtimes: runc
Default Runtime: runc
Security Options:
Kernel Version: 4.4.11-hypriotos
Operating System: Debian GNU/Linux 8 (jessie)
OSType: linux
Architecture: armv7l
CPUs: 1
Total Memory: 491 MiB
Name: chip
ID: SSJ5:7OTQ:BCAZ:4MDL:VEW6:VKND:3J6W:UI3O:UTBB:7H5V:LQ4W:ABRP
Docker Root Dir: /var/lib/docker
Debug Mode (client): false
Debug Mode (server): false
Registry: https://index.docker.io/v1/
Insecure Registries:
 127.0.0.0/8
Finally we could see, the latest Docker Engine v1.12.1 is now installed and is successfully running.
Step 8: Run your first Docker Container on the C.H.I.P.
As a last step we’d like to start a first Docker container, a small web server.
docker run -d -p 80:80 hypriot/rpi-busybox-httpd
Unable to find image 'hypriot/rpi-busybox-httpd:latest' locally
latest: Pulling from hypriot/rpi-busybox-httpd
c74a9c6a645f: Pull complete
6f1938f6d8ae: Pull complete
e1347d4747a6: Pull complete
a3ed95caeb02: Pull complete
Digest: sha256:c00342f952d97628bf5dda457d3b409c37df687c859df82b9424f61264f54cd1
Status: Downloaded newer image for hypriot/rpi-busybox-httpd:latest
fec2773baaec570ba8b6e00296dfd11b4b4768d1b51e574d851968b9225b9d22
Now start your web browser and point it to the website from our Docker container.
open http://192.168.2.112

Additional tip:
After installing some packages via apt-get it’s a good idea to clean the APT cache from time to time and save disk space.
root@chip:~# apt-get clean
root@chip:~# df -h
Filesystem      Size  Used Avail Use% Mounted on
ubi0:rootfs     3.7G  373M  3.3G  11% /
devtmpfs        213M     0  213M   0% /dev
tmpfs           246M     0  246M   0% /dev/shm
tmpfs           246M  6.7M  239M   3% /run
tmpfs           5.0M  4.0K  5.0M   1% /run/lock
tmpfs           246M     0  246M   0% /sys/fs/cgroup
tmpfs            50M     0   50M   0% /run/user/0
Lessons learned - TL;DR
Currently the C.H.I.P. isn’t able to run Docker out-of-the-box, but it just needs to install a custom built Linux kernel to prepare this awesome ARM board to run Docker easily. And now we’re able to install the officially built Docker Engine from the Docker project’s APT repository.
TL;DR
these are the only commands you need to install Docker
# install Docker
curl -sSL https://github.com/DieterReuter/arm-docker-fixes/raw/master/002-fix-install-docker-on-chip-computer/apply-fix-002.sh | bash

# install custom Linux Kernel and reboot
curl -sSL https://github.com/hypriot/binary-downloads/releases/download/chip-kernel-4.4.11/4.4.11-hypriotos.tar.bz2 | tar xvfj - -C /
reboot
And the best thing is, according to this tweet, the developers at @NextThingCo have already started to include all the required kernel settings into the standard OS images. So we can expect that the Docker Engine can be installed in the future even without tweaking the Linux kernel.
Outlook
As I told you at the beginning of this tutorial, these are just the basic steps for a normal user to install and use Docker on the C.H.I.P. computer. But if you’re interested in all the technical details behind the scene, how to check and analyze your Linux kernel and how to optimize it for running Docker efficiently, then please drop me a comment or tweet me and I’ll write even more about all the technical details so you can follow the path along on to an expert level too. With these skills you then should be able to install Docker on any Linux-based ARM device.
Feedback, please
As always use the comments below to give us feedback and share it on Twitter or Facebook.
Please send us your feedback on our Gitter channel or tweet your thoughts and ideas on this project at @HypriotTweets.
Dieter @Quintus23M
comments powered by Disqus