Getting Docker running on a high-density ARMv8 development board from HiSilicon
Tue, Mar 1, 2016Running Docker containers on the latest high-density ARMv8 cloud servers lets you operate your data center at lower costs and gives you the ability to scale your business even faster. In this article we demonstrate the technical ground work of compiling Docker and bootstrapping all the necessary development tools.
Introduction
We at Hypriot are working hard to bring the Docker container technology to all major ARM platforms. This journey started almost 15 months ago, when we tried to use Docker the first time on a Raspberry Pi which lead to the first HypriotOS release in February 2015.
A couple of months ago Shameerali Kolothum Thodi (or Shameer for short) from HiSilicon, a subsidiary of Huawei, contacted me and asked for help to get Docker running on their brand-new ARMv8 development board. We agreed on a collaboration and I got remote access to a 16-core ARMv8 Cortex-A57 machine.
Why are ARMv8 and Docker a perfect fit ?
With the hyper-growth that the major cloud service providers face, one of the biggest challenges is to scale the computing power of their data centers to keep up with demand. ARMv8 server technology promises to deliver major improvements that would allow to scale out data center capacity even faster.
In a recent article ARM Servers: Throwing Down The 25 Percent Share Gauntlet the author stated “PayPal’s math showed that the X86 iron would cost 1.8X as much as the” ARMv8 “machines, would consume 7X the power, and offer one-tenth the node density per rack. PayPal did not say how much cost savings – if any – came from the move to the” ARMv8 “chips, but did say there was a “game changing” cost per watt per cubic foot benefit over the X86 machinery.”
When we’re talking about high-density of the server hardware itself, we should also talk about high-density of the software stack. With the help of Docker container technology we’re able to increase the density of the software stack, too. By combining both technologies we are able to increase the efficiency and get the most out of our data center resources.
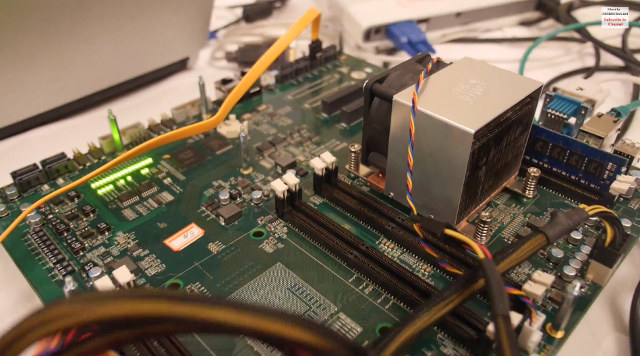
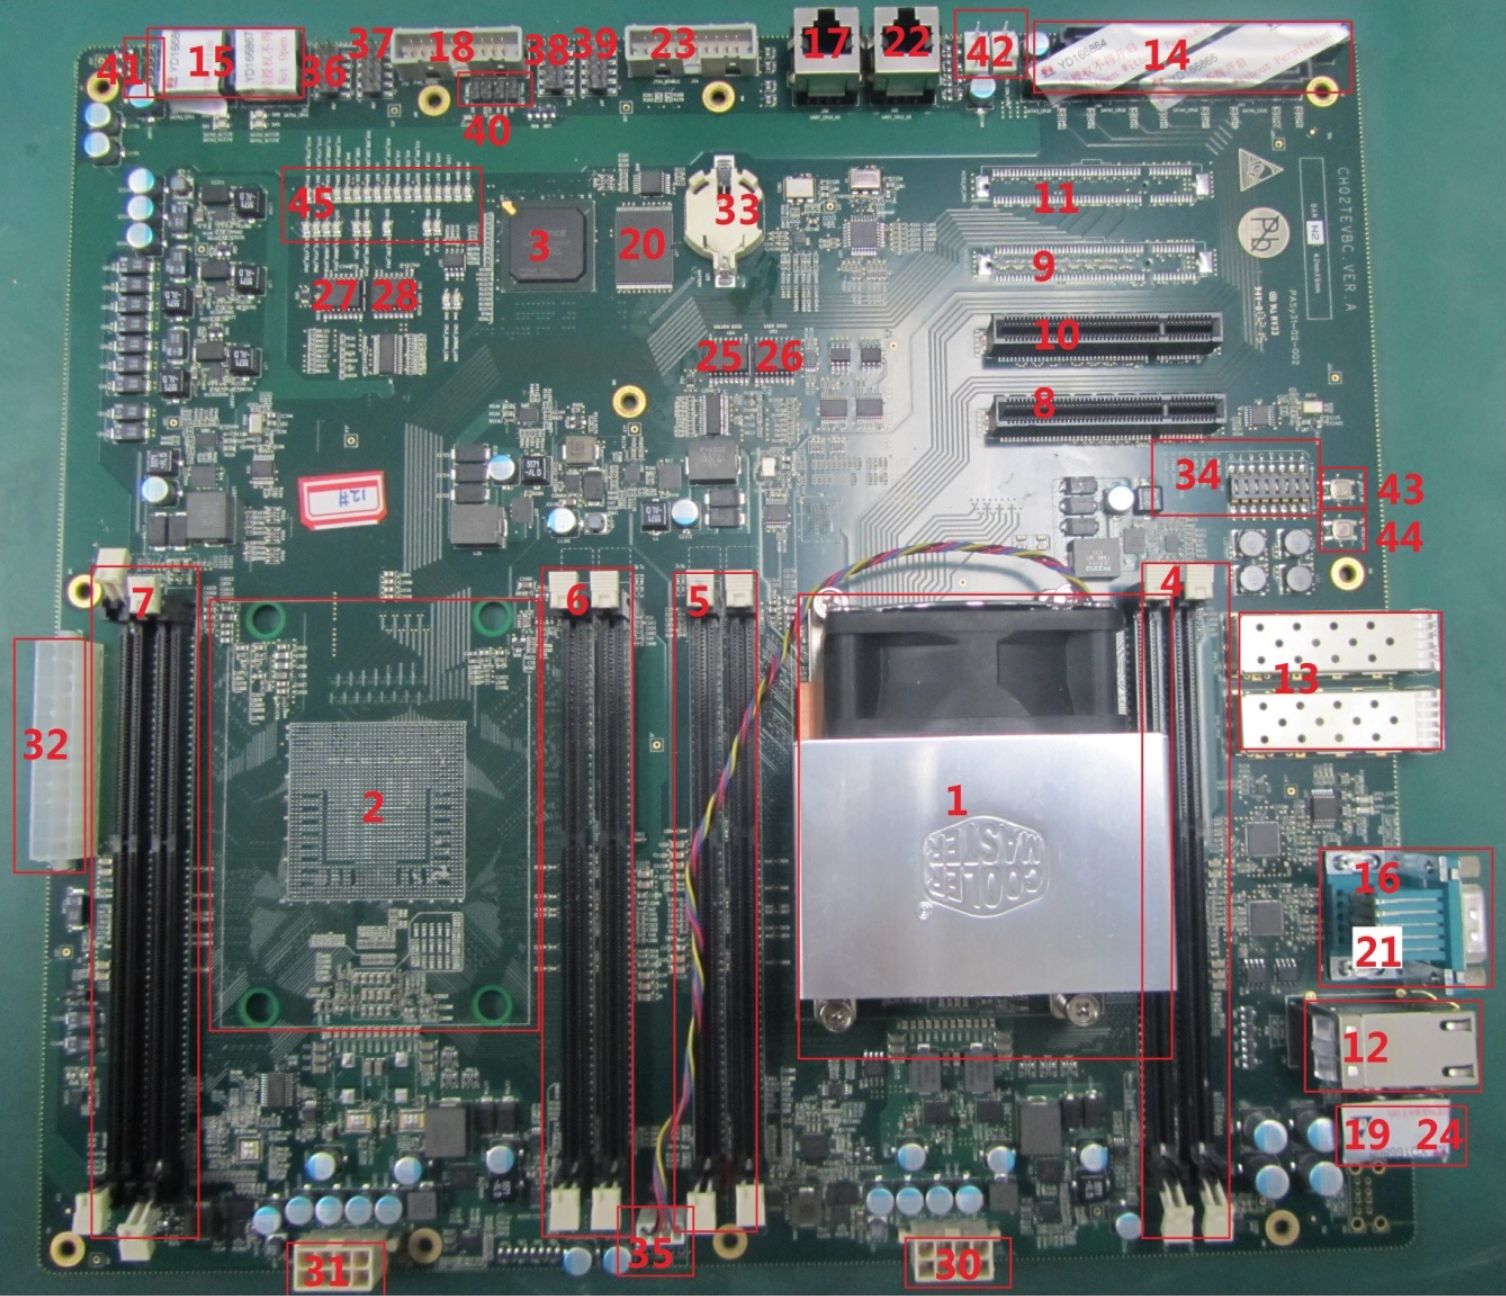
One of the first new ARMv8 servers is the D02 development board from HiSilicon.
HiSilicon D02 development board specs
| Features | Description |
|---|---|
| Board | SSI-EEB/E-ATX Compatible |
| Processors | 16-core ARM Cortex-A57@max. 2.1GHz |
| 1MB L2 cache/cluster, 16MB L3 cache | |
| supports ARMv8-A instruction set | |
| Memory/Flash | 2x Memory channel 4x DDR3 DIMM per CPU |
| 2x SPI Flash 16Mb BIOS/UEFI | |
| 128 MBytes Nor Flash | |
| Peripheral interfaces | 1x USB2.0 host port |
| 8x SAS3.0 ports | |
| 1x ARM Tracer connector | |
| 1x JTAG interface | |
| Expansion Capabilities | 2x 8 PCI express interfaces |
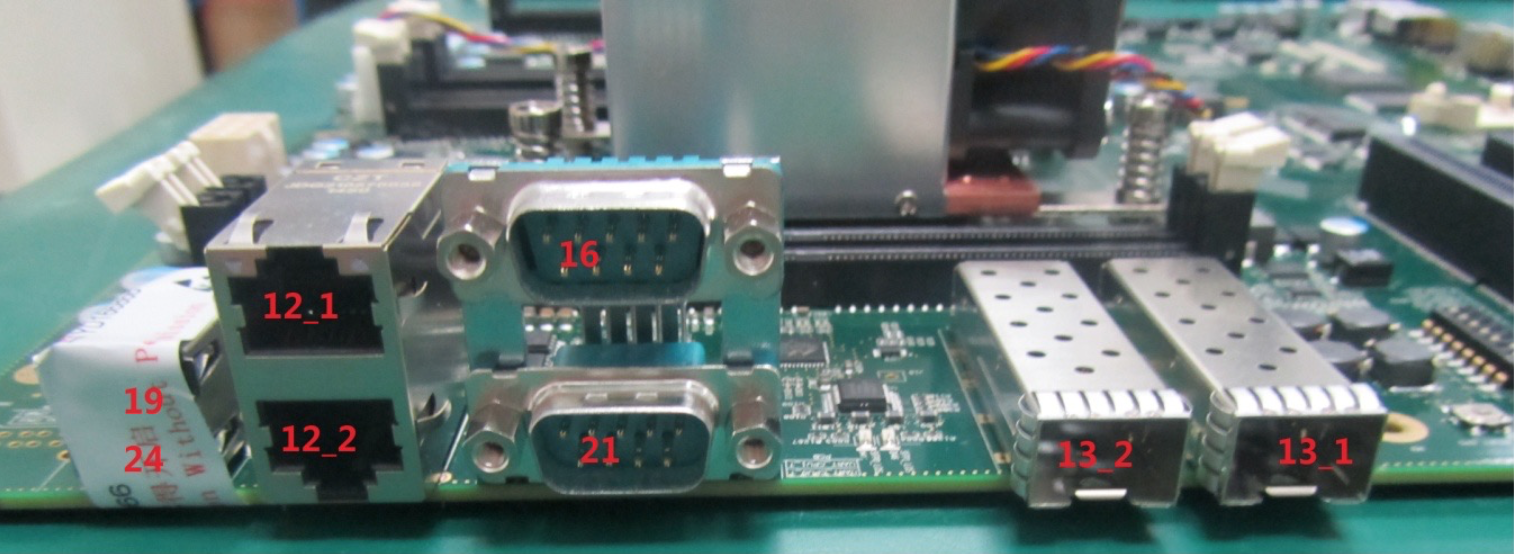
| LAN | 2x 10/100/1000Mbps Ethernet ports |
| 2x xGE SFP+ ports (10Gb/s) |
The HiSilicon D02 board uses the UEFI/Kernel/Ubuntu rootfs, which is available for download at http://open-estuary.org/.
Step-by-Step to a working Docker installation
TLDR; Go 1.6 and Docker 1.10.2 are running on ARMv8
Getting to know the installed Linux OS and the ARMv8 hardware
As a first step when I’m connecting to a new ARM board I’d like to get some details about the operating system and the hardware itself. With this known details it’s easier to get a first impression about the capabilities and the performance of this specific hardware.
So let’s find out what we have with some standard Linux commands.
Ubuntu 15.04 ubuntu ttyS0

ubuntu login: root
Password:
Last login: Sun Feb 28 14:57:03 UTC 2016 on ttyS0
Welcome to Ubuntu 15.04 (GNU/Linux 4.1.6+ aarch64)

root@ubuntu:~#
From the login prompt we can see that the board is running an Ubuntu 15.04 Linux OS which
is very common and nothing seems to be special, except the CPU architecture is different.
So let’s dig into this a little bit deeper and get some more details.
# uname -a
Linux ubuntu 4.1.6+ #2 SMP Thu Jan 14 22:33:10 IST 2016 aarch64 aarch64 aarch64 GNU/Linux
Here we can recognize a recent Linux 4.1.6 kernel and the CPU architecture is listed
as aarch64 which turns out to be the architecture name that Linux uses for an ARMv8
processor. This is in contrast to the ARMv6 and ARMv7 architectures which are
labeled as armv6l or armv7l.
It will be more interesting to get some details of the hardware itself:
# cat /proc/meminfo
MemTotal:        8086304 kB
MemFree:         6883540 kB
MemAvailable:    7487700 kB
Buffers:          186196 kB
Cached:           344836 kB
SwapCached:            0 kB
Active:           475296 kB
Inactive:         129716 kB
Active(anon):      75208 kB
Inactive(anon):    24656 kB
Active(file):     400088 kB
Inactive(file):   105060 kB
Unevictable:           0 kB
Mlocked:               0 kB
SwapTotal:             0 kB
SwapFree:              0 kB
Dirty:                 0 kB
Writeback:             0 kB
AnonPages:         74092 kB
Mapped:            35568 kB
Shmem:             25876 kB
Slab:             174704 kB
SReclaimable:     141456 kB
SUnreclaim:        33248 kB
KernelStack:        3584 kB
PageTables:          816 kB
NFS_Unstable:          0 kB
Bounce:                0 kB
WritebackTmp:          0 kB
CommitLimit:     4043152 kB
Committed_AS:     328952 kB
VmallocTotal:   258998208 kB
VmallocUsed:       89648 kB
VmallocChunk:   258855996 kB
AnonHugePages:     59392 kB
CmaTotal:          16384 kB
CmaFree:            6120 kB
HugePages_Total:       0
HugePages_Free:        0
HugePages_Rsvd:        0
HugePages_Surp:        0
Hugepagesize:       2048 kB
OK, we do have 8 GBytes of main memory for this HiSilicon D02 board, which should be sufficient for our development work, but from the board specs we know, this can be increased for a real production work load.
But what about the ARMv8 CPU’s itself, let’s see how much of them are installed.
# cat /proc/cpuinfo
processor	: 0
Features	: fp asimd evtstrm aes pmull sha1 sha2 crc32
CPU implementer	: 0x41
CPU architecture: 8
CPU variant	: 0x1
CPU part	: 0xd07
CPU revision	: 1

processor	: 1
Features	: fp asimd evtstrm aes pmull sha1 sha2 crc32
CPU implementer	: 0x41
CPU architecture: 8
CPU variant	: 0x1
CPU part	: 0xd07
CPU revision	: 1

...

processor	: 15
Features	: fp asimd evtstrm aes pmull sha1 sha2 crc32
CPU implementer	: 0x41
CPU architecture: 8
CPU variant	: 0x1
CPU part	: 0xd07
CPU revision	: 1
Wow, an impressing number of 16 CPU cores can be found in this neat little server machine. But this is only a single CPU as the D02 currently supports only a single CPU socket. The D02 is designed to be used with two CPU sockets, but with this hardware revision the board is only populated with a single CPU.
To sum it up we currently have:
- a single ARMv8 CPU with 16x ARMv8 Cortex-A57 cores in total
- 8 GByte of main memory
- Ubuntu 15.04 (Vivid Vervet) Linux operating system
- a recent Linux 4.1.6 kernel
Installing and compiling the latest Go version
To compile Docker we need the very latest version of Go, which is currently Go 1.6. You can find all available Go versions at The Go Programming Language - Downloads.
Since the release 1.5 of the Go language, the Go compiler is written in pure Go code and can be compiled itself with an earlier Go version - and this is the recommended way. As we are running an almost current Ubuntu version, the chances are high that we can use the Go version that comes with the distribution.
# apt-get update
# apt-get install -y golang-go
# go version
go version go1.4.2 gccgo (Ubuntu 5.1~rc1-0ubuntu1.1) 5.0.1 20150414 (prerelease) [gcc-5-branch revision 222102] linux/arm64
With Go 1.4.2 we are able to bootstrap Go 1.6, which allows us to compile Docker. So let’s proceed and get the install path of the Go binary which we will need later on.
# which go
/usr/bin/go
We need the path /usr where the Go compiler /bin/go is located to start the bootstrap process.
Next we are downloading the source code of the Go compiler and extracting it to
the default location /usr/local/go.
Then start the compile script and wait some time.
# export GO_VERSION=1.6
# curl -sSL "https://storage.googleapis.com/golang/go${GO_VERSION}.src.tar.gz" | tar xz -C /usr/local
# cd /usr/local/go/src
# time GOROOT_BOOTSTRAP=/usr ./make.bash
As this is the first time that we compile something, we can get a first impression of the performance of this 16-core ARMv8 machine.
Installed Go for linux/arm64 in /usr/local/go
Installed commands in /usr/local/go/bin

real	3m19.853s
user	5m22.660s
sys	9m15.532s
Compiling the complete Go compiler within 9 minutes only!
Now we do have Go 1.6 installed and it’s almost ready to use. The only thing we
have to do is to include the path to the Go compiler binaries into the standard
PATH environment variable. This can be done by including this code snippet into
our root users ~/.profile script.
# set PATH so it includes GO bin if it exists
if [ -d "/usr/local/go/bin" ] ; then
  PATH="/usr/local/go/bin:$PATH"
fi
After the next login Go 1.6 should be enabled by default.
# go version
go version go1.6 linux/arm64

# which go
/usr/local/go/bin/go
To avoid any conflicts with the old Go 1.4.2 version, we should remove it and
clean up the system. For this purpose we check which golang packages were
installed previously.
# dpkg -l | grep golang
ii  golang-go                        2:1.3.3-1ubuntu4                  arm64        Go programming language compiler
ii  golang-src                       2:1.3.3-1ubuntu4                  arm64        Go programming language compiler - source files
And now let’s remove them completely and double-ckeck if there is nothing left.
# apt-get --purge remove -y golang-go golang-src
# dpkg -l | grep golang
With a couple of commands we were able to install and compile the latest Go v1.6 compiler and it’s now ready to use.
Bootstrapping the Docker Engine the first time
In order to compile Docker directly on our development board, we have to know the different methods, how we can and how we should compile the Docker Engine.
First of all, the official process to compile Docker is to run the complete build process within a Docker container. But without an already running Docker Engine on our dev machine, we cannot do this - that’s clear, right?
For this purpose there is an easy, but not really well-known workaround. We have to check and install the necessary development dependencies first and then we can run the build script natively to get a first working Docker binary. So, let’s do it right away.
With the previous step we’ve already installed the most important dependency with the Go 1.6 compiler, but we’ll need something more.
# apt-get install -y git-core
# apt-get install -y btrfs-tools libsqlite3-dev libdevmapper-dev
After installing these packages it’s a good practice to check and document all the installed versions.
# dpkg -l | grep -E "btrfs-tools|libsqlite3-dev|libdevmapper-d
ii  btrfs-tools                      3.17-1.1                          arm64        Checksumming Copy on Write Filesystem utilities
ii  libdevmapper-dev:arm64           2:1.02.90-2ubuntu1                arm64        Linux Kernel Device Mapper header files
ii  libsqlite3-dev:arm64             3.8.7.4-1ubuntu0.1                arm64        SQLite 3 development files
If you have already installed these packages previously, then it could also be a good idea to upgrade them to the latest version.
# apt-get upgrade -y btrfs-tools libsqlite3-dev libdevmapper-dev
With hopefully all the necessary build dependencies installed now on our machine, we can clone the Docker GitHub repo and compile Docker from it’s source code.
As we know, the latest Docker release is v1.10.2. That’s why we’re checking out
this tag.
# mkdir -p ~/code
# cd ~/code
# git clone https://github.com/docker/docker
# cd docker
# git checkout v1.10.2
And here comes the magic trick to compile Docker natively on our host machine without the need of having a Docker Engine already running. This build will take a few minutes, and as long as we have all the necessary dependencies installed it should succeed, too.
# time AUTO_GOPATH=1 ./hack/make.sh dynbinary
# WARNING! I don't seem to be running in the Docker container.
# The result of this command might be an incorrect build, and will not be
#   officially supported.
#
# Try this instead: make all
#

---> Making bundle: dynbinary (in bundles/1.10.2/dynbinary)
Created binary: bundles/1.10.2/dynbinary/dockerinit-1.10.2
Building: bundles/1.10.2/dynbinary/docker-1.10.2
Created binary: bundles/1.10.2/dynbinary/docker-1.10.2


real	3m58.883s
user	6m44.140s
sys	13m9.056s
SUCCESS, we’ve got it!
Our first Docker binary is successfully compiled and we can use it right away.
# bundles/1.10.2/dynbinary/docker-1.10.2 -v
Docker version 1.10.2, build c3959b1
# bundles/1.10.2/dynbinary/docker-1.10.2 version
Client:
 Version:      1.10.2
 API version:  1.22
 Go version:   go1.6
 Git commit:   c3959b1
 Built:        Sun Feb 28 17:17:48 2016
 OS/Arch:      linux/arm64
Cannot connect to the Docker daemon. Is the docker daemon running on this host?
Installing the Docker Engine on ARMv8
To run Docker efficiently on a Linux OS, we first need to know if our Linux kernel supports all the necessary kernel modules and is compiled with all the important kernel settings. This isn’t easy and therefore the Docker developers are providing an easy-to-use script. This script should be downloaded and run on the target machine and checks all the important kernel settings for us and provides a complete summary.
# wget https://github.com/docker/docker/raw/master/contrib/check-config.sh
# chmod +x check-config.sh
# ls -al check-config.sh
-rwxr-xr-x 1 root root 6984 Feb 28 20:09 check-config.sh
Run a complete kernel check, just to make sure, we can run Docker without any problems.
# ./check-config.sh
info: reading kernel config from /proc/config.gz ...

Generally Necessary:
- cgroup hierarchy: properly mounted [/sys/fs/cgroup]
- apparmor: enabled and tools installed
- CONFIG_NAMESPACES: enabled
- CONFIG_NET_NS: enabled
- CONFIG_PID_NS: enabled
- CONFIG_IPC_NS: enabled
- CONFIG_UTS_NS: enabled
- CONFIG_DEVPTS_MULTIPLE_INSTANCES: enabled
- CONFIG_CGROUPS: enabled
- CONFIG_CGROUP_CPUACCT: enabled
- CONFIG_CGROUP_DEVICE: enabled
- CONFIG_CGROUP_FREEZER: enabled
- CONFIG_CGROUP_SCHED: enabled
- CONFIG_CPUSETS: enabled
- CONFIG_MEMCG: enabled
- CONFIG_CONFIG_KEYS: missing
- CONFIG_MACVLAN: enabled
- CONFIG_VETH: enabled
- CONFIG_BRIDGE: enabled (as module)
- CONFIG_BRIDGE_NETFILTER: enabled (as module)
- CONFIG_NF_NAT_IPV4: enabled
- CONFIG_IP_NF_FILTER: enabled (as module)
- CONFIG_IP_NF_TARGET_MASQUERADE: enabled
- CONFIG_NETFILTER_XT_MATCH_ADDRTYPE: enabled
- CONFIG_NETFILTER_XT_MATCH_CONNTRACK: enabled
- CONFIG_NF_NAT: enabled
- CONFIG_NF_NAT_NEEDED: enabled
- CONFIG_POSIX_MQUEUE: enabled

Optional Features:
- CONFIG_USER_NS: enabled
- CONFIG_SECCOMP: enabled
- CONFIG_MEMCG_KMEM: enabled
- CONFIG_MEMCG_SWAP: enabled
- CONFIG_MEMCG_SWAP_ENABLED: enabled
- CONFIG_BLK_CGROUP: enabled
- CONFIG_IOSCHED_CFQ: enabled
- CONFIG_BLK_DEV_THROTTLING: enabled
- CONFIG_CGROUP_PERF: enabled
- CONFIG_CGROUP_HUGETLB: enabled
- CONFIG_NET_CLS_CGROUP: enabled
- CONFIG_CGROUP_NET_PRIO: enabled
- CONFIG_CFS_BANDWIDTH: enabled
- CONFIG_FAIR_GROUP_SCHED: enabled
- CONFIG_RT_GROUP_SCHED: enabled
- CONFIG_EXT3_FS: enabled
- CONFIG_EXT3_FS_XATTR: enabled
- CONFIG_EXT3_FS_POSIX_ACL: enabled
- CONFIG_EXT3_FS_SECURITY: enabled
- CONFIG_EXT4_FS: enabled
- CONFIG_EXT4_FS_POSIX_ACL: enabled
- CONFIG_EXT4_FS_SECURITY: enabled
- Storage Drivers:
  - "aufs":
    - CONFIG_AUFS_FS: missing
  - "btrfs":
    - CONFIG_BTRFS_FS: enabled
  - "devicemapper":
    - CONFIG_BLK_DEV_DM: enabled
    - CONFIG_DM_THIN_PROVISIONING: enabled
  - "overlay":
    - CONFIG_OVERLAY_FS: enabled
  - "zfs":
    - /dev/zfs: missing
    - zfs command: missing
    - zpool command: missing
It turns out that this Linux 4.1.6 kernel on the HiSilicon D02 board is highly optimized for Docker. That’s because Shameer tuned almost all of the necessary kernel settings and kernel modules. He did a great job and included all of the important settings into the kernel .config.
To install our new binary on a server that has an existing Docker installation is easy. As soon as the old version is stopped, we can change the binaries by copying the new version to the destination folder and restarting the Docker service.
# systemctl stop docker
# cd ~/code/docker/
# mkdir -p /usr/lib/docker/
# cp bundles/1.10.2/dynbinary/docker-1.10.2 /usr/bin/docker
# cp bundles/1.10.2/dynbinary/dockerinit-1.10.2 /usr/lib/docker/dockerinit
# systemctl start docker
Before using the new Docker Engine we’re checking, if the Docker service is really running.
# systemctl -l status docker
● docker.service - Docker Application Container Engine
   Loaded: loaded (/lib/systemd/system/docker.service; enabled; vendor preset: enabled)
   Active: active (running) since Sun 2016-02-28 19:32:09 UTC; 1min 41s ago
     Docs: https://docs.docker.com
 Main PID: 15424 (docker)
   CGroup: /system.slice/docker.service
           └─15424 /usr/bin/docker daemon -H fd:// --storage-driver=overlay -D

Feb 28 19:32:09 ubuntu docker[15424]: time="2016-02-28T19:32:09.125226000Z" level=debug msg="Registering GET, /events"
Feb 28 19:32:09 ubuntu docker[15424]: time="2016-02-28T19:32:09.125579000Z" level=debug msg="Registering GET, /info"
Feb 28 19:32:09 ubuntu docker[15424]: time="2016-02-28T19:32:09.125872000Z" level=debug msg="Registering GET, /version"
Feb 28 19:32:09 ubuntu docker[15424]: time="2016-02-28T19:32:09.126276000Z" level=debug msg="Registering POST, /auth"
Feb 28 19:32:09 ubuntu docker[15424]: time="2016-02-28T19:32:09.126586000Z" level=debug msg="Registering GET, /volumes"
Feb 28 19:32:09 ubuntu docker[15424]: time="2016-02-28T19:32:09.126873000Z" level=debug msg="Registering GET, /volumes/{name:.*}"
Feb 28 19:32:09 ubuntu docker[15424]: time="2016-02-28T19:32:09.127500000Z" level=debug msg="Registering POST, /volumes/create"
Feb 28 19:32:09 ubuntu docker[15424]: time="2016-02-28T19:32:09.127882000Z" level=debug msg="Registering DELETE, /volumes/{name:.*}"
Feb 28 19:32:09 ubuntu docker[15424]: time="2016-02-28T19:32:09.128327000Z" level=debug msg="Registering POST, /build"
Feb 28 19:32:09 ubuntu docker[15424]: time="2016-02-28T19:32:09.128781000Z" level=info msg="API listen on /var/run/docker.sock"
Now as the Docker Engine should be working, let’s check all the details with a couple of Docker commands.
# docker version
Client:
 Version:      1.10.2
 API version:  1.22
 Go version:   go1.6
 Git commit:   c3959b1
 Built:        Sun Feb 28 17:17:48 2016
 OS/Arch:      linux/arm64

Server:
 Version:      1.10.2
 API version:  1.22
 Go version:   go1.6
 Git commit:   c3959b1
 Built:        Sun Feb 28 17:17:48 2016
 OS/Arch:      linux/arm64
# docker info
Containers: 1
 Running: 0
 Paused: 0
 Stopped: 1
Images: 0
Server Version: 1.10.2
Storage Driver: overlay
 Backing Filesystem: extfs
Execution Driver: native-0.2
Logging Driver: json-file
Plugins:
 Volume: local
 Network: bridge null host
Kernel Version: 4.1.6+
Operating System: Ubuntu 15.04
OSType: linux
Architecture: aarch64
CPUs: 16
Total Memory: 7.712 GiB
Name: ubuntu
ID: FGHC:4WU2:MQVO:7EOI:OUKY:43RZ:AN2I:BGAH:DTLX:HR4J:HJPE:K7LP
Debug mode (server): true
 File Descriptors: 11
 Goroutines: 17
 System Time: 2016-02-28T19:36:41.329998Z
 EventsListeners: 0
 Init SHA1: 0fecd52467342c39b5987e394c6f5dee0b438771
 Init Path: /usr/lib/docker/dockerinit
 Docker Root Dir: /var/lib/docker
Before going ahead in our journey to build Docker the official way, we should check whether we can start some Docker containers from the Docker Hub. Ok, this one is not for ARMv8 but maybe an ARMv7 image works as well.
# docker pull hypriot/rpi-busybox-httpd
Using default tag: latest
latest: Pulling from hypriot/rpi-busybox-httpd
c74a9c6a645f: Pull complete
6f1938f6d8ae: Pull complete
e1347d4747a6: Pull complete
a3ed95caeb02: Pull complete
Digest: sha256:c00342f952d97628bf5dda457d3b409c37df687c859df82b9424f61264f54cd1
Status: Downloaded newer image for hypriot/rpi-busybox-httpd:latest
# docker images
REPOSITORY                  TAG                 IMAGE ID            CREATED             SIZE
hypriot/rpi-busybox-httpd   latest              fbd9685c5ffc        8 months ago        2.156 MB
And now let’s start a first container.
# docker run -d -p 80:80 hypriot/rpi-busybox-httpd
d5cafadbc9395f55480607ddbe461b746d7d21a068735765cf496c9048dbd210

# docker ps -a
CONTAINER ID        IMAGE                       COMMAND                  CREATED             STATUS              PORTS                NAMES
d5cafadbc939        hypriot/rpi-busybox-httpd   "/bin/busybox httpd -"   16 seconds ago      Up 14 seconds       0.0.0.0:80->80/tcp   small_jang
Checking this web server with curl we should get an answer like this one.
# curl http://127.0.0.1:80/
<html>
<head><title>Pi armed with Docker by Hypriot</title>
  <body style="width: 100%; background-color: black;">
    <div id="main" style="margin: 100px auto 0 auto; width: 800px;">
      <img src="pi_armed_with_docker.jpg" alt="pi armed with docker" style="width: 800px">
    </div>
  </body>
</html>
At the end, we’re making a backup of our Docker installation - just in case.
# cd ~/
# tar cvfz docker-1.10.2.tar.gz /usr/bin/docker /usr/lib/docker/dockerinit /etc/default/docker /lib/systemd/system/docker*
/usr/bin/docker
/usr/lib/docker/dockerinit
/etc/default/docker
/lib/systemd/system/docker.service
/lib/systemd/system/docker.socket

# ls -al docker-1.10.2.tar.gz
-rw-r--r-- 1 root root 11665112 Feb 28 19:53 docker-1.10.2.tar.gz
# cat /etc/default/docker

# Docker Upstart and SysVinit configuration file

# Customize location of Docker binary (especially for development testing).
#DOCKER="/usr/local/bin/docker"

# Use DOCKER_OPTS to modify the daemon startup options.
#DOCKER_OPTS="--dns 8.8.8.8 --dns 8.8.4.4"
DOCKER_OPTS="--storage-driver=overlay -D"

# If you need Docker to use an HTTP proxy, it can also be specified here.
#export http_proxy="http://127.0.0.1:3128/"

# This is also a handy place to tweak where Docker's temporary files go.
#export TMPDIR="/mnt/bigdrive/docker-tmp"
# cat /lib/systemd/system/docker.service

[Unit]
Description=Docker Application Container Engine
Documentation=https://docs.docker.com
After=network.target docker.socket
Requires=docker.socket

[Service]
Type=notify
ExecStart=/usr/bin/docker daemon -H fd:// $DOCKER_OPTS
EnvironmentFile=-/etc/default/docker
MountFlags=slave
LimitNOFILE=1048576
LimitNPROC=1048576
LimitCORE=infinity
TimeoutStartSec=0

[Install]
WantedBy=multi-user.target
We now have a running Docker Engine with the latest stable release v1.10.2 on our ARMv8 board.
Compiling the Docker Engine the official way
With a running Docker Engine in place we can now start creating Docker the official way. The recommended way is to compile Docker within a Docker container.
First checkout the Docker repo and use the current development version from the
master branch. This is necessary because the build tools for ARMv8 are only
available in master.
# cd ~/code/docker
# git pull
# git checkout master
# apt-get install -y make
To build the builder Docker image, we only have to run make build. But please
be patient as this can take a really long time.
# make build
The build is starting with the following line which indicates that there will be a
Docker image built with the ARMv8 specific Dockerfile.aarch64.
docker build  -t "docker-dev:master" -f "Dockerfile.aarch64" .
...
As a result the Docker image docker-dev is built, which will be used for all
subsequent Docker builds.
# docker images
REPOSITORY                  TAG                 IMAGE ID            CREATED             SIZE
docker-dev                  master              5163299014a4        54 seconds ago      1.399 GB
aarch64/debian              jessie              2e841aedd266        2 days ago          116.7 MB
hypriot/rpi-busybox-httpd   latest              fbd9685c5ffc        8 months ago        2.156 MB
As soon as the docker-dev image is successfully created, we can start the first
real build job within a Docker container. So let’s compile a static Docker binary.
# time make binary
...
---> Making bundle: binary (in bundles/1.11.0-dev/binary)
Building: bundles/1.11.0-dev/binary/docker-1.11.0-dev
Created binary: bundles/1.11.0-dev/binary/docker-1.11.0-dev


real	2m51.415s
user	0m5.108s
sys	0m17.092s
Quickly testing this statically linked Docker binary shows.
# bundles/1.11.0-dev/binary/docker-1.11.0-dev -v
Docker version 1.11.0-dev, build 0866d63

# bundles/1.11.0-dev/binary/docker-1.11.0-dev version
Client:
 Version:      1.11.0-dev
 API version:  1.23
 Go version:   go1.5.3
 Git commit:   0866d63
 Built:        Sun Feb 28 22:59:18 2016
 OS/Arch:      linux/arm64
Error response from daemon: client is newer than server (client API version: 1.23, server API version: 1.22)
We now have a Docker Engine built the official way. The resulting binary is statically linked and can be used immediately on our HiSilicon D02 development board.
Updating the Docker Engine on ARMv8 server
To use the new binary we just need to exchange it and restart the Docker Engine.
# systemctl stop docker
# mv /usr/bin/docker /usr/bin/docker.1.10.2
# cp bundles/1.11.0-dev/binary/docker-1.11.0-dev /usr/bin/docker
# systemctl start docker
And let’s check the new Docker version.
# docker -v
Docker version 1.11.0-dev, build 0866d63
# docker version
Client:
 Version:      1.11.0-dev
 API version:  1.23
 Go version:   go1.5.3
 Git commit:   0866d63
 Built:        Sun Feb 28 22:59:18 2016
 OS/Arch:      linux/arm64

Server:
 Version:      1.11.0-dev
 API version:  1.23
 Go version:   go1.5.3
 Git commit:   0866d63
 Built:        Sun Feb 28 22:59:18 2016
 OS/Arch:      linux/arm64
# docker info
Containers: 2
 Running: 0
 Paused: 0
 Stopped: 2
Images: 37
Server Version: 1.11.0-dev
Storage Driver: overlay
 Backing Filesystem: extfs
Execution Driver: native-0.2
Logging Driver: json-file
Plugins:
 Volume: local
 Network: host bridge null
Kernel Version: 4.1.6+
Operating System: Ubuntu 15.04
OSType: linux
Architecture: aarch64
CPUs: 16
Total Memory: 7.712 GiB
Name: ubuntu
ID: FGHC:4WU2:MQVO:7EOI:OUKY:43RZ:AN2I:BGAH:DTLX:HR4J:HJPE:K7LP
Docker Root Dir: /var/lib/docker
Debug mode (client): false
Debug mode (server): true
 File Descriptors: 12
 Goroutines: 38
 System Time: 2016-02-28T23:16:28.447878Z
 EventsListeners: 0
Ok, we do have Docker Engine v1.11.0-dev running and for the first real test
we just run the make binary again.
# time make binary
...
bundles/1.11.0-dev already exists. Removing.

---> Making bundle: binary (in bundles/1.11.0-dev/binary)
Building: bundles/1.11.0-dev/binary/docker-1.11.0-dev
Created binary: bundles/1.11.0-dev/binary/docker-1.11.0-dev


real	2m50.375s
user	0m7.268s
sys	0m17.280s
With all this hard work we are now able to build the Docker Engine the official and recommended way. This gives us an absolutely clean workflow and results in reproducible builds. The complete build environment is fully isolated within a Docker image and the builds are pretty fast, too.
Conclusion
As you can see, the latest release of the Docker Engine v1.10.2 is running on this
ARMv8 development board pretty well. But right now the ARMv8 architecture is not officially
supported by Docker, although the builds are working and at least a basic support
is already merged into the master branch.
In order to get a fully supported Docker release for ARMv8 a lot more work has to be done in the coming weeks and months. The Docker CI pipeline has to be expanded with ARMv8 build servers, so that all new changes and pull request will be checked and verified automatically.
After this walkthrough I hope you can clearly see that the Docker container technology is almost ready for the new generation of high-density ARMv8 cloud servers.
Feedback please!
Please send us your feedback on our Gitter channel or tweet your thoughts and ideas on this tutorial at @HypriotTweets.
Dieter @Quintus23M
comments powered by Disqus