Connecting Kitematic to an external Docker Engine running on a Raspberry Pi
Wed, Apr 15, 2015In this post we show you the first steps how easy it is using Kitematic to control a Docker engine running on a Raspberry Pi. Finally we demostrate in a small screencast how to run an unbelievable amount of 101 web servers on a single Raspberry Pi 2.
Intro and Background
At Hypriot we recently built and released our own OS image to run the Docker Engine on a low-cost Raspberry Pi and labeled it HypriotOS. A user can download this pre-compiled Raspbian based SD card image, which includes a Linux 3.18.10 kernel with all Docker related kernel options included, and Docker 1.5.0 is already enabled with Overlay filesystem. Just download, extract, flash to a SD card and boot your Raspberry Pi - and within minutes you have Docker up and running and you can instantly start using it.
You can read more details and find the download links in our blog post Heavily ARMed after major upgrade: Raspberry Pi with Docker 1.5.0 and recently updated post HypriotOS: Back Again and Better then Ever.
As developers and geeks, we’re really comfortable using SSH and a bash shell to control the Docker CLI. It’s also not a problem to connect a Linux or Mac OSX host via a native Docker CLI over the network, even a Windows client works well. But what about the normal end users? Wouldn’t it be great to have a more convinient way to use a graphical frontend via web or a specific app. A GUI would be really cool, but this would take a long time to develop.
Kitematic to the Rescue
Even the fact that our OS image works pretty much out of the box, and everybody can use Docker within minutes we’ve received a lot of feedback, whether we could build and deliver a graphical application to control Docker and deploying apps/containers with it. And here comes Kitematic to the rescue - what a great timing. We’ve just read the announcement on the Docker blog and were extremely impressed but also a little bit frustrated, it’s only meant to be used on a Mac running it’s own Boot2Docker VM through a newly created Docker Machine.
We were fascinated immediately about the simplicity and the seamless GUI, instantly installing Kitematic on a MacBookPro and it was running within 10 minutes only. Really impressed and hooked! Another 15 minutes later, we had cloned the source code repo from GitHub, then a “npm install” and a “npm start” and WOW, we’re running our personal dev version! And we even were able to create our own Mac App with a “npm run release”.
Imagine now what could be even better for an end user? What if we could use Kitematic to control a remote Docker Host running on that cute little Raspberry Pi.
Connecting the Dots
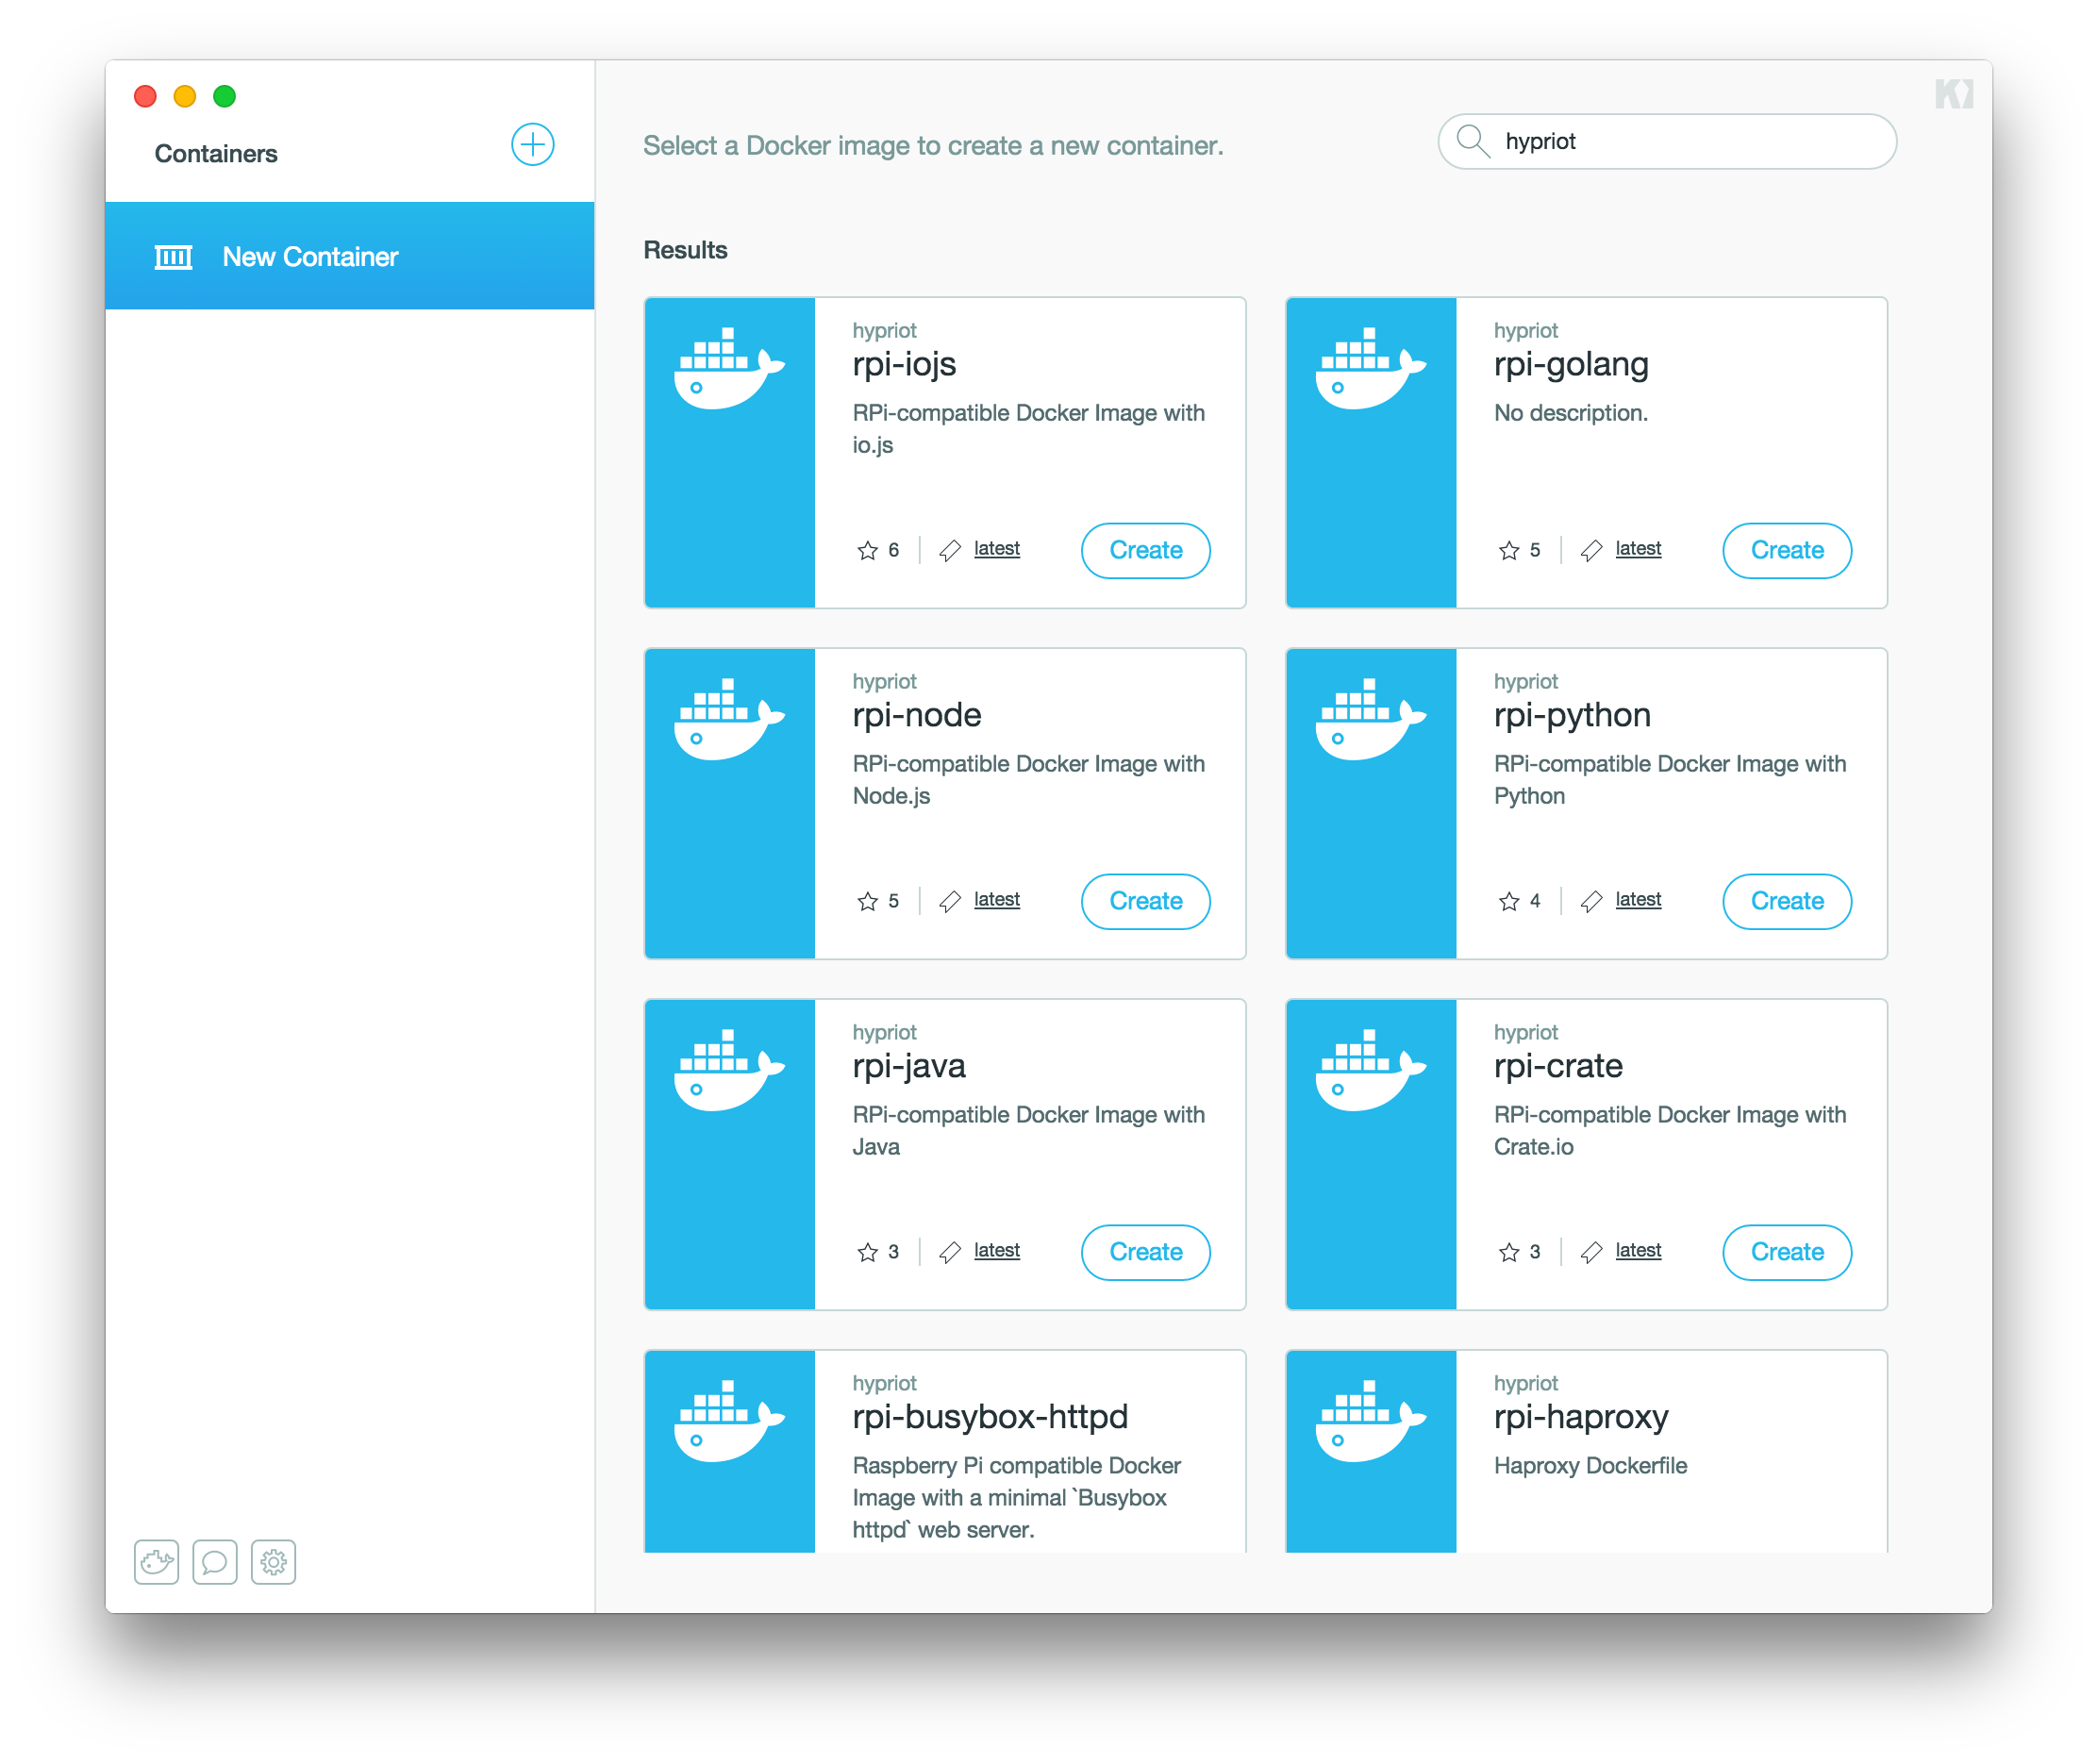
We quickly read through the docs and studied the source code and found out that Kitematic is based upon Docker Machine to control the backend Docker Host, hey cool - that’s the key. Within a couple of hours we had the first rough hack and were able to actively control a Raspberry Pi 2 running Docker 1.5.0 with a brand new graphical user interface. Just selecting one of our favorite Docker Images from the Docker Hub and pushed it seamlessly to a RPi!
But until now, it was just a hack and far away from being used in production or by end users. All settings were done with some source code changes within Kitematic itself.
Here are the details of that quick hack. You only have to change these three lines in src/Docker.js:
16:      protocol: 'http',
17:      host: 192.168.2.114,
18:      port: 2375,
Just use an unencrypted connection for the first step, change the protocol from https to http, use the IP address of the Raspberry Pi, and don’t forget to change the port number to 2375. With the last change, Kitematic don’t use any cert or key file to connect to the remote Docker Host.
For the next day we scheduled a short online meeting with Mike from Kitematic, and to our surprise the whole team joined us, including Jeff and Sean. Everybody was so happy and surprised how easy we could merge both ideas and concepts together. Right now, we’re able to offer a Docker optimized OS for the Raspberry Pi which one could install and use within a few minutes only, and within the same amount of time, installing the app from Kitematic to control your Raspberry Pi with a great user experience.
Switch to a better System Design
Thanks to the fact, that Kitematic uses Docker Machine under the hood to connect to it’s Docker VM, it must be able to use this concept for a better system design to communicate with an external Docker Host. Our first try was just looking for a standard driver available which supports our needs. We quickly tested the none driver and were able to control the Raspberry Pi from within Docker Machine. For this case it was necessary to reconfigure Docker to use a TLS encrypted connection. But we had absolute no luck to get it work together with Kitematic.
Ok, let’s dig deeper and just use the Docker Machine GitHub repo to get familiar with the driver concept. And learn what has to be done, to build your own Docker Machine Driver specifically for connecting a Docker Engine running on an external Linux machine. Within a day only, we got it working, our very first driver implementation for Docker Machine. Our goal was to keep it super-simple and ready-to-use together with Kitematic, and hopefully don’t change anything within the app’s source code.
All changes are already documented in a few pull-requests which are available for further improvement and testing.
- hypriot/kitematic#1, Connect to externel docker host through docker-machine
- hypriot/machine#1, Add driver ‘hypriot’
To use this improved Kitematic version from Hypriot, you have to clone the GitHub repo hypriot/kitematic, use the branch connect-to-externel-docker-host and build it with “npm run install”, it will also download and use our specifically built version of Docker Machine with the hypriot driver included.
Mission accomplished
At the end, we’ve now built our own basic Docker Machine driver for the HypriotOS to use it for controlling a Raspberry Pi with the Kitematic app, and we’ll improve it over the next few days and weeks to get it production ready. To our surprise, we only had to change a single line of code within Kitematic itself.
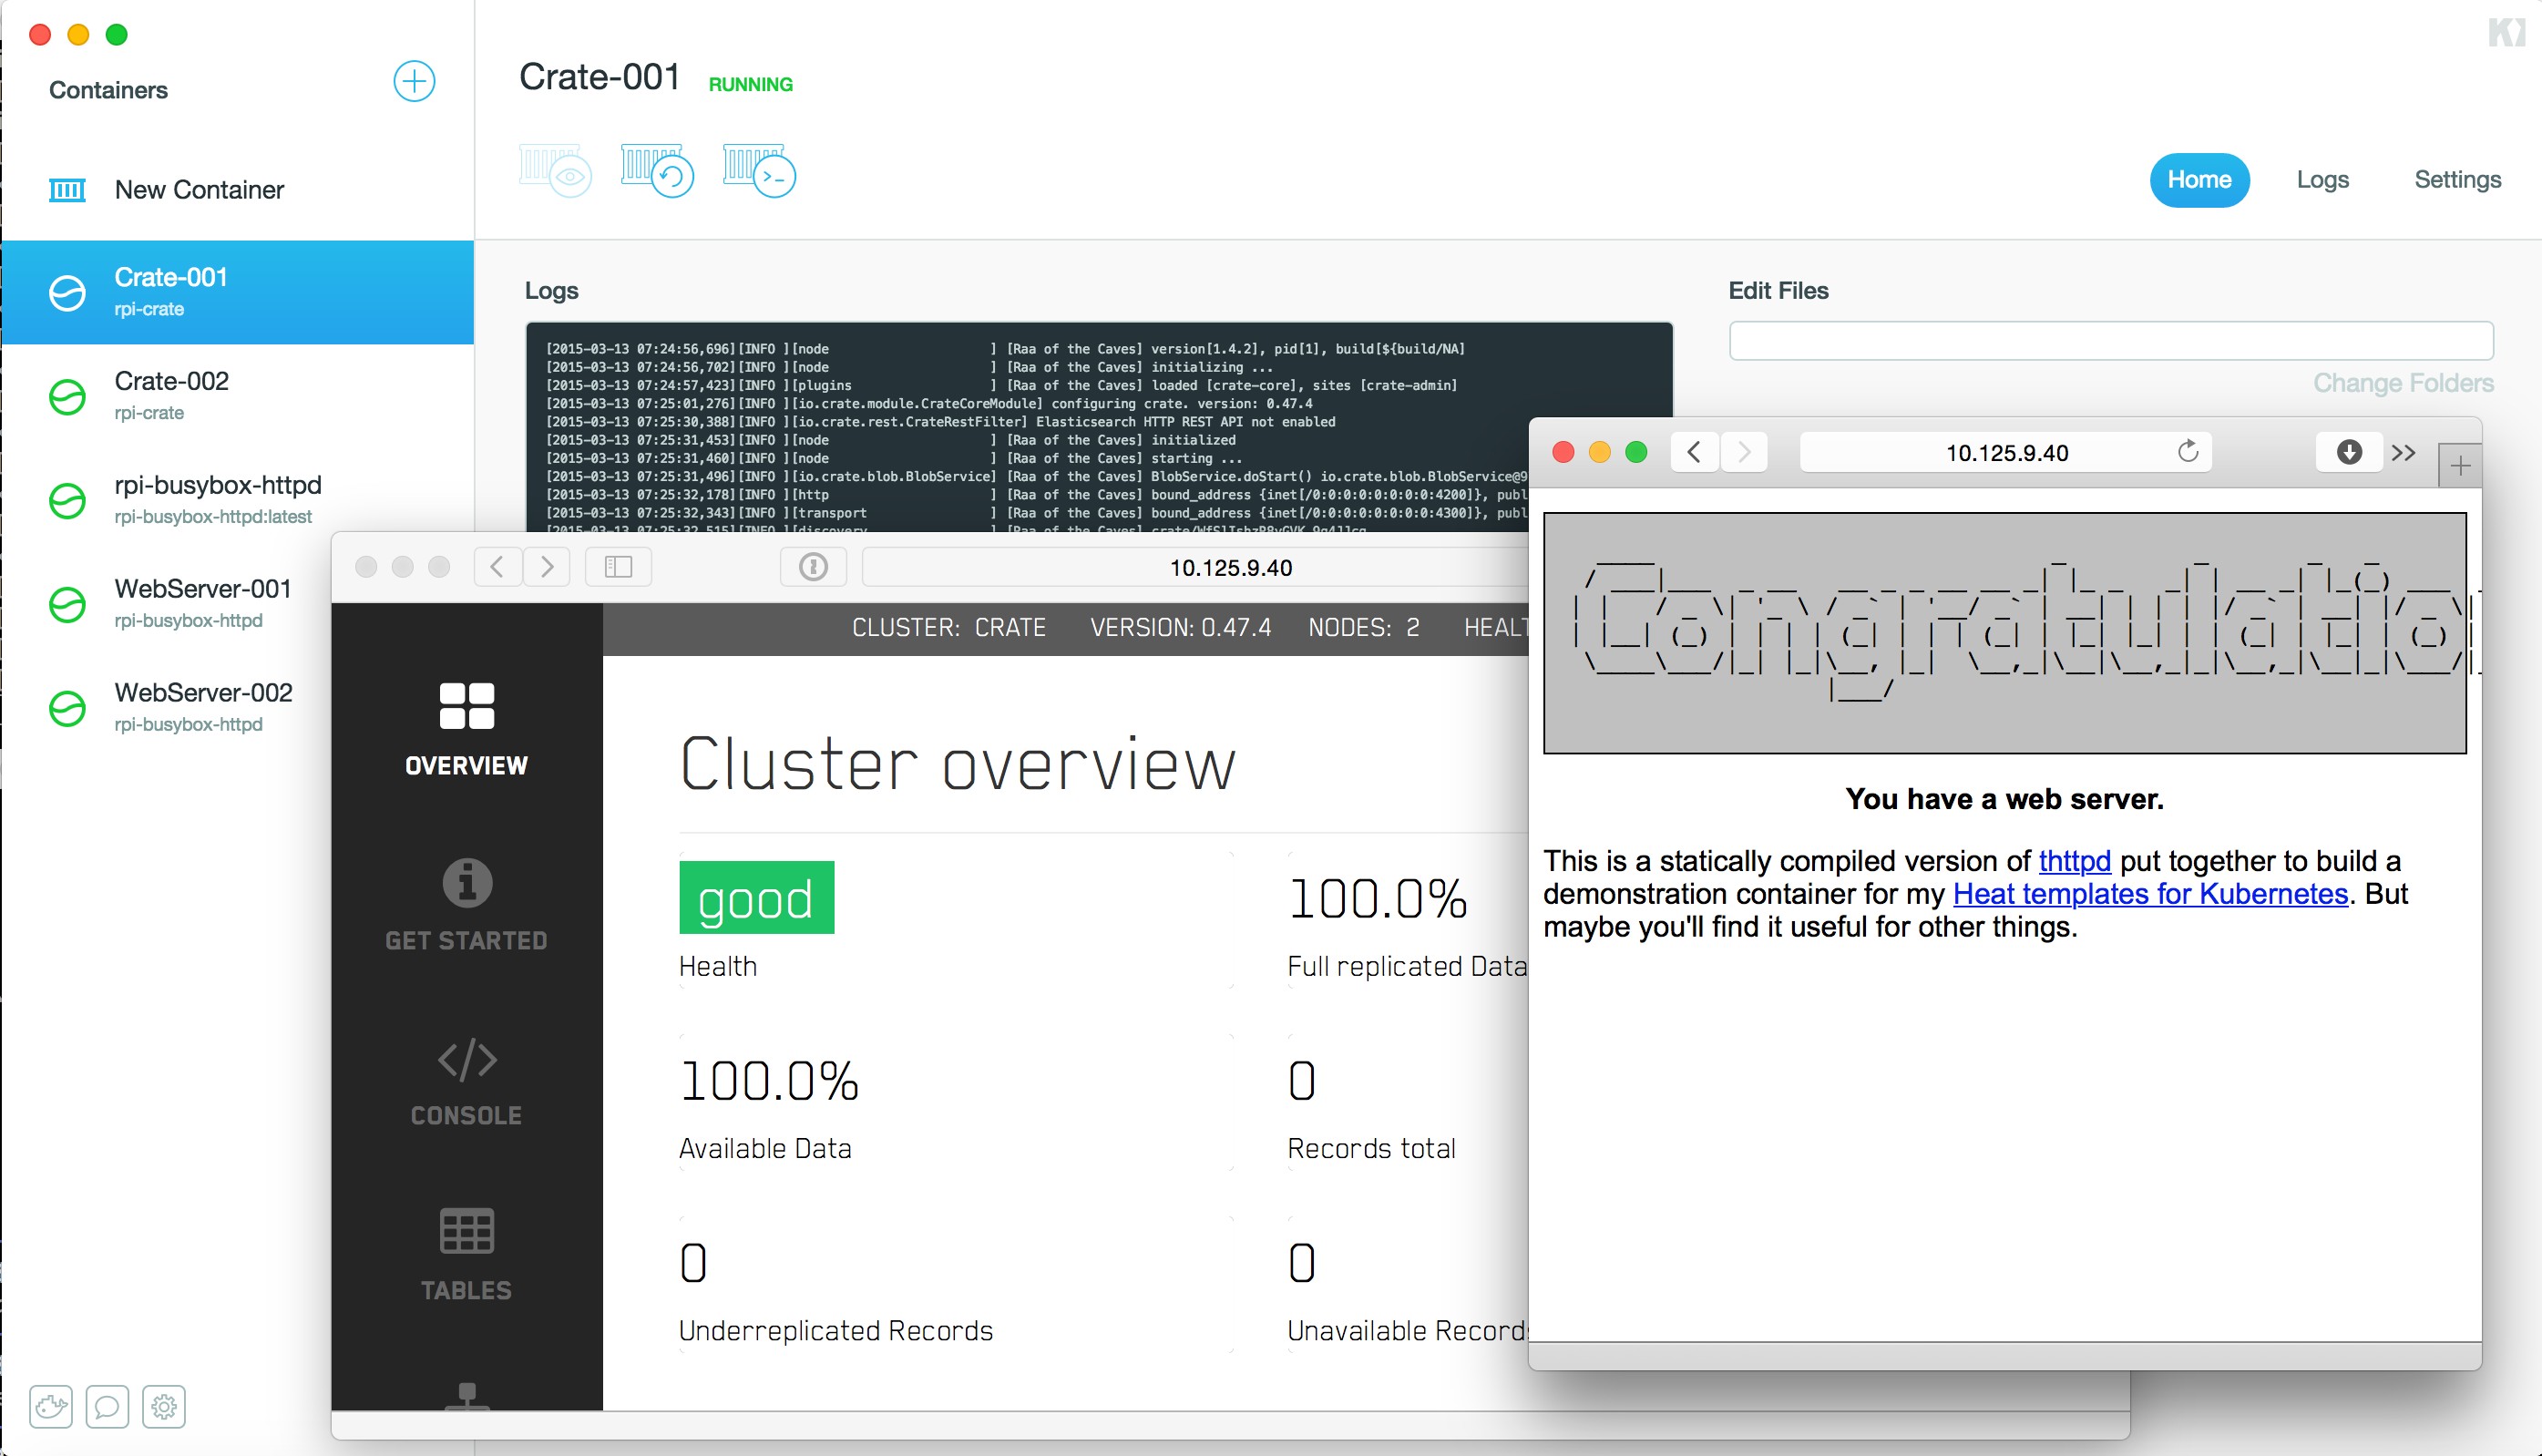
Here is a short 4 minute screencast to demonstrate the running system as Docker Kitematic controls Raspberry Pi 2 running Docker 1.5.0. Watch out the number of web servers we started simultaneously on the Raspberry Pi 2, all as separate Docker containers. Can you imagine how cool this Linux container technology from Docker is, even on such a small device?
And the best thing is, it could be used to connect any other external Docker Host to Kitematic, not only the Raspberry Pi. In the PR we included a short description how to connect an already running Boot2Docker VM to Kitematic. And if anyone is interested to help, please feel free to join. As soon as we’re done with the development we’ll create an upstream PR to get the changes back into Kitematic and Docker Machine.
Next Steps
We do have a lot of things on our roadmap, maybe too much to share in this blog post. Here are at least the next important things we’re planing:
- new Linux kernel 3.18.10 (DONE)
- support for Open vSwitch (we’d love to use SocketPlane on the RPi) (DONE)
- include kernel options for Open vSwitch (DONE)
- natively compiled packages for Open vSwitch (DONE)
- support for Docker Machine (WIP)
- production ready driver for HypriotOS and the Raspberry Pi
- support for Docker Compose (WIP)
- support for Docker Swarm (WIP)
- … (depending on user feedback)
Send us your Feedback, please!
We really love feedback and would like to get some new ideas and thoughts from all of you. So, if you’re liking our ideas and the way to find and break the limits, please send us your comments via email, twitter or drop us a line. We’d be more than happy to answer and talk directly to share our experiences.
Note
This post was originally posted at the Kitematic Blog, and is slightly updated to recent download links and version numbers.
– Dieter Reuter
comments powered by Disqus