This guide shows you how to get Docker running on your Raspberry Pi using a Windows workstation.
If you have not read the getting started guide about Docker on the Raspberry Pi yet you might wanna check it out first: Getting started on your ARM device
The hardware you gonna need to follow along is a Raspberry Pi 1 or 2 and one SD card. If you are going to use a Raspberry 2 you will have to use a microSD card - otherwise a normal SD card is sufficient. We recommend a size of at least 4 GB.
The SD card contains all the software which we are going to use on our Raspberry Pi. With software we basically mean two things: first an operating system for your Raspberry Pi and second the software you as user would like to use - e.g. a browser or a word processing program. In our case the software we wanna use is Docker.
We - from Hypriot - created a preconfigured SD card image which contains everything you need to run Docker on your Raspberry Pi. To use the image you first have to download and transfer it to your SD card. Transferring an image to an SD card is often referred to as flashing. Afterwards you just have to insert the flashed SD card into your Raspberry Pi and start it up.
For this tutorial you will need to install four applications which we are going to use later. Please follow the download links and install them. Note the installation remarks.
| Application | Description |
|---|---|
| 7-Zip | For extracting the compressed SD card image. Make sure you choose the download file that fits your workstations’s architecture (x32 vs. x64)! |
| Win32 Disk Imager | For flashing the SD card image to the SD card. During installation you will find a checkbox called “Start Pcap-Service at startup”. We recommend to disable it. |
| Putty | For establishing a connection to the Raspberry Pi Just download it. No installation needed. |
| Zenmap | For identifying the IP address of your Raspberry Pi |
Download our latest SD card image from the download page.
Next go to your Download folder and extract the downloaded zip file by right-clicking on the file and then clicking on 7-zip -> extract here….
After 7-zip is finished with extracting you will have a file with a .img extension. In the next step we will flash this file onto your SD card.
To start the flashing process right-click on the Win32 Disk Imager application which we installed earlier and click on Run as administrator. You will see a window asking for permissions. Grant them.
Now, with the Win32 Disk Imager’s window opened, click on the blue folder icon and choose the Hypriot SD card image in your Download folder.
Next to the blue folder button, you will find a dropdown menu in which you can select your SD card. To double check the device letter open your Windows Explorer and locate the SD card drive.
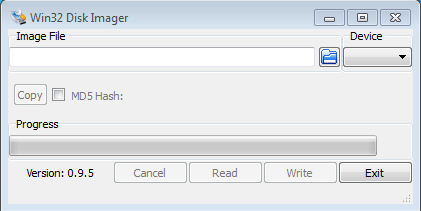
Finally click on write which will flash the SD card image to the SD card.
Upon completion close Win32 Disk Imager and eject the SD card before removing it from its slot. In order to eject the SD card use the secure eject function in the menu next to your system clock. This is usually in the very bottom right corner of your screen.

Boot your Raspberry Pi by
After finishing the last step your Raspberry Pi will boot and the LEDs should start blinking. The very first boot will take one to three minutes as the file system will be resized.
To check if Docker is actually running we need to log into the Raspberry Pi via PuTTY.
To do this we need to find out the IP address of your Raspberry Pi first. This can be done with Zenmap which we installed earlier.
After starting Zenmap look for the field Command.
Type the following command into this field but replace the IP address in front of /24 with your own and hit Enter.
nmap -sP 192.168.0.100/24
As a result you should see this:
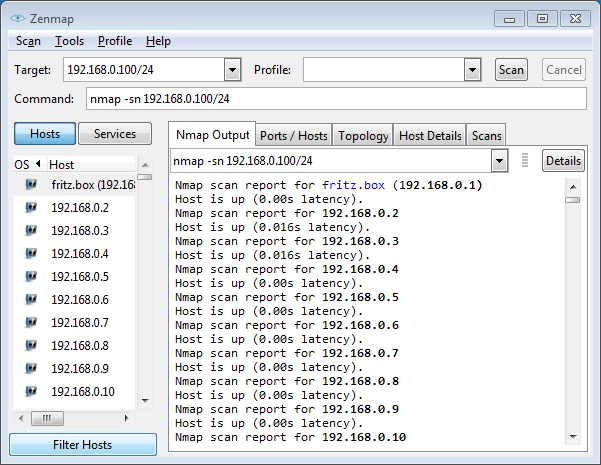
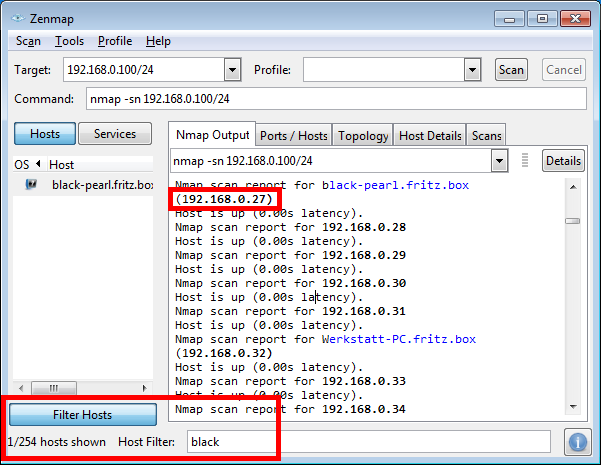
Zenmap list all active hosts within your local network. In order to find the Raspberry Pi click the button filter hosts at the bottom of the Zenmap and type in black. Now the first line of the list should show the IP address of your Raspberry Pi.
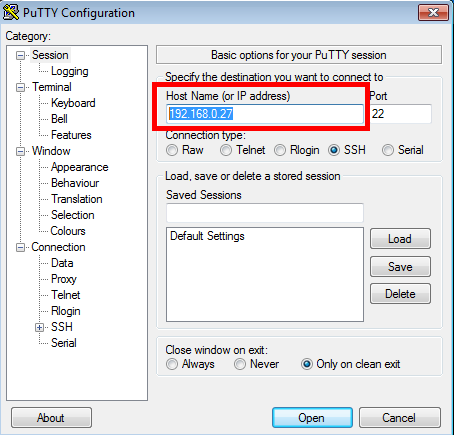
Since we now know where to find the Raspberry Pi within your network it is time to start PuTTY to establish a SSH connection to your Raspberry Pi.
After starting PuTTY type in the IP address we determined into the field Host Name. With a click on the button Open the connection will be established.
In the new window which just opened type pirate as login name and hit Enter. Next you will be asked for a password. Type hypriot and hit Enter again.
If everything went fine you should now see the HypriotOS command line prompt waiting for your input. It should look like this:

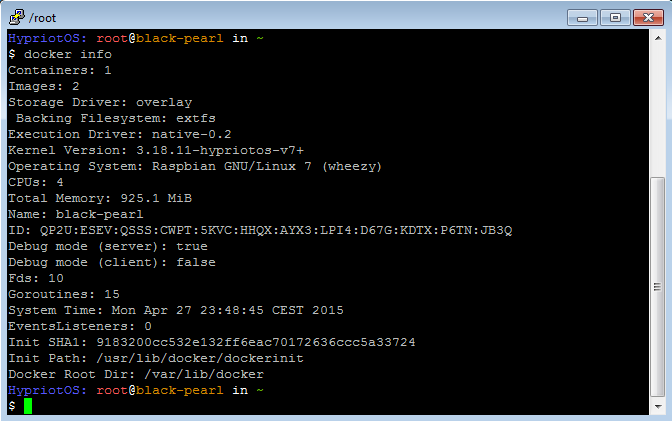
Finally to check if the Docker service is running type
docker info
The output of the docker info command should look similar to:
Congratulations! You have succeeded in getting Docker running on your Raspberry Pi! :)
You are now ready to continue your exploration of Docker with our Getting Started Guide.
Have fun!
comments powered by Disqus