How to build a traffic light
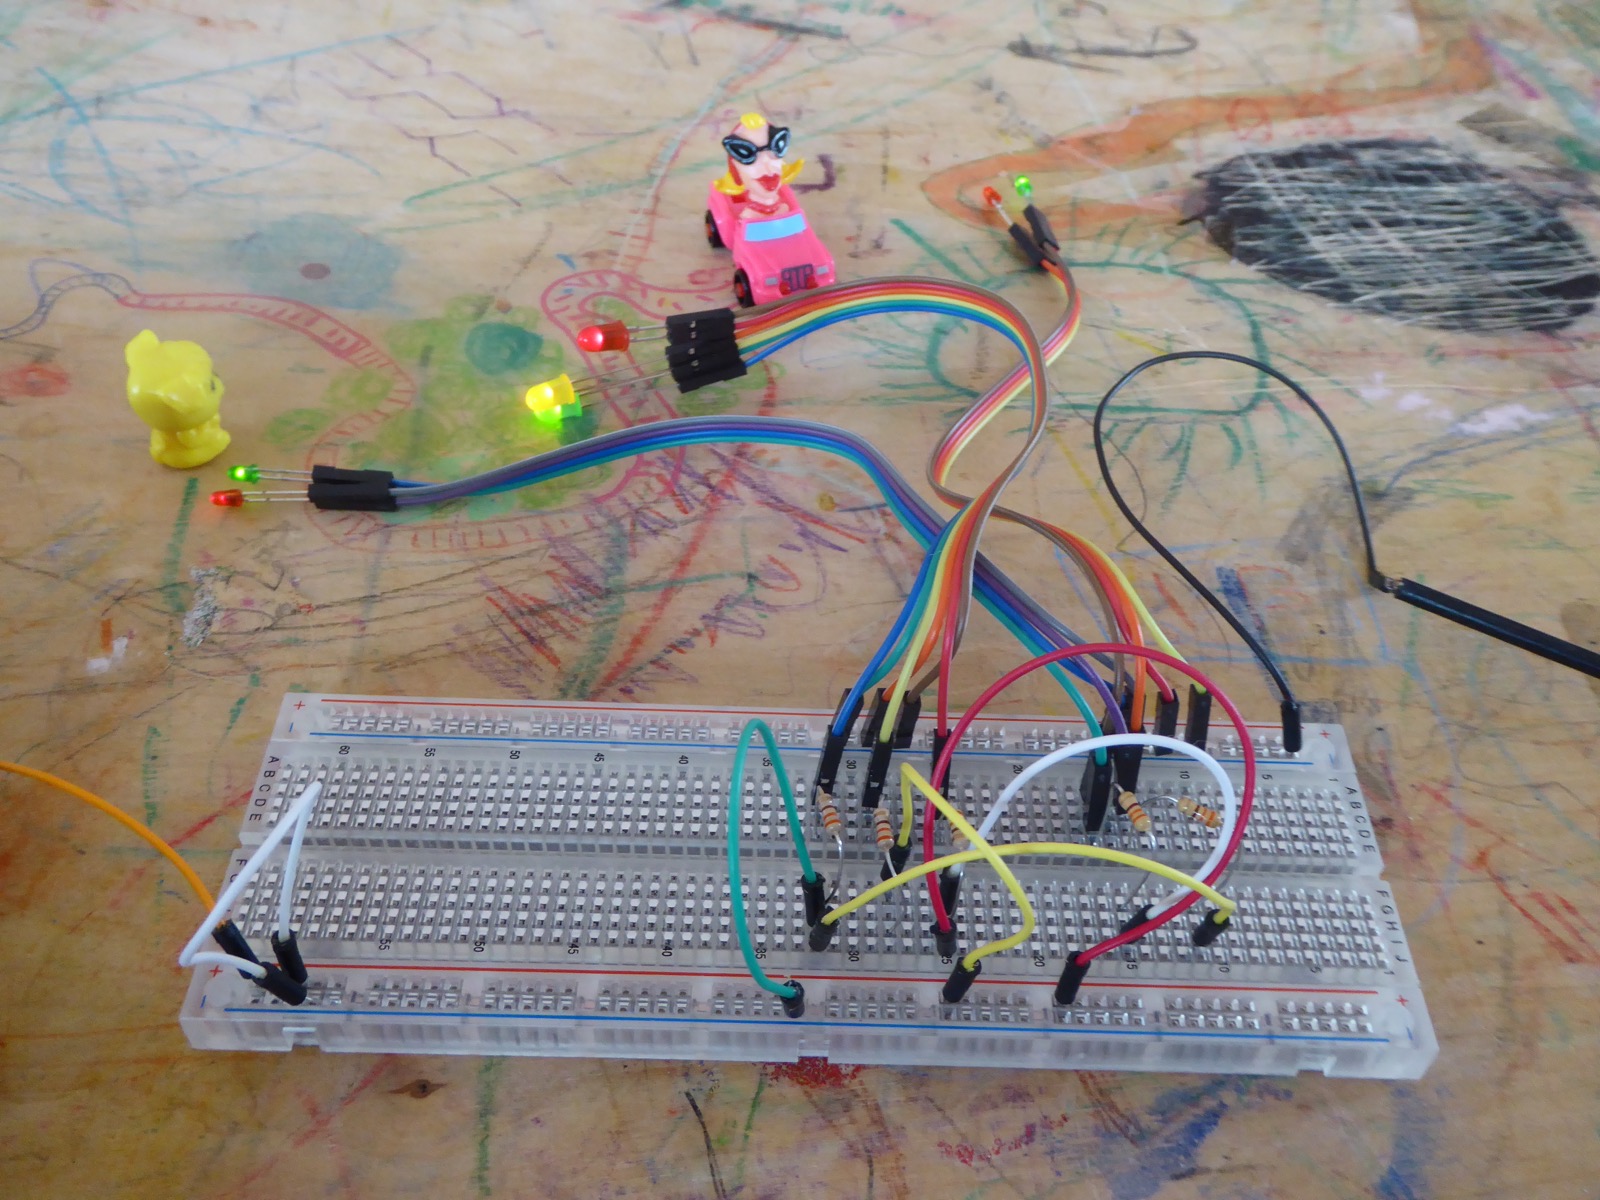
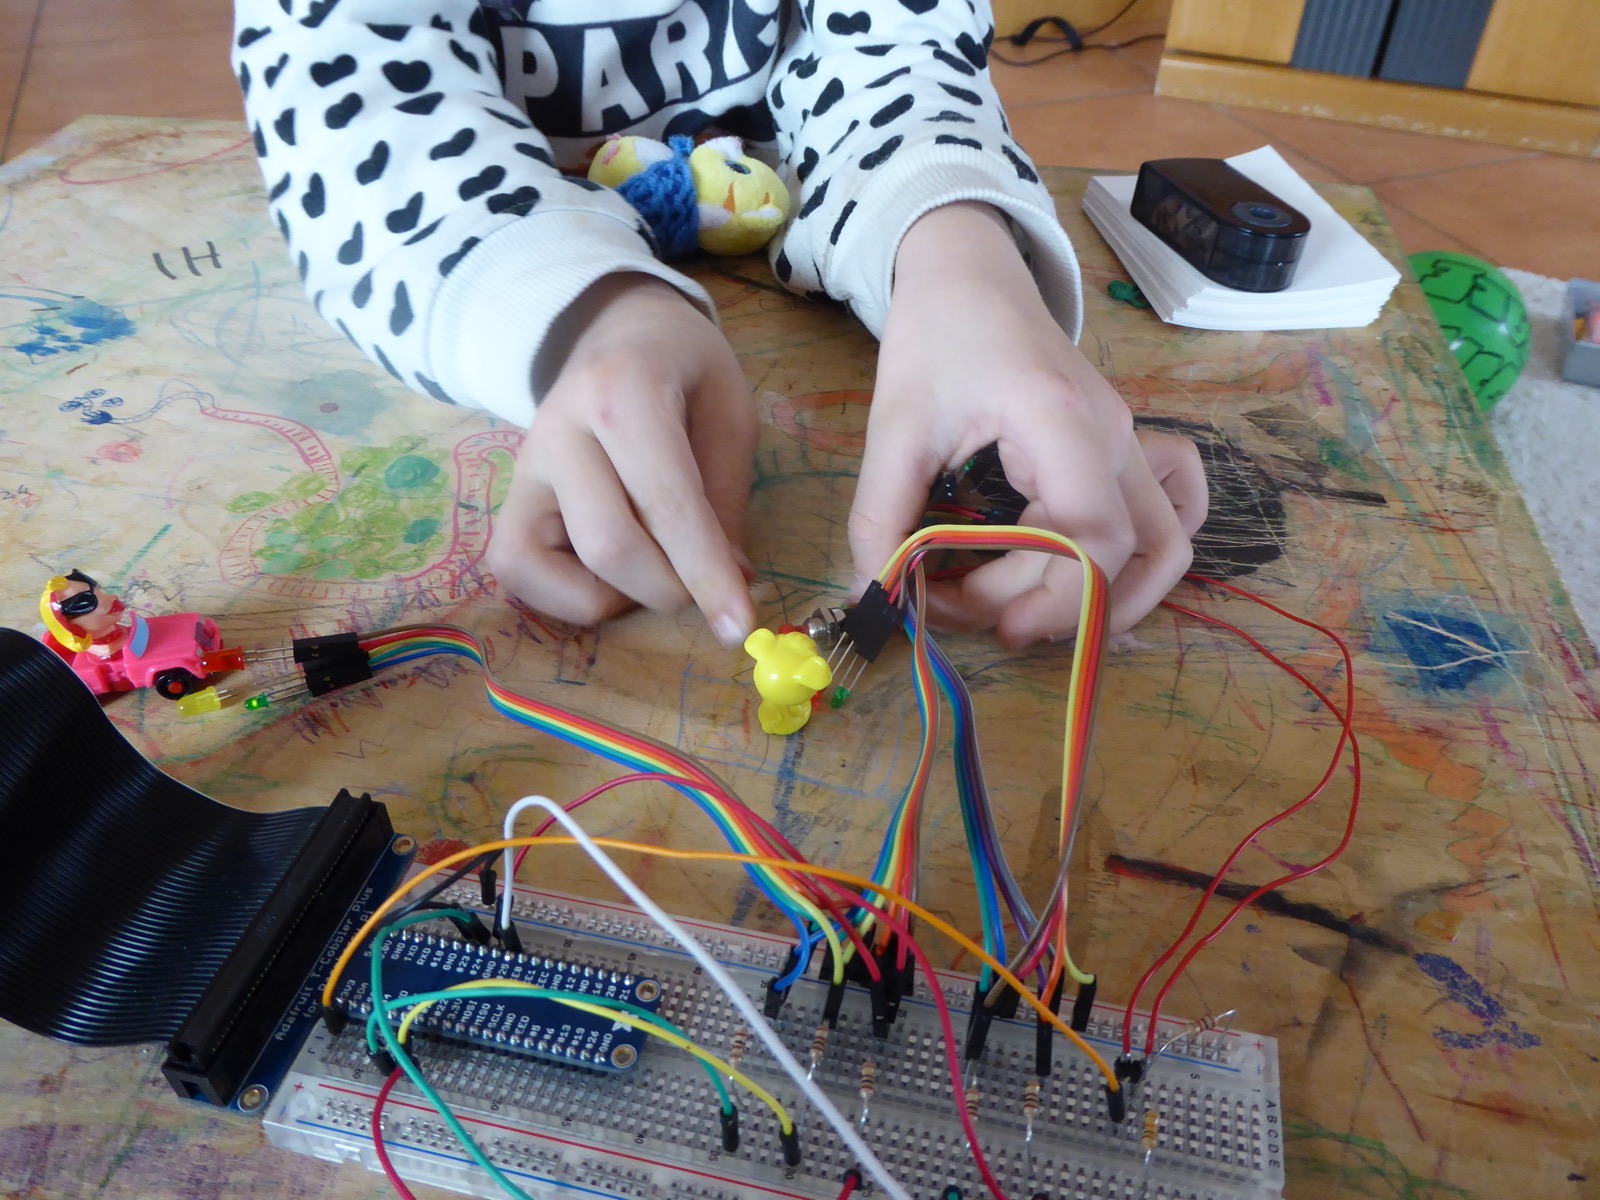
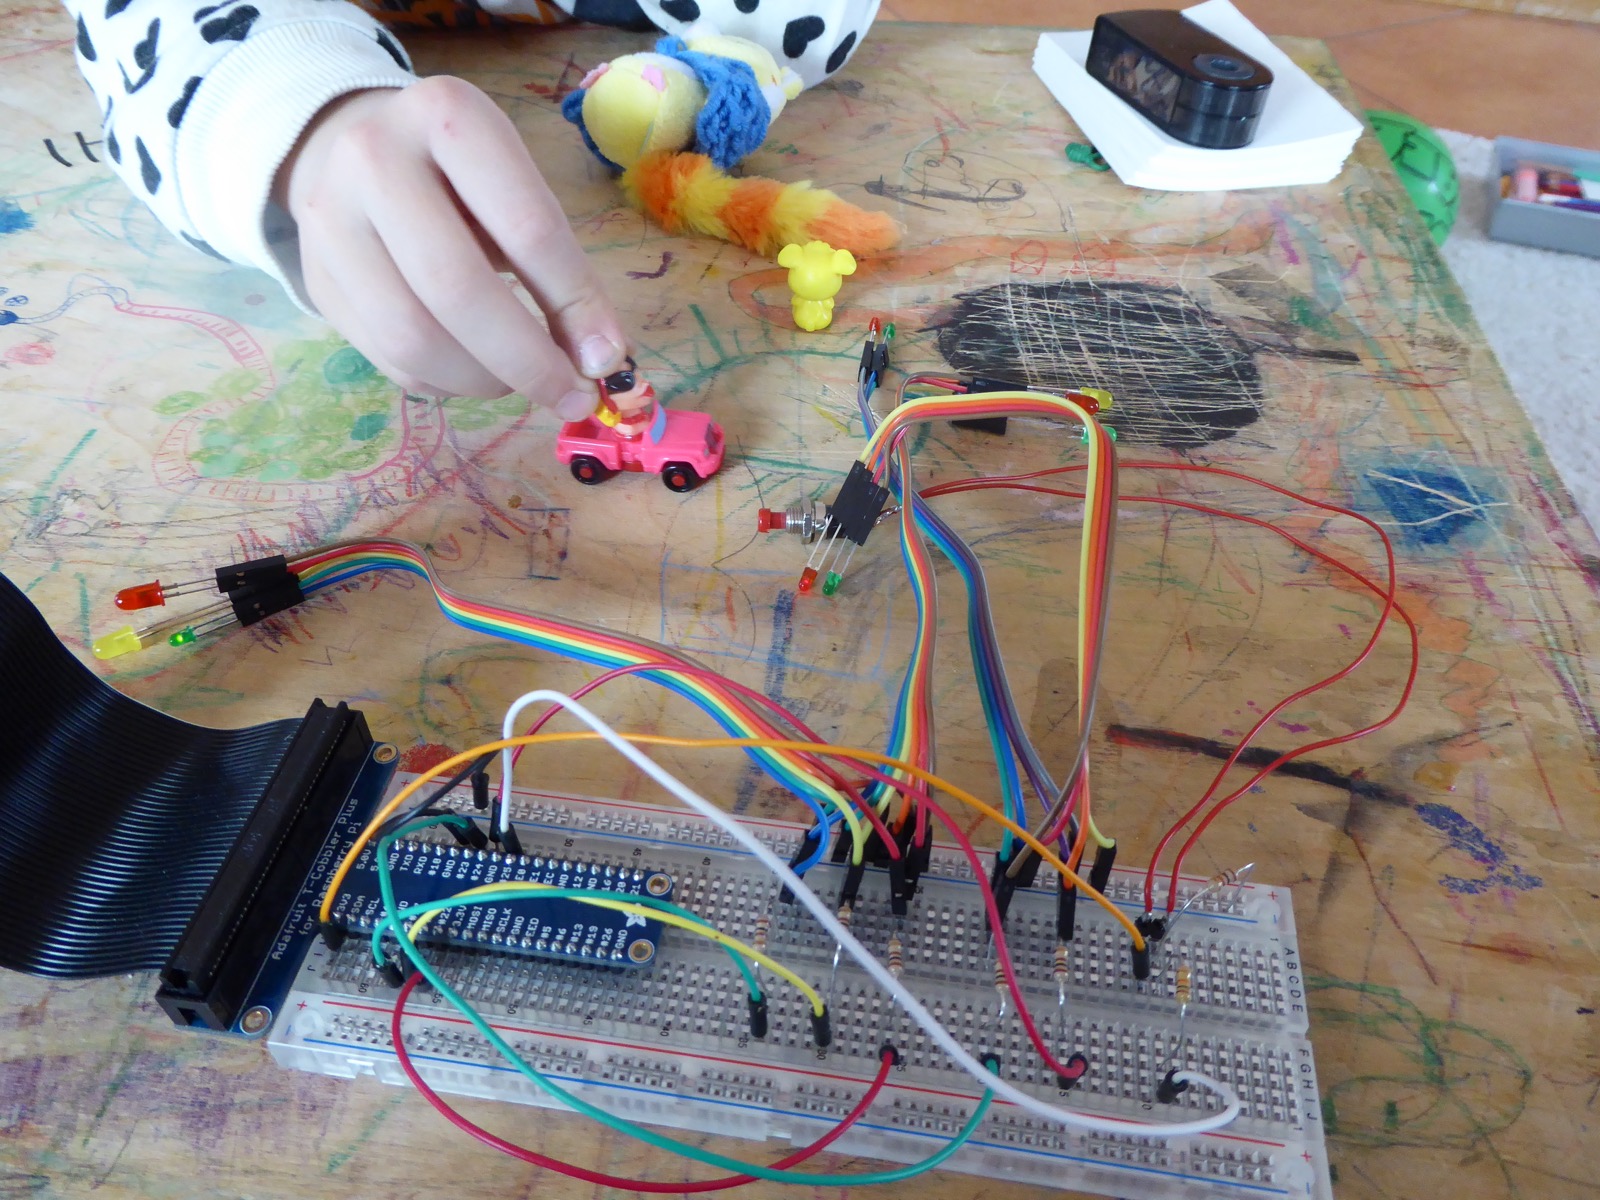
Sun, Mar 13, 2016My seven year old asked me how does a traffic light work. Before explaining too much we put some LEDs and wires together and did a hands-on tutorial. Finally we had a pedestrian crossing with a push button controlled by an app - of course - running dockerized on a Raspberry Pi 3.
The hardware
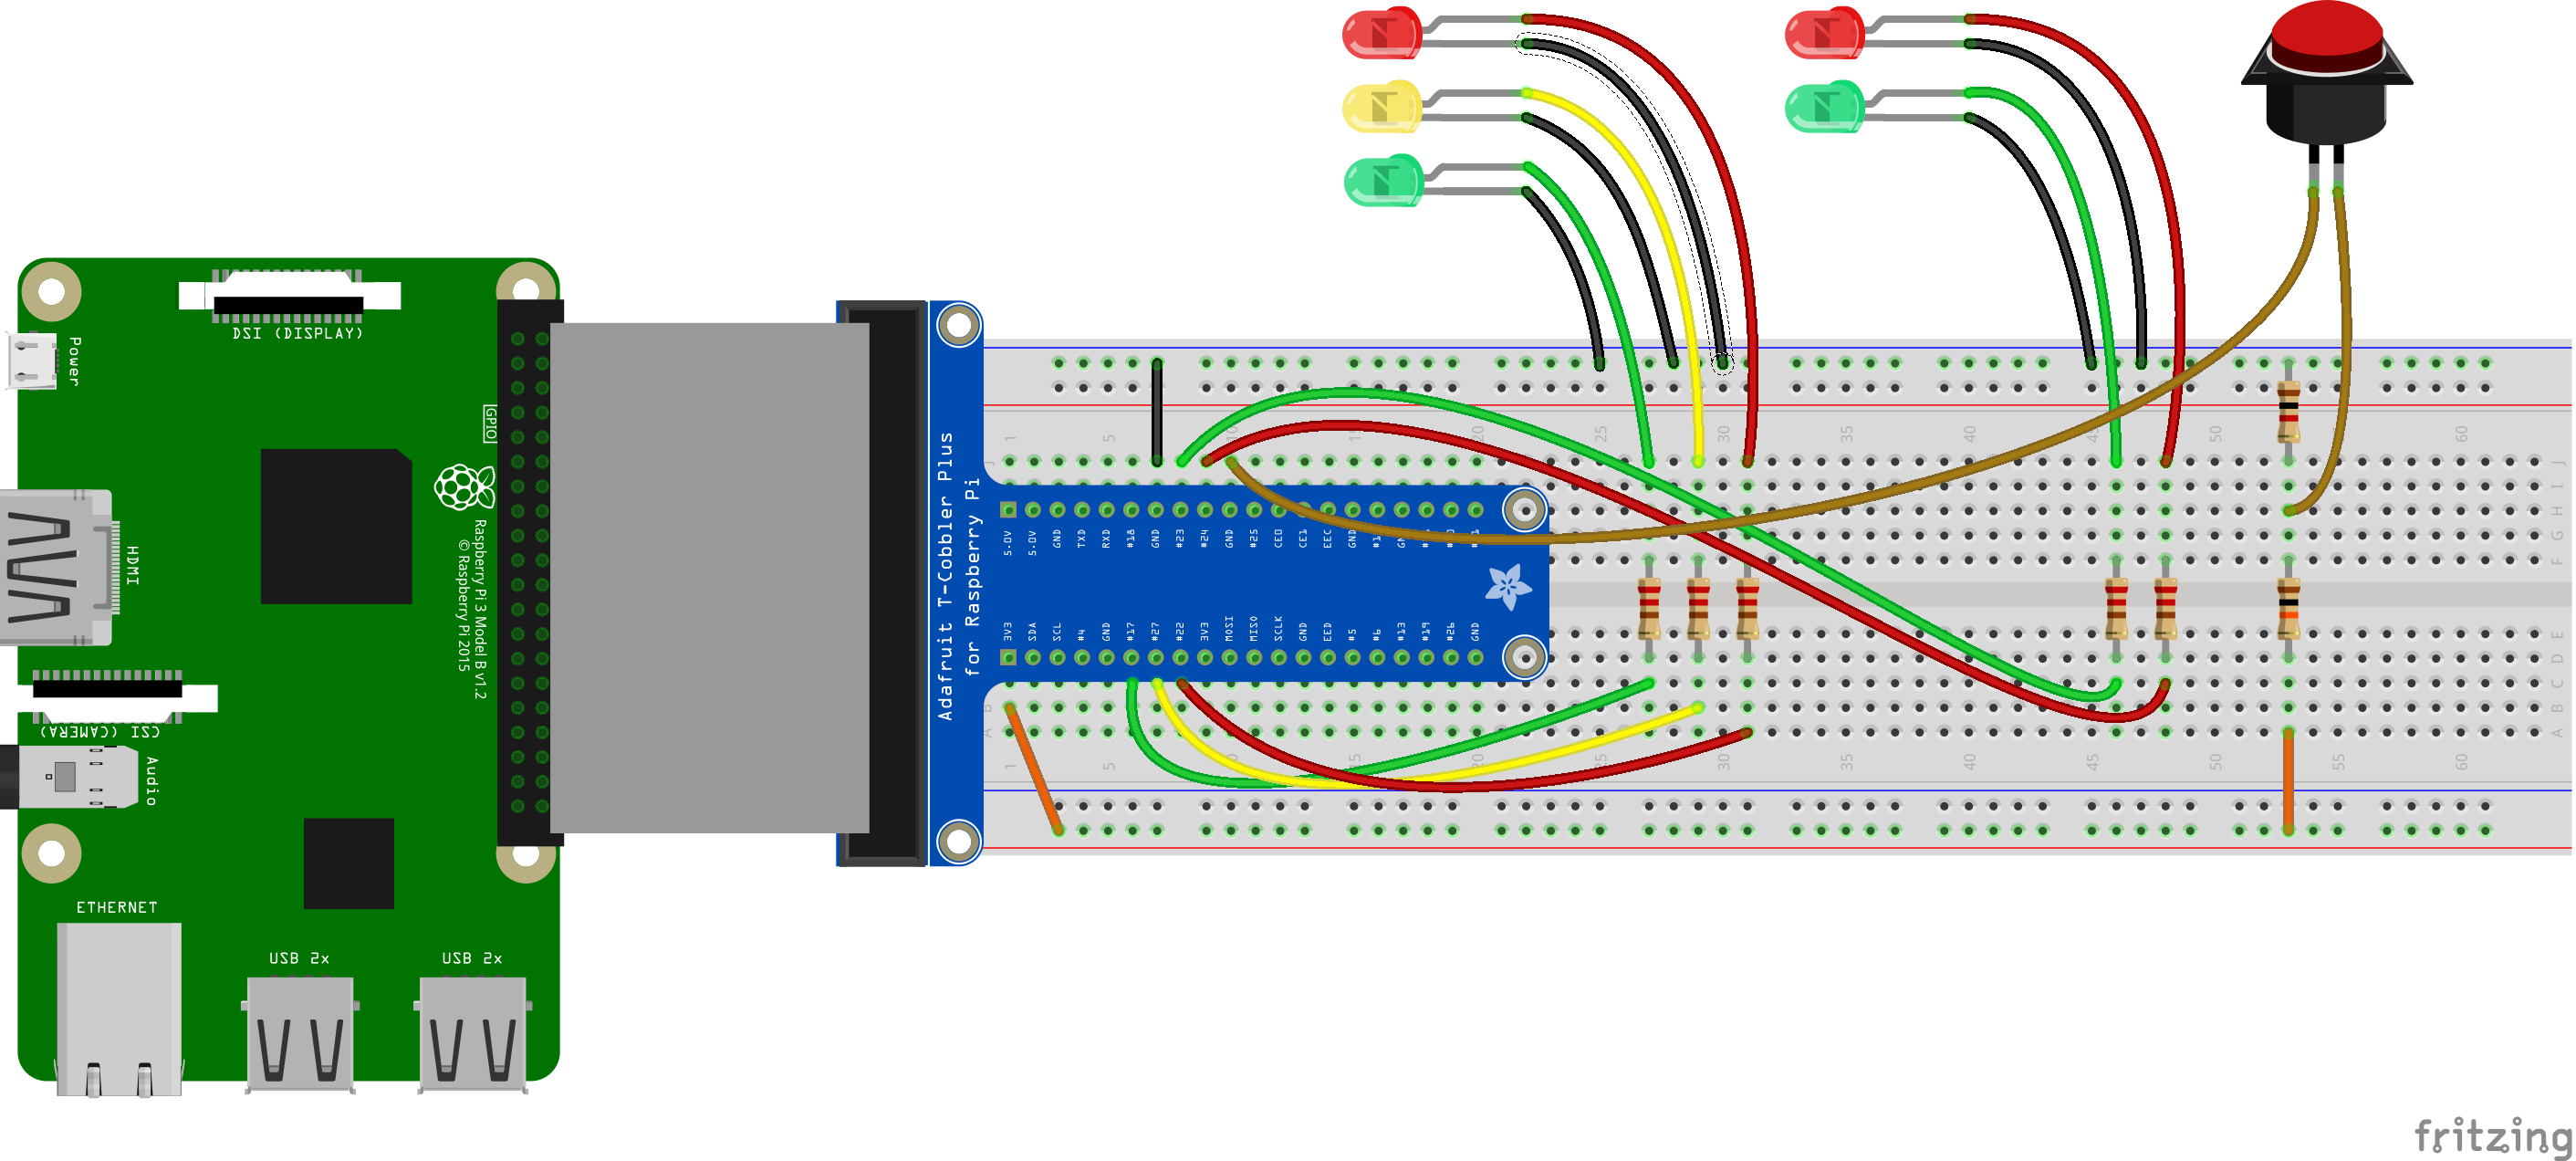
First we have to build the curcuit. To follow this tutorial you need these parts
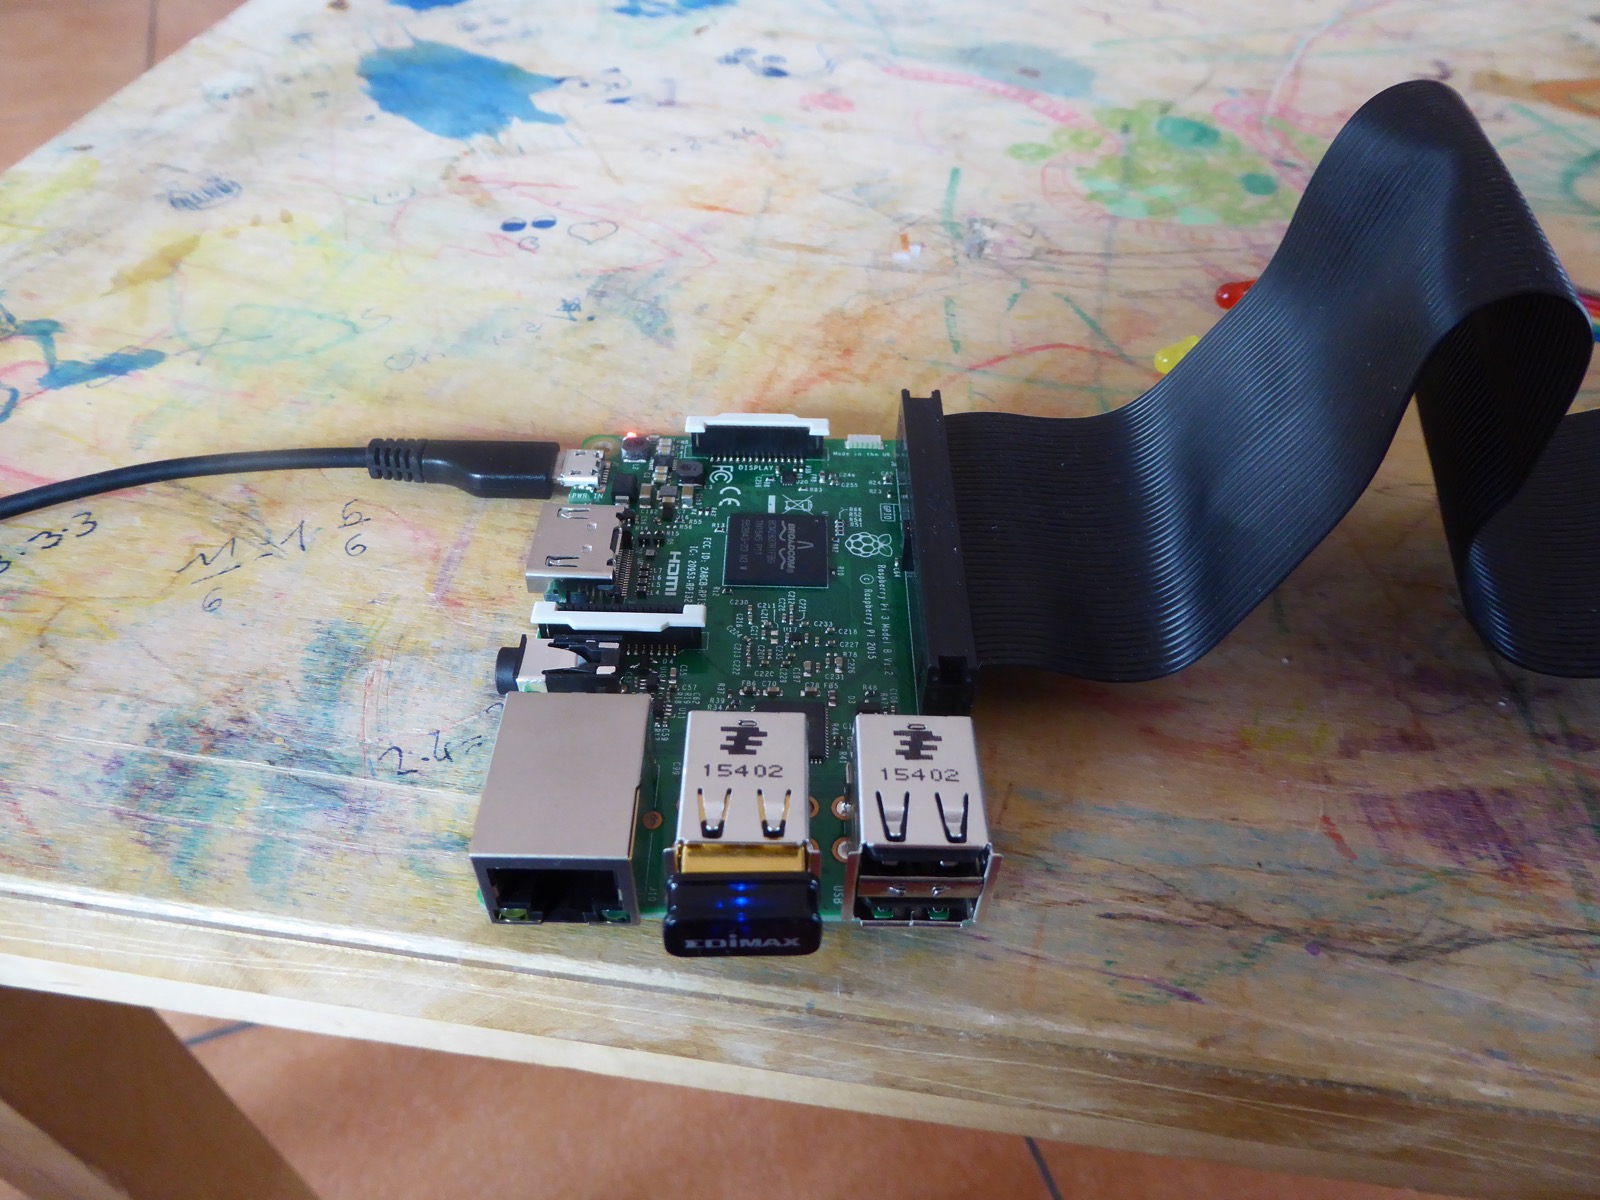
- Raspberry Pi 3, but any other is also good for this tutorial
- Adafruit T-Cobbler Plus
- Breadboard
- 2x Red, 1x yellow and 2x green LEDs
- 5x 220Ω resistors
- 1x 1kΩ resistor
- 1x 10kΩ resistor
- 1x push button
- 1x USB power for the Raspberry Pi
- cables
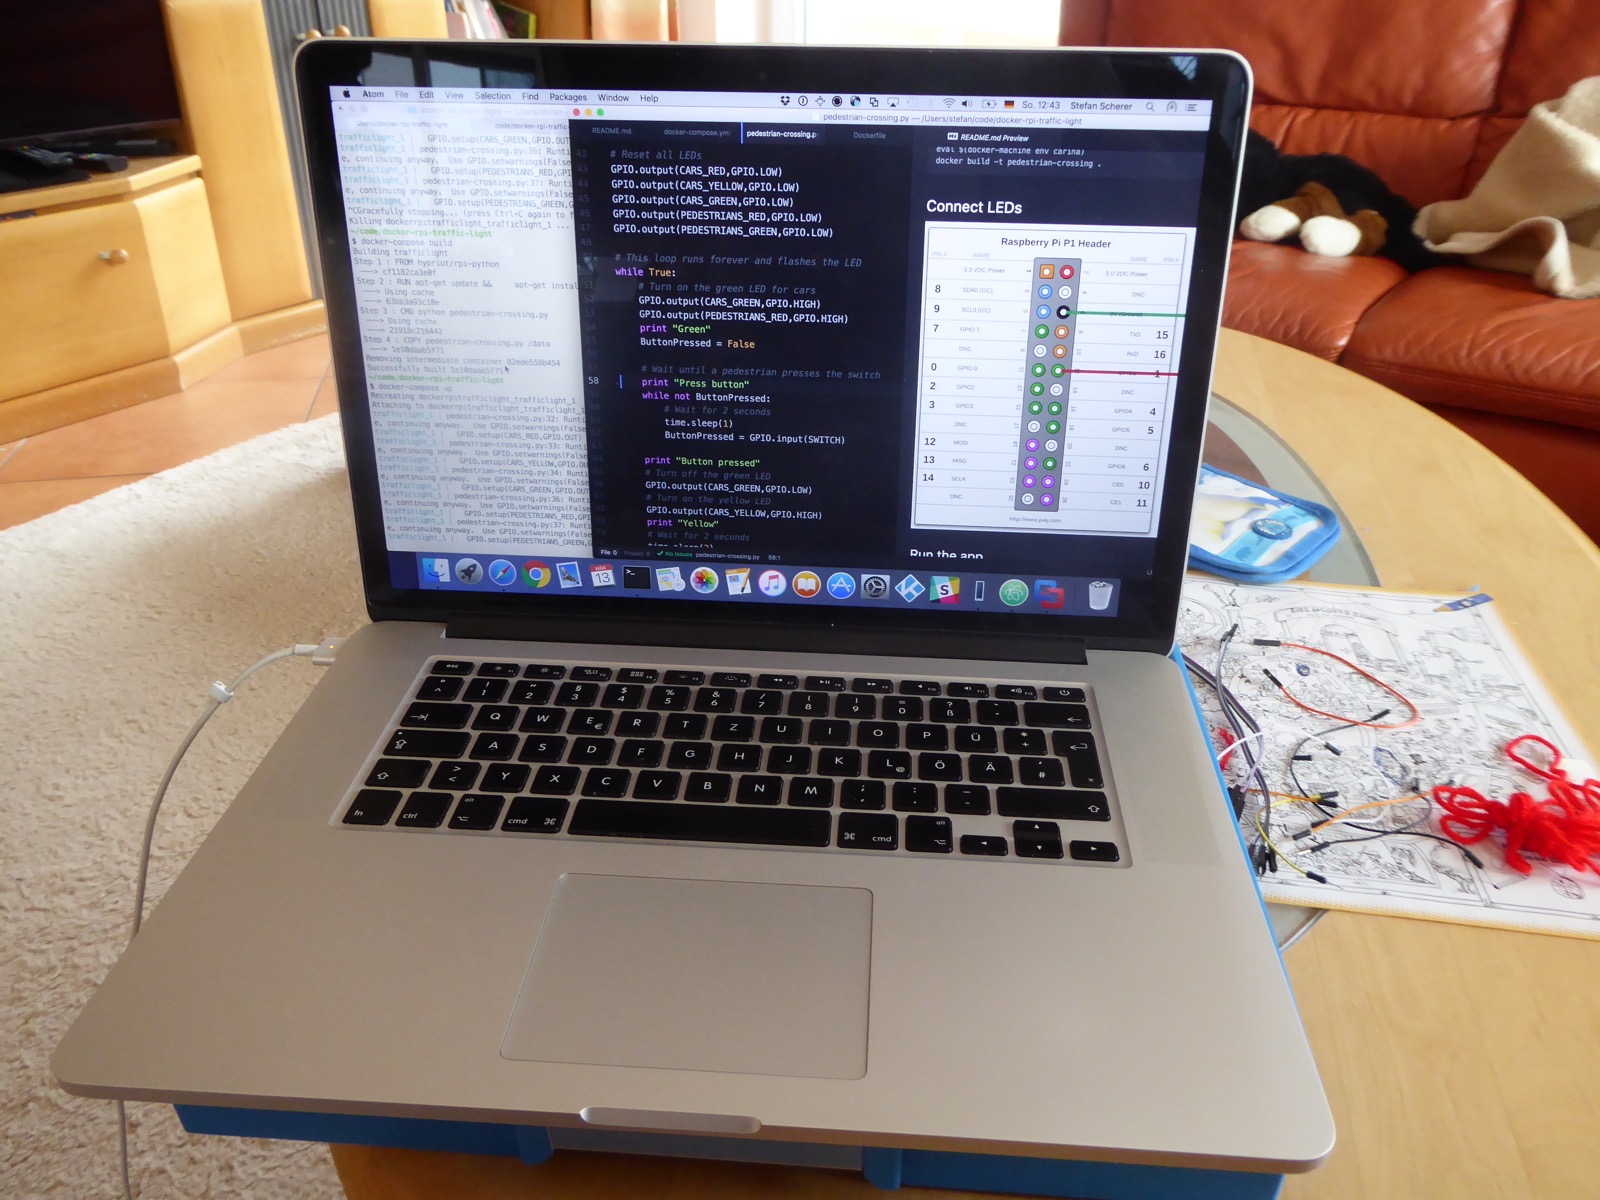
The software
The application is written in Python and it is based on the blog post Raspberry PI Traffic Lights by Bob Rathbone. I have added some more LEDs and changed it to our local traffic light scheme. You can find the full source code on GitHub.
Defining the GPIO pins
Initializing the GPIO ports
At the beginning of the app we initialize the GPIO ports and turn off all LEDs. They may turned on from aborting a previous run.
Main loop
The main loop begins with green lights for the cars. In this state the button for the pedestrian crossing is checked.
Pedestrian crossing
After the button has been pressed the next code block just changes the LEDs for the cars to red, green for pedestrians and back again.
That completes the whole app. I could explain how a traffic light works and my daughter could play with it for a while. This could be the whole story, but as I’ve deployed my app with Docker there is another story behind the story.
Dockerize all the things
I want to save my work and make it reproducible for me and others. So beside putting the source code into a GitHub repo I also dockerized the application development and deployment. With the help of Docker and the Docker tools it is very easy to develop from eg. a MacBook.
Even after months and other projects it is easy to spin up that application again as there is a standardized way. There also is no need to backup the SD image and write down what you had to install on your Raspberry Pi.
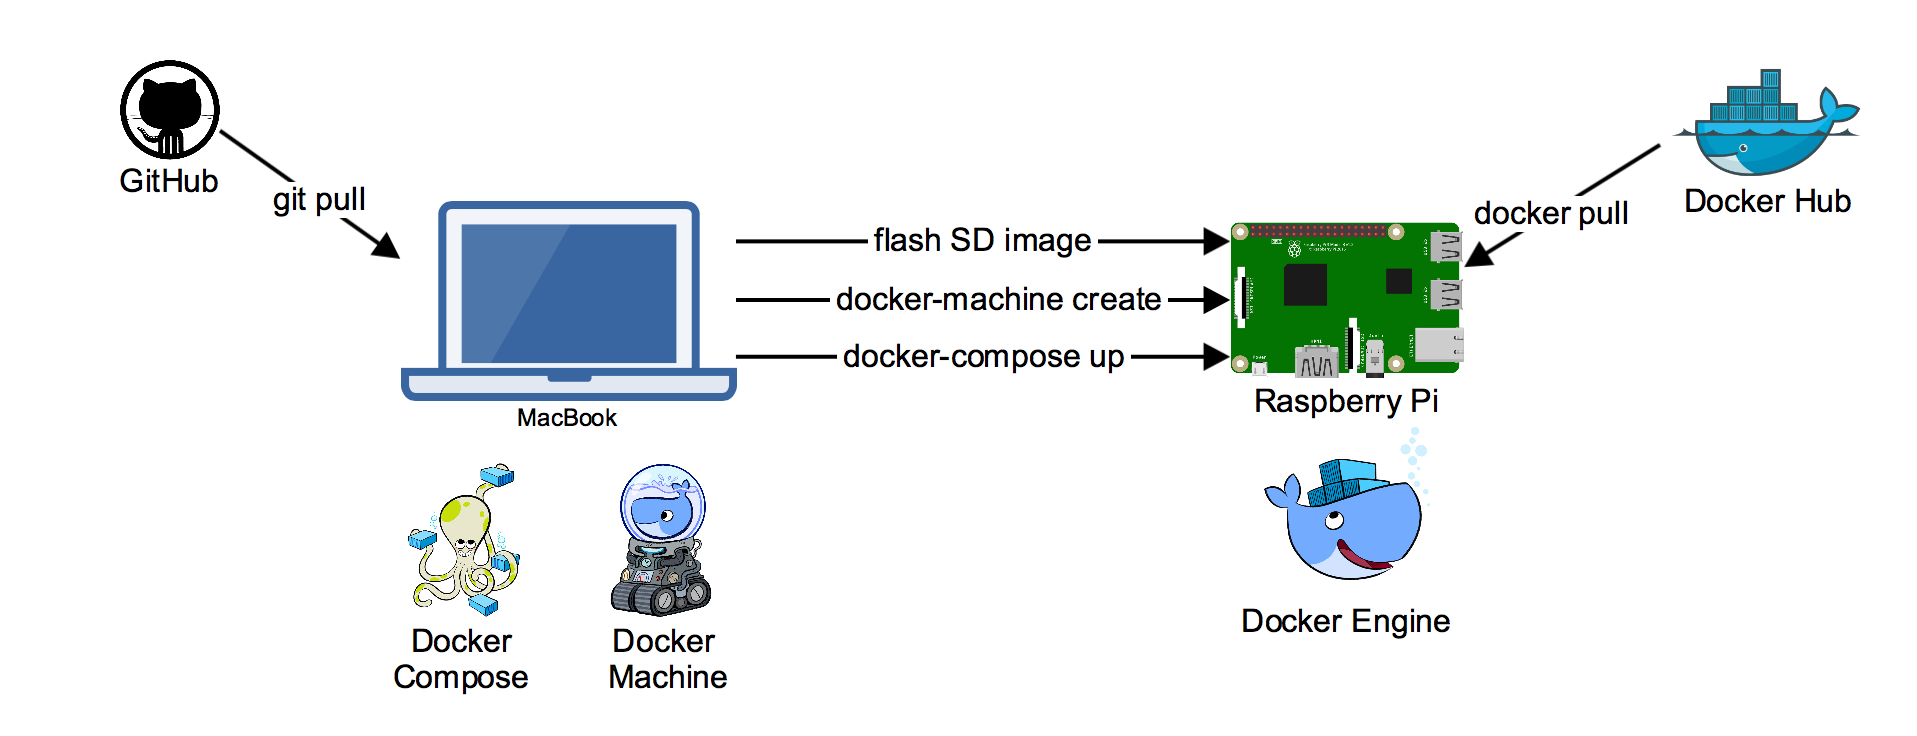
As shown in the diagram your Notebook should have the following tools installed.
- flash tool to flash the SD card image with HypriotOS
- Docker Machine to build a secured connection to the Raspberry Pi Docker Engine
- Docker Compose to easily start dockerized apps with a single command
- Docker Client to run other Docker commands
I don’t get into the details on how to connect your Notebook with the Docker Engine on the Raspberry Pi. This is part of a previous blog post how to use docker-machine for that.
Dockerfile
To build the Docker image we need a Dockerfile. We use a Python base image and install the needed tools and dependencies. Then we add the application source code and define the command to execute.
docker-compose.yml
Docker Compose can be used to simplify running the container. With the docker-compose.yml we can document all the parameters needed to start the container. The file is versioned in Git so we do not forget how to run this container.
Developing the app
When you develop the app or want to modify the source code the Docker image has to be rebuilt with the new code. To do this just run this command
docker-compose build
Running the app
docker-compose up
If you want to stop the app again, just press CTRL+C. You may have to press it twice to kill the app.
Running permanently
You can run the application automatically by adding -d. The docker-compose.yml also sets the restart policy to always, so the container is starting right after booting the Raspberry Pi. This is very useful for such hardware projects which should start automatically after turning on your Pi.
docker-compose up -d
If you want to stop the app again, just use this command
docker-compose kill
Sharing the dockerized app
The advantage of using Docker is to easily share the dockerized app with others. As the developer of an app you just push the Docker image with to the Docker Hub. Others can pull this Docker image from there and run it without to know which tools and dependencies to install.
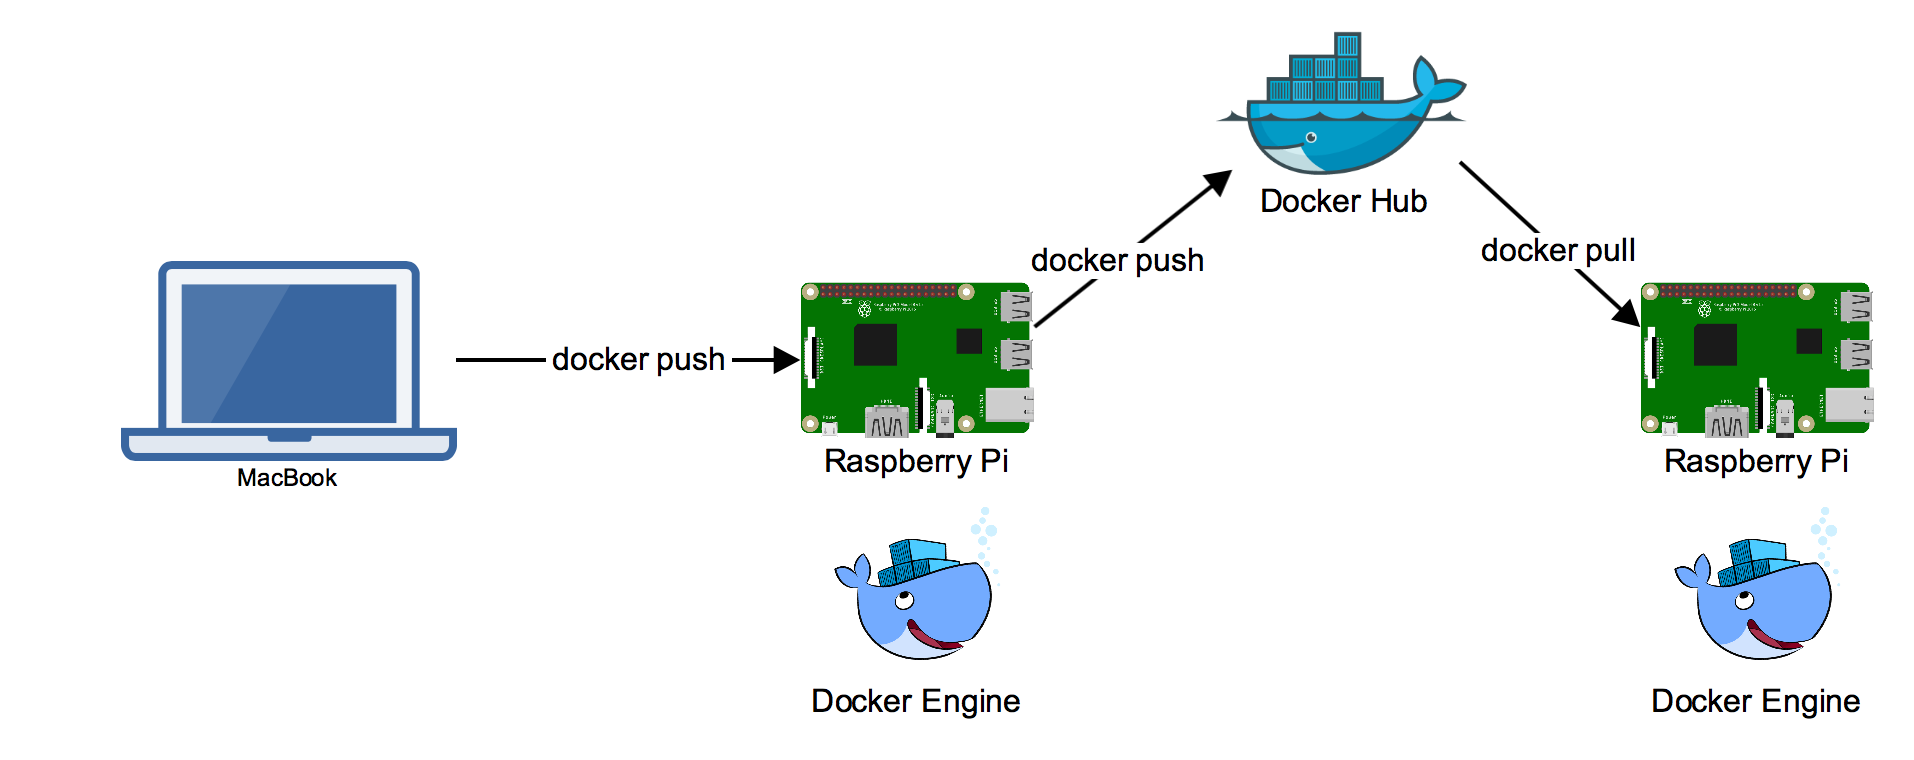
Pushing the Docker image
docker images
docker tag dockerrpitrafficlight_trafficlight stefanscherer/rpi-traffic-light
docker push stefanscherer/rpi-traffic-light
The Docker image is send sent to the Docker Hub. My example is available as image stefanscherer/rpi-traffic-light.
Sharing with Others
If someone else wants to build the traffic light and run your application, she has to use this little modified docker-compose.yml to pull the published Docker image instead of building it herself.
version: '2'
services:
  trafficlight:
    image: stefanscherer/rpi-traffic-light
    devices:
      - "/dev/mem:/dev/mem"
    cap_add:
      - SYS_RAWIO
    restart: always
And then run the application with
docker-compose up -d
Or use the docker command with all the parameters
docker run --rm --cap-add SYS_RAWIO --device /dev/mem stefanscherer/rpi-traffic-light
This command pulls the Docker image from the Docker hub if it isn’t available locally on the Raspberry Pi. After that it runs a Docker container with the application.
In this way any app can be published in the same way, regardless the programming language used.


As always use the comments below to give us feedback and share it on Twitter or Facebook.
Stefan @stefscherer
comments powered by Disqus