Static Website Generation on Steriods with Docker
Tue, Jun 30, 2015Within the blogging community static site generators have been an exceptional hot topic in the last couple of years (at least before Docker appeared). There are even whole projects dedicated to giving an overview of the most popular static site generators.
One of the first static site generators that got really popular was Jekyll, which was conceived by Tom Preston-Werner of Github fame. Typically static site generators transform input (e.g. text in a lightweight markup language such as Markdown or reStructuredText) to static HTML with the help of templates and filters.
There are several advantages to this approach - to name just a few:
- as the input is text it can easily be managed in a version control system like Git
- as the output is just static HTML it can easily deployed with a cheap webhoster or even for free with a service like Github Pages
- static HTML is much faster than dynamic HTML
- there is neither a server-side web-framework nor a database necessary
While Jekyll is still the most popular static site generator there are some new contenders, which are gaining traction very fast.
Out of these static site generators Hugo is our favorite. Hugo is written in Go and is focused on speed and performance. We are using Hugo to generate this very blog… :)
![]()
What we like most is that Hugo is basically just one binary. That makes it really easy to use Hugo in a Docker container. And - surprise - that is exactly what we did. You can find the prepared image on the Docker Hub.
Setting up Hugo
To get started with Hugo you need a Raspberry Pi with a running Docker engine. The best way to get there is with our Getting Started Guide.
After logging into your Raspberry Pi via SSH do a
docker pull hypriot/rpi-hugo
Next, create a directory for your awesome new blogging project at a location of your choice.
mkdir awesome-blog
Change into the new directory.
cd awesome-blog
Create a new site
First create a new site by
docker run --rm -v `pwd`:/www hypriot/rpi-hugo new site .
Afterwards you will find a basic directory layout which was created by Hugo. Next we need to download some nifty themes for our new site.
git clone --recursive --depth 1 https://github.com/spf13/hugoThemes themes
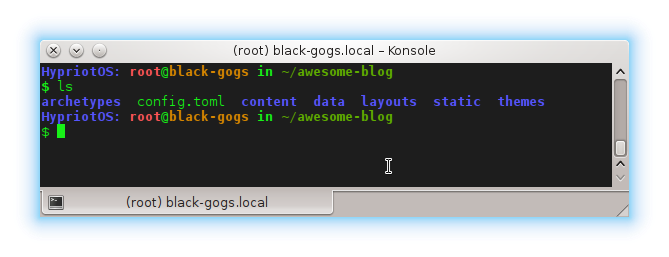
If you execute ls you should see a folder structure similar to the one in the following screenshot:
Create a new article
To create a new article run the following commands:
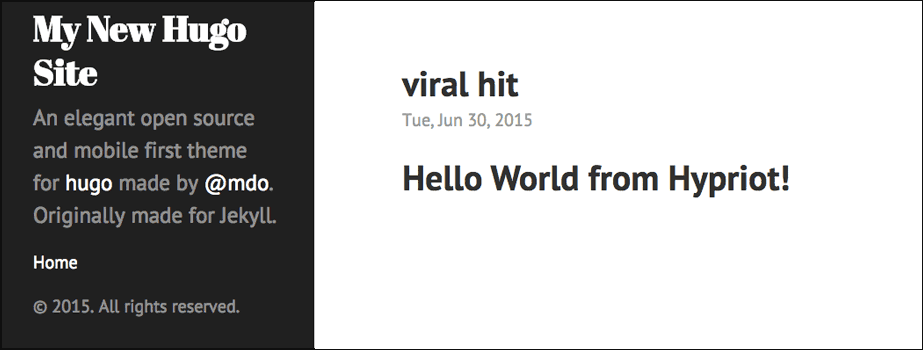
docker run --rm -v `pwd`:/www hypriot/rpi-hugo new post/viral-hit.md
echo '# Hello World from Hypriot!' >> content/post/viral-hit.md
This will create and start a new container based on the ‘hypriot/rpi-hugo’ image.
It will also mount the current directory into the container at /www and run hugo new post/viral-hit.md.
hugo new creates a new markdown document in the subfolder post. With the echo command we add a Hello-World message to our blog post.
You can further edit this document with the editor of your choice.
Live preview
To see a live preview of your new awesome blog run
docker run -d -p 1313:1313 -v `pwd`:/www hypriot/rpi-hugo server --bind=0.0.0.0 -w -D --theme=hyde
You can now open your browser and go to http://<ip of your pi>:1313 to preview your new blog.
Whenever you change any of your documents, Hugo will regenerate the HTML and reload the resulting webpage in your browser.
Build the final HTML pages
To get the final HTML pages for publication you just need to run Hugo without any options.
docker run --rm -v `pwd`:/www hypriot/rpi-hugo
Afterwards you can find the generated static HTML pages in a folder called public in your project folder.
Now you can just open public/index.html with a browser or upload the contents of the public folder to a webhoster of your preference.
You can learn more about Hugo and how to use it on it’s documentation website.
How we use Hugo
Right at the beginning when we started blogging about Docker on ARM we were faced with several challenges. We failed to address these challenges with our first blogging platform - Posthaven - and soon switched to Hugo. We wrote about this false start with Posthaven in We moved our blog from Posthaven to Hugo after only three posts. Why?.
But we did not tell you everything in that blog post. We held some bits back… :)
Hugo in Docker really starts to make a lot of sense when it is used together with some other tools in a team publishing workflow.
Our publishing workflow is based on Git, Github, Drone, Hugo and GitHub Pages.
Drone is a Continuous Integration server written in Go (surprise!) that runs exceptionally well in a Docker container. Drone can be used to “listen” for changes in a Git-Repository - in this case the sources of our Hugo blog project. Drone can then be configured to generate the static HTML of your blog in another Hugo container and publish it to Github Pages. But describing this setup in detail is for another day.
Two days ago we introduced Gogs, today Hugo - next will be a blog post about Drone. After that we will have all the ingredients together to describe how to integrate everything for an ultimate Docker and Raspberry Pi based blogging platform. What else would you wanna use for instant Blogger-(ähm Docker-) Bliss?
As always use the comments below to give us feedback and share it on Twitter or Facebook.
Govinda & Andreas
comments powered by Disqus