Deploying an IoT Swarm with Docker Machine
Sun, Sep 4, 2016With the new SwarmMode in Docker 1.12 it is really damn easy to build a Docker Swarm and connect different ARM devices to an IoT cluster.
So let’s connect a few of the $9 C.H.I.P. computers and a Raspberry Pi Zero all through a WiFi network…
Step 1: Install Docker Machine
First of all, we need to make sure we do have Docker Machine installed on our local computer. I’m using a Mac for this tutorial, but you can use Docker Machine on Linux or Windows too. If not already done, you should install the latest Docker Machine binary following the Install Docker Machine instructions.
You can easily check the version of Docker Machine with the following command.
docker-machine --version
docker-machine version 0.8.0, build b85aac1
Step 2: Prepare all C.H.I.P.’s with Docker Machine
In order to connect a couple of C.H.I.P. computers to a Docker Swarm cluster, we have to install Docker 1.12.1 first. This can be done easily by following the steps of my last tutorial Install Docker 1.12 on the $9 C.H.I.P. computer. Then we’re using the standard Docker Machine from a Mac to attach each C.H.I.P. device via a secured Docker API port and give each device an individual hostname on the network. With the help of Docker Machine it’s easier to access all the C.H.I.P. devices we’d like to connect to the Swarm cluster from a Mac, Linux or Windows machine.
Here are the basic steps we have to follow for each single C.H.I.P. computer:
- flash C.H.I.P. and install Docker 1.12.1
- detect the IP address and use Docker Machine
- restart Avahi daemon or reboot C.H.I.P.
- check the device connectivity via network and Docker API
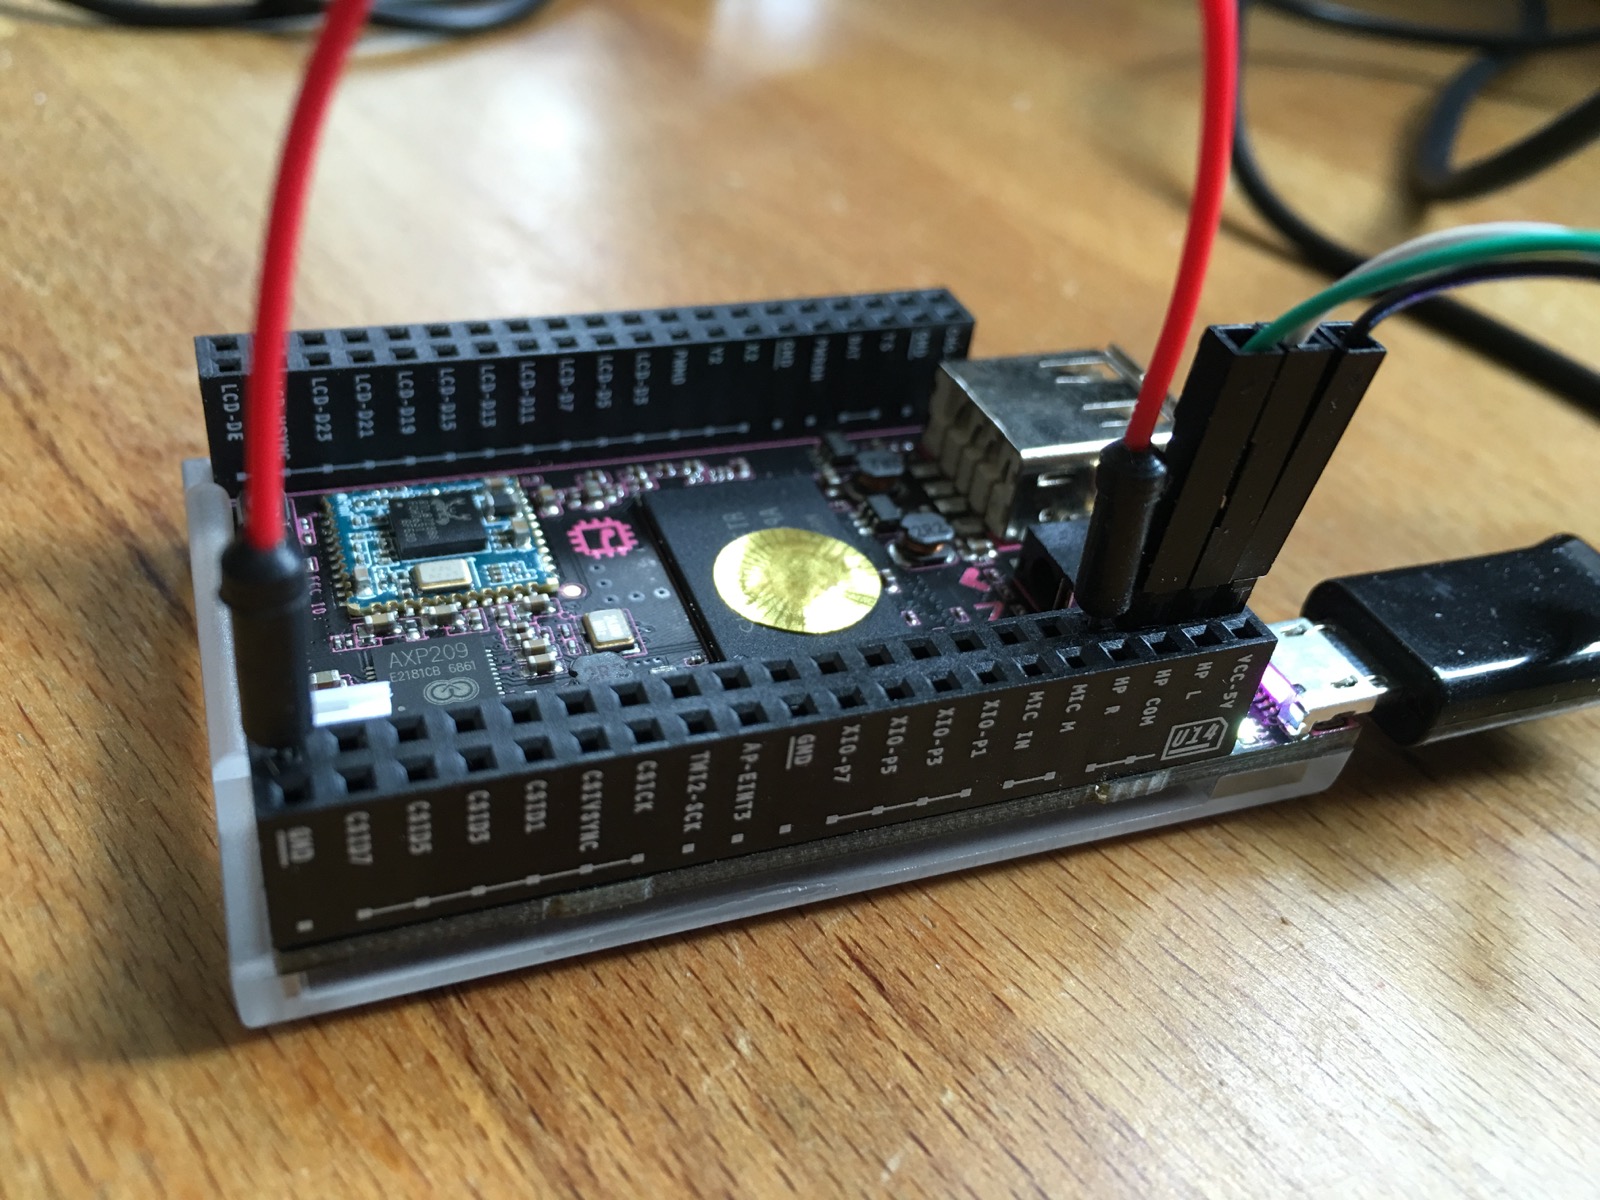
Flashing the C.H.I.P. computer in FEL mode with UART console cable attached:
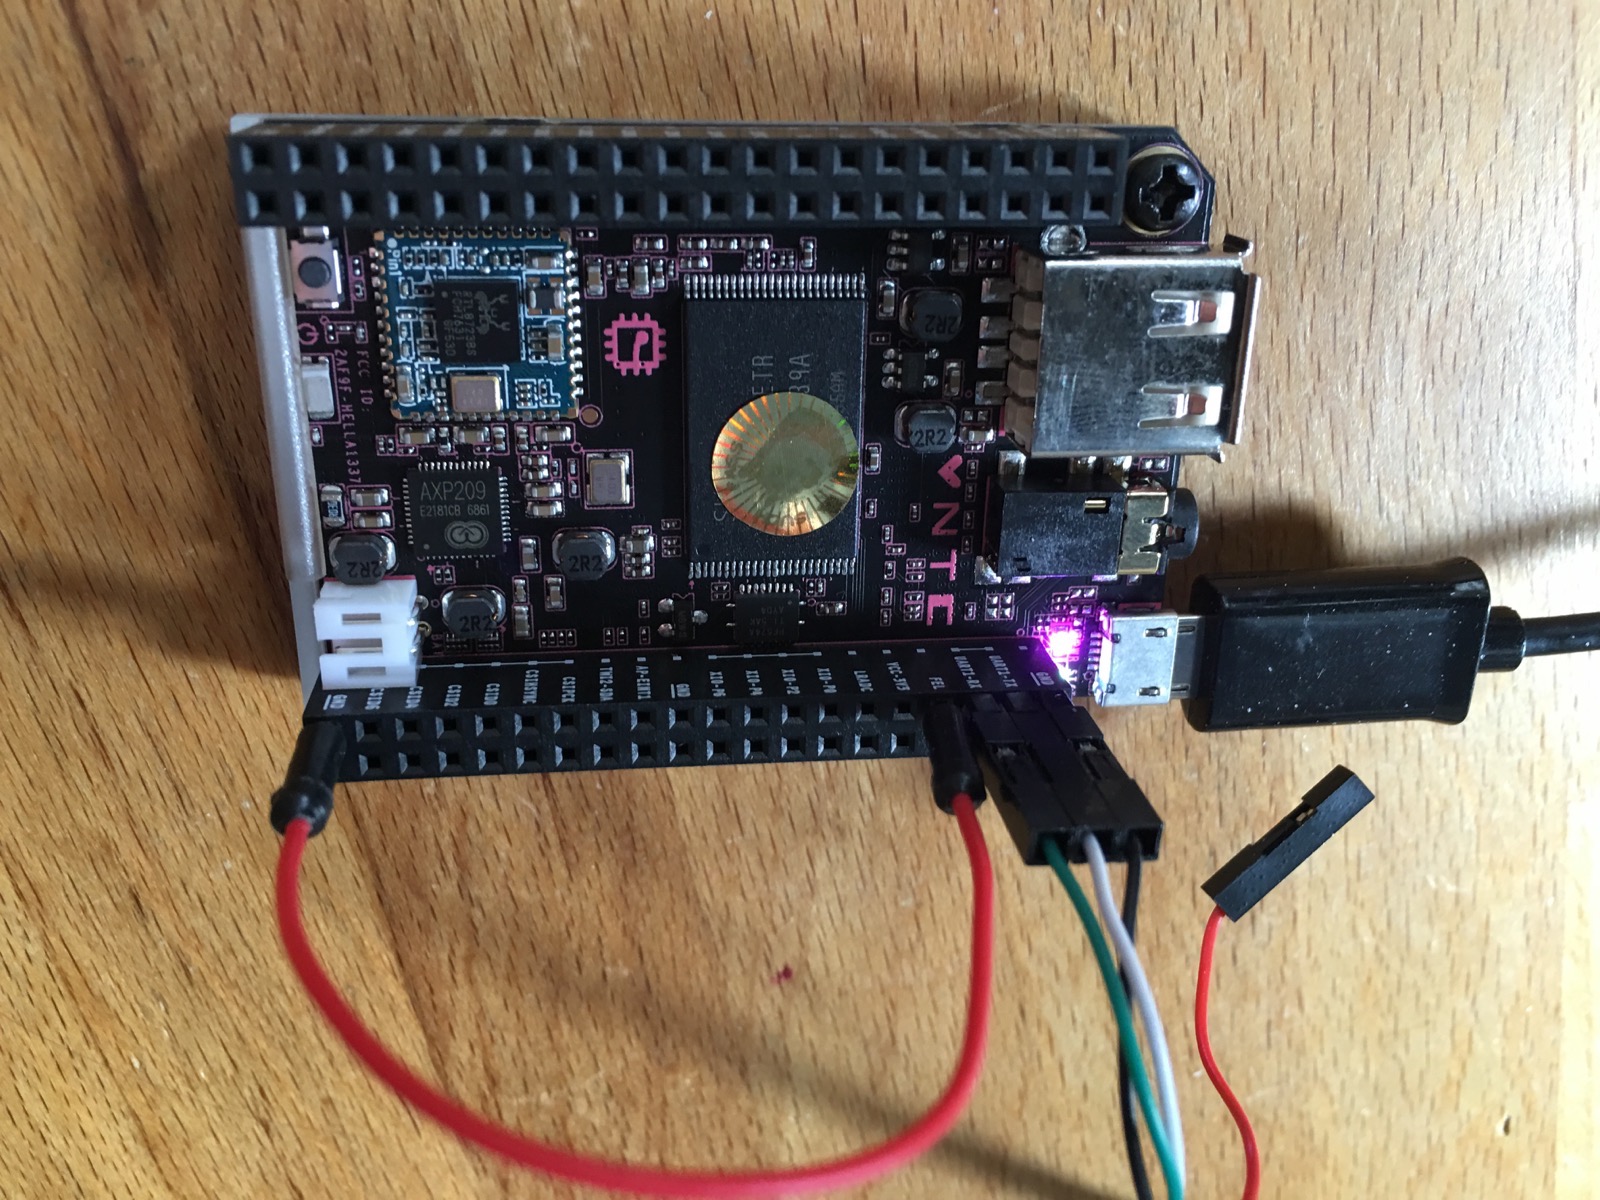
As soon as we’ve installed our first C.H.I.P. with Docker we’ll use its IP address and run docker-machine create and let’s do some Docker magic and we have secured the network access to its Docker Engine easily. In this command I’m using the flag --debug to get a more verbose output, so you can see all the details whats going on in the background, but you can omit this flag for the remaining C.H.I.P.’s.
CHIP_IP_ADDRESS=192.168.2.112
CHIP_NODENAME=swarm-chip01

docker-machine --debug create \
  --driver=generic \
  --engine-storage-driver=overlay \
  --generic-ip-address=$CHIP_IP_ADDRESS \
  $CHIP_NODENAME
After successfully running this command, the C.H.I.P. device is attached to Docker Machine.
docker-machine ls --filter name=swarm*
NAME           ACTIVE   DRIVER    STATE     URL                        SWARM   DOCKER    ERRORS
swarm-chip01   -        generic   Running   tcp://192.168.2.112:2376           v1.12.1
On the C.H.I.P. itself you can see that the hostname has changed. So let’s check this in detail to get a better understanding what’s happening behind the scene. Now we’re using some Docker Machine fu to connect to the device.
docker-machine ssh swarm-chip01
root@swarm-chip01:~#
The hostname has changed to swarm-chip01.
root@chip:~# cat /etc/hostname
swarm-chip01
And so there is a new local loopback address included as 127.0.1.1 swarm-chip01.
root@chip:~# cat /etc/hosts
127.0.0.1      	chip
127.0.0.1      	localhost
::1    		localhost ip6-localhost ip6-loopback
ff02::1		ip6-allnodes
ff02::2		ip6-allrouters

127.0.1.1 swarm-chip01
Let’s check if we can reach the C.H.I.P. from the network with its new hostname.
ping -c 3 swarm-chip01.local
ping: cannot resolve swarm-chip01.local: Unknown host
Unfortunately the Avahi service discovery daemon didn’t changed the hostname, so we have to restart it manually to get the changes in order to reach the C.H.I.P. with it’s new hostname from the WiFi network. Alternatively we can just reboot the C.H.I.P. to activate these changes. So let’s do it through Docker Machine.
docker-machine ssh swarm-chip01 systemctl restart avahi-daemon.service
And check with ping again.
ping -c 3 swarm-chip01.local
PING swarm-chip01.local (192.168.2.112): 56 data bytes
64 bytes from 192.168.2.112: icmp_seq=0 ttl=64 time=105.129 ms
64 bytes from 192.168.2.112: icmp_seq=1 ttl=64 time=3.529 ms
64 bytes from 192.168.2.112: icmp_seq=2 ttl=64 time=48.178 ms

--- swarm-chip01.local ping statistics ---
3 packets transmitted, 3 packets received, 0.0% packet loss
round-trip min/avg/max/stddev = 3.529/52.279/105.129/41.579 ms
Now it’s up to you to repeat these steps for all the remaining C.H.I.P. devices. After some time you should be ready and having a list of devices connected to Docker Machine. I’ve done this with six C.H.I.P.’s, and one of them is an Alpha unit which works exactly the same way without any differences.
docker-machine ls --filter name=swarm*
NAME            ACTIVE   DRIVER    STATE     URL                        SWARM   DOCKER    ERRORS
swarm-chip01    -        generic   Running   tcp://192.168.2.112:2376           v1.12.1
swarm-chip02    -        generic   Running   tcp://192.168.2.116:2376           v1.12.1
swarm-chip03    -        generic   Running   tcp://192.168.2.117:2376           v1.12.1
swarm-chip04    -        generic   Running   tcp://192.168.2.118:2376           v1.12.1
swarm-chip05    -        generic   Running   tcp://192.168.2.120:2376           v1.12.1
swarm-chip06    -        generic   Running   tcp://192.168.2.104:2376           v1.12.1
Step 3: Initialize the Swarm, create a Swarm manager
As soon as all the C.H.I.P.’s are prepared we are able to initiate a Swarm cluster. We are creating a Swarm manager first and then we can attach the other C.H.I.P.’s as additional Swarm managers or Swarm workers pretty easily. All the steps to form a Swarm cluster are literally a single command per device only!
With this command the Swarm will be initialized.
docker-machine ssh swarm-chip01 docker swarm init
Swarm initialized: current node (8174iszkmn4u4wwjogam8bsrw) is now a manager.

To add a worker to this swarm, run the following command:

    docker swarm join \
    --token SWMTKN-1-2olhigqvrmxkbby00qarokzdd6cmy0ovak6fst77y4qnec4ufv-4utgsw8ed9a0cyxx86yygqvzt \
    192.168.2.112:2377

To add a manager to this swarm, run 'docker swarm join-token manager' and follow the instructions.
And we do have our first Swarm manager running.
docker-machine ssh swarm-chip01 docker node ls
ID                           HOSTNAME      STATUS  AVAILABILITY  MANAGER STATUS
8174iszkmn4u4wwjogam8bsrw *  swarm-chip01  Ready   Active        Leader
Step 4: Set up Swarm for high-availability, attach more Swarm managers
In order to build a high-availability Swarm cluster, we like to join two additional Swarm managers. So, first we have to ask the Swarm Leader for an access token to join new Swarm managers. You have to know that the complete control traffic between Swarm nodes is secured by default.
docker-machine ssh swarm-chip01 docker swarm join-token manager
To add a manager to this swarm, run the following command:

    docker swarm join \
    --token SWMTKN-1-2olhigqvrmxkbby00qarokzdd6cmy0ovak6fst77y4qnec4ufv-beiuuzahvn9f7c1q42irqzncb \
    192.168.2.112:2377
With this given command we can now join the nodes swarm-chip02 and swarm-chip02 as Swarm managers with a single command for each of the nodes.
docker-machine ssh swarm-chip02 \
  docker swarm join \
  --token SWMTKN-1-2olhigqvrmxkbby00qarokzdd6cmy0ovak6fst77y4qnec4ufv-beiuuzahvn9f7c1q42irqzncb \
  192.168.2.112:2377
This node joined a swarm as a manager.

docker-machine ssh swarm-chip03 \
  docker swarm join \
  --token SWMTKN-1-2olhigqvrmxkbby00qarokzdd6cmy0ovak6fst77y4qnec4ufv-beiuuzahvn9f7c1q42irqzncb \
  192.168.2.112:2377
This node joined a swarm as a manager.
The Swarm status and the list of all Swarm nodes can be determined by asking any of the three Swarm managers.
docker-machine ssh swarm-chip01 docker node ls
ID                           HOSTNAME      STATUS  AVAILABILITY  MANAGER STATUS
1qelz3ttd54mh8fb57hf67ff1    swarm-chip03  Ready   Active        Reachable
8174iszkmn4u4wwjogam8bsrw *  swarm-chip01  Ready   Active        Leader
ctggddtwrg0ybrwpa52heaz9c    swarm-chip02  Ready   Active        Reachable
OSX: dieter@DietersMacBookPro in ~/code/github/hypriot/blog on deploy-swarm-on-chip-with-docker-machine

docker-machine ssh swarm-chip02 docker node ls
ID                           HOSTNAME      STATUS  AVAILABILITY  MANAGER STATUS
1qelz3ttd54mh8fb57hf67ff1    swarm-chip03  Ready   Active        Reachable
8174iszkmn4u4wwjogam8bsrw    swarm-chip01  Ready   Active        Leader
ctggddtwrg0ybrwpa52heaz9c *  swarm-chip02  Ready   Active        Reachable
OSX: dieter@DietersMacBookPro in ~/code/github/hypriot/blog on deploy-swarm-on-chip-with-docker-machine

docker-machine ssh swarm-chip03 docker node ls
ID                           HOSTNAME      STATUS  AVAILABILITY  MANAGER STATUS
1qelz3ttd54mh8fb57hf67ff1 *  swarm-chip03  Ready   Active        Reachable
8174iszkmn4u4wwjogam8bsrw    swarm-chip01  Ready   Active        Leader
ctggddtwrg0ybrwpa52heaz9c    swarm-chip02  Ready   Active        Reachable
Step 5: Let’s grow the Swarm, attach all Swarm workers
Now it’s time to join our remaining C.H.I.P. devices as Swarm workers to our Swarm cluster. For this purpose we just pick the token from the initial Swarm creation command. But if we can’t remember we can just ask one of the Swarm managers for the access token with the command.
docker-machine ssh swarm-chip02 docker swarm join-token worker
To add a worker to this swarm, run the following command:

    docker swarm join \
    --token SWMTKN-1-2olhigqvrmxkbby00qarokzdd6cmy0ovak6fst77y4qnec4ufv-4utgsw8ed9a0cyxx86yygqvzt \
    192.168.2.116:2377
Let’s join our workers one by one now.
docker-machine ssh swarm-chip04 \
  docker swarm join \
  --token SWMTKN-1-2olhigqvrmxkbby00qarokzdd6cmy0ovak6fst77y4qnec4ufv-4utgsw8ed9a0cyxx86yygqvzt \
  192.168.2.112:2377
This node joined a swarm as a worker.

docker-machine ssh swarm-chip05 \
  docker swarm join \
  --token SWMTKN-1-2olhigqvrmxkbby00qarokzdd6cmy0ovak6fst77y4qnec4ufv-4utgsw8ed9a0cyxx86yygqvzt \
  192.168.2.112:2377
This node joined a swarm as a worker.

docker-machine ssh swarm-chip06 \
  docker swarm join \
  --token SWMTKN-1-2olhigqvrmxkbby00qarokzdd6cmy0ovak6fst77y4qnec4ufv-4utgsw8ed9a0cyxx86yygqvzt \
  192.168.2.112:2377
This node joined a swarm as a worker.
As a result we have joined all of the six C.H.I.P. devices to the Swarm cluster, three as Swarm managers and three as Swarm workers.
Step 6: Attach an additional Pi Zero as Swarm worker
But we’re not limited in using only one kind of ARM devices for our Swarm cluster. So I’d like to add a different device, a Raspberry Pi Zero which is equipped with a RedBear IoT pHAT for WiFi/Bluetooth connectivity.
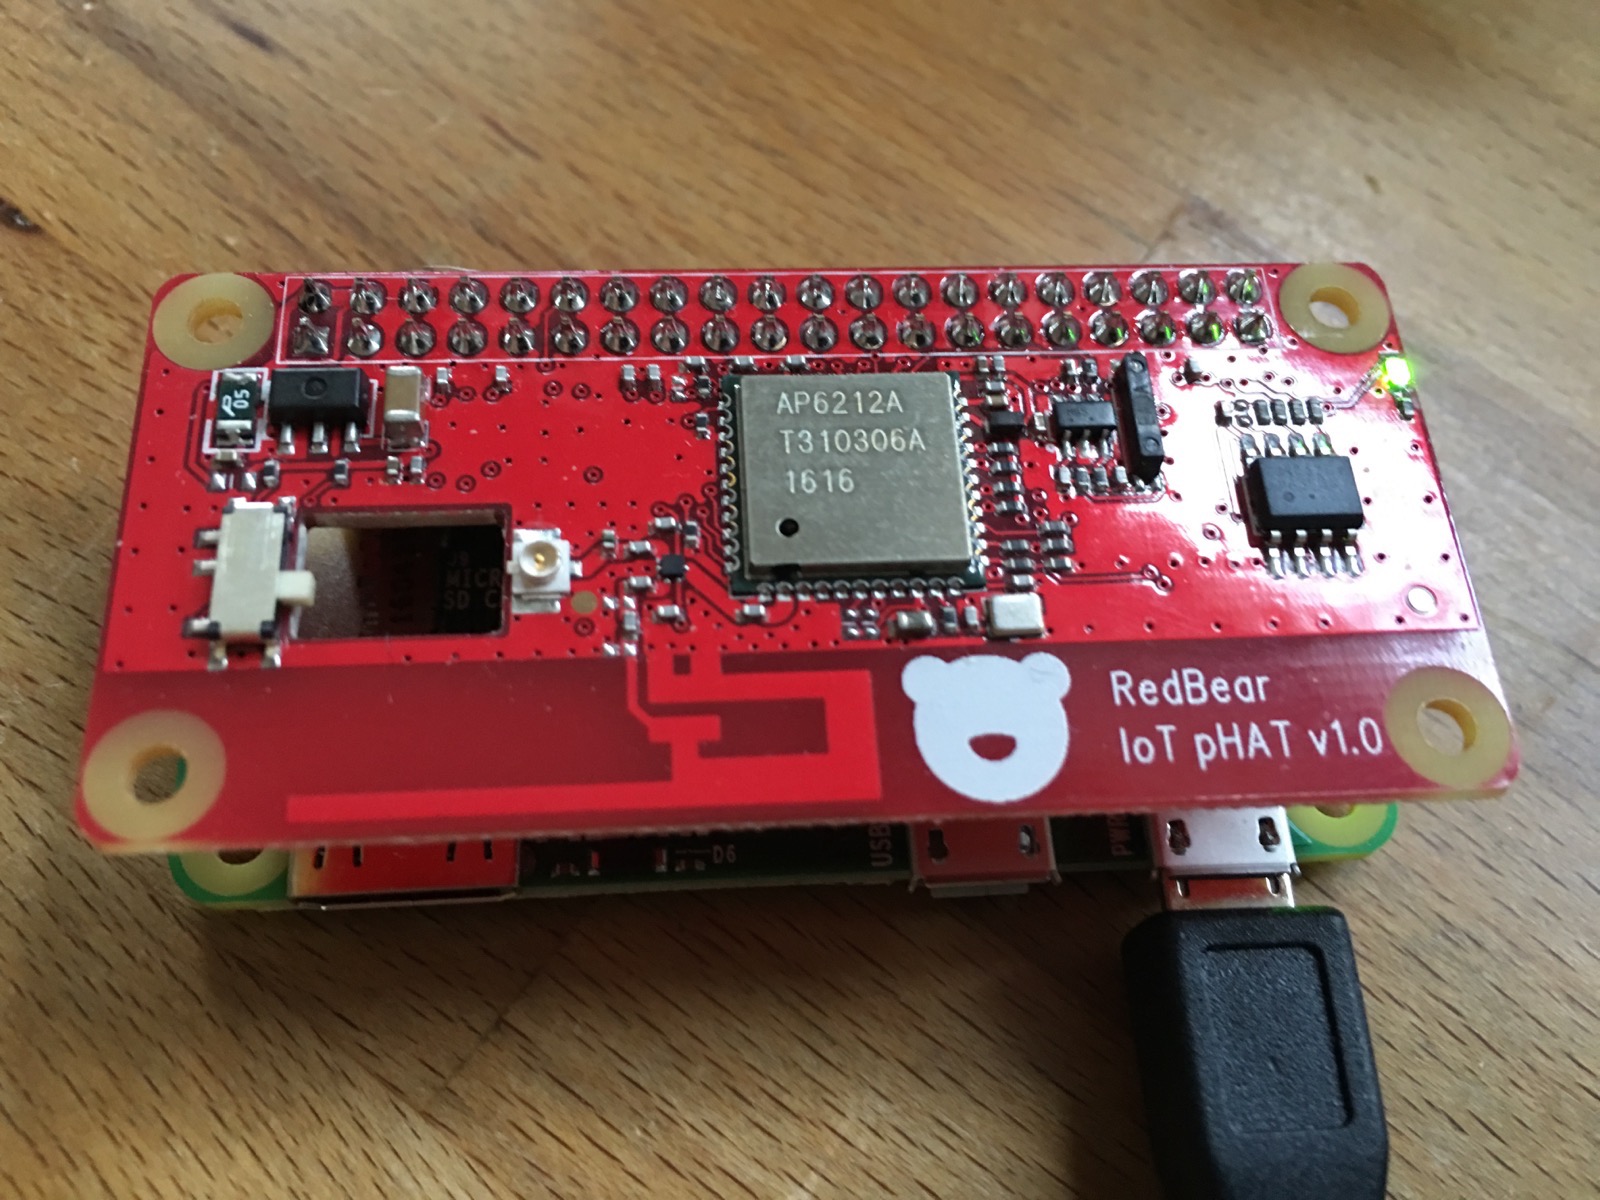
Here you can see that using HypriotOS for RPi and the Hypriot flash tool it’s damn easy to create another ARM device with Docker 1.12.1 and attach it via WiFi to our network.
Flash the SD card, and power up the Raspberry Pi Zero.
flash -n swarm-raspi01 -s "WLAN-R46VFR" -p "************" https://github.com/hypriot/image-builder-rpi/releases/download/v1.0.0/hypriotos-rpi-v1.0.0.img.zip
Determine the IP address of the Pi Zero.
ping -c 3 swarm-raspi01.local
PING swarm-raspi01.local (192.168.2.119): 56 data bytes
64 bytes from 192.168.2.119: icmp_seq=0 ttl=64 time=617.658 ms
64 bytes from 192.168.2.119: icmp_seq=1 ttl=64 time=26.326 ms
64 bytes from 192.168.2.119: icmp_seq=2 ttl=64 time=1187.048 ms

--- swarm-raspi01.local ping statistics ---
3 packets transmitted, 3 packets received, 0.0% packet loss
round-trip min/avg/max/stddev = 26.326/610.344/1187.048/473.891 ms
Prepare SSH access to the Pi Zero, use username=pirate and password=hypriot.
ssh-keygen -R 192.168.2.119
ssh-copy-id [email protected]
ssh [email protected]
uname -a
Linux swarm-raspi01 4.4.15-hypriotos+ #2 PREEMPT Mon Jul 25 09:18:11 UTC 2016 armv6l GNU/Linux
exit
Login and install a fix on the Pi so we can use the standard Docker Machine binary.
ssh [email protected]
curl -sSL https://github.com/DieterReuter/arm-docker-fixes/raw/master/001-fix-docker-machine-1.8.0-create-for-arm/apply-fix-001.sh | bash
Back on our Mac we are able to run Docker Machine and attach the Raspi. As you can see, we do use another flag --generic-ssh-user=pirate because we’re using a different username instead of the default root.
RASPI_IP_ADDRESS=192.168.2.119
RASPI_NODENAME=swarm-raspi01

docker-machine --debug create \
  --driver=generic \
  --engine-storage-driver=overlay \
  --generic-ip-address=$RASPI_IP_ADDRESS \
  --generic-ssh-user=pirate \
  $RASPI_NODENAME
After a few minutes only, the Raspberry Pi Zero can be accessed through Docker Machine with the exactly same methods and commands like the C.H.I.P. devices.
docker-machine ls --filter name=swarm*
NAME            ACTIVE   DRIVER    STATE     URL                        SWARM   DOCKER    ERRORS
swarm-chip01    -        generic   Running   tcp://192.168.2.112:2376           v1.12.1
swarm-chip02    -        generic   Running   tcp://192.168.2.116:2376           v1.12.1
swarm-chip03    -        generic   Running   tcp://192.168.2.117:2376           v1.12.1
swarm-chip04    -        generic   Running   tcp://192.168.2.118:2376           v1.12.1
swarm-chip05    -        generic   Running   tcp://192.168.2.120:2376           v1.12.1
swarm-chip06    -        generic   Running   tcp://192.168.2.104:2376           v1.12.1
swarm-raspi01   -        generic   Running   tcp://192.168.2.119:2376           v1.12.1
Finally we join our last Swarm worker, a lonely Raspberry Pi Zero running HypriotOS 1.0.1 and Docker 1.12.1, to the Swarm cluster.
docker-machine ssh swarm-raspi01 \
  docker swarm join \
  --token SWMTKN-1-2olhigqvrmxkbby00qarokzdd6cmy0ovak6fst77y4qnec4ufv-4utgsw8ed9a0cyxx86yygqvzt \
  192.168.2.112:2377
This node joined a swarm as a worker.
Step 7: Check the complete Swarm
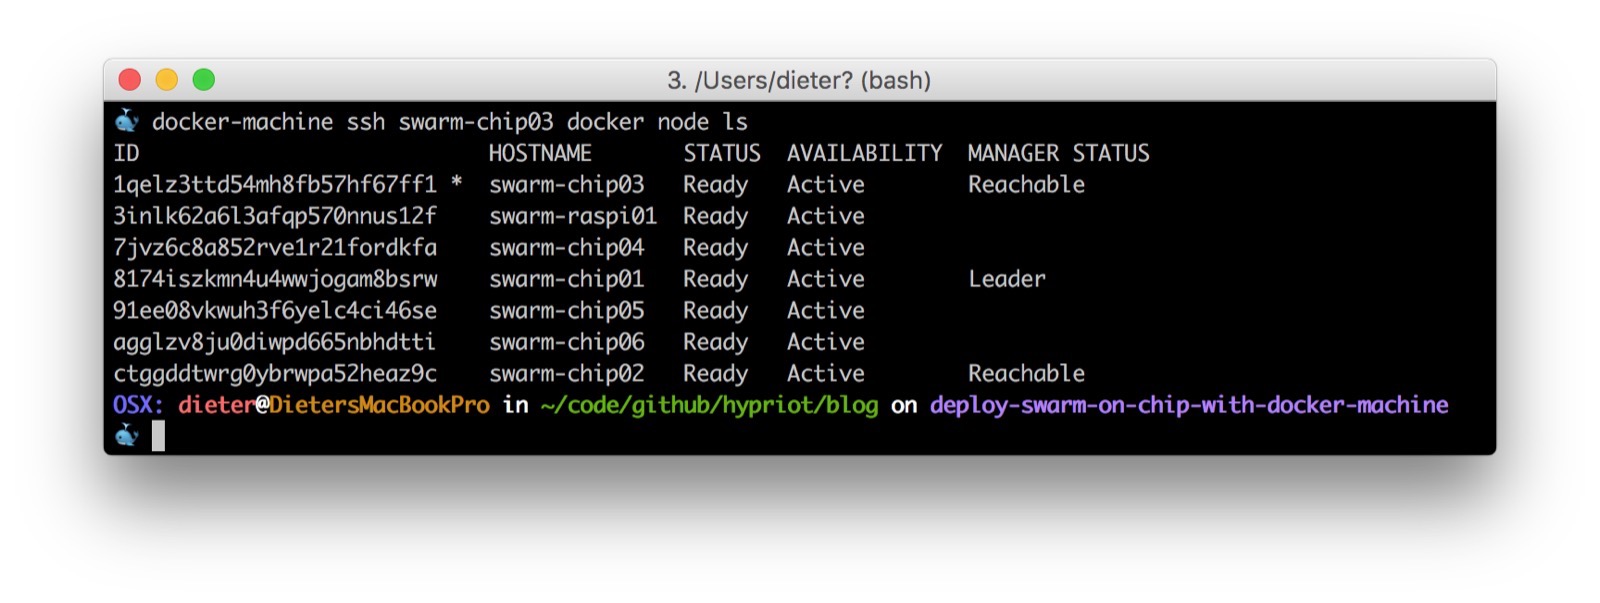
With the docker node ls command issued on any of the Swarm managers we can list all the Swarm nodes, get their roles and status shown in the printed output on our terminal window.
docker-machine ssh swarm-chip03 docker node ls
ID                           HOSTNAME       STATUS  AVAILABILITY  MANAGER STATUS
1qelz3ttd54mh8fb57hf67ff1 *  swarm-chip03   Ready   Active        Reachable
3inlk62a6l3afqp570nnus12f    swarm-raspi01  Ready   Active
7jvz6c8a852rve1r21fordkfa    swarm-chip04   Ready   Active
8174iszkmn4u4wwjogam8bsrw    swarm-chip01   Ready   Active        Leader
91ee08vkwuh3f6yelc4ci46se    swarm-chip05   Ready   Active
agglzv8ju0diwpd665nbhdtti    swarm-chip06   Ready   Active
ctggddtwrg0ybrwpa52heaz9c    swarm-chip02   Ready   Active        Reachable
THE RESULT: a mixed IoT Swarm running Docker 1.12
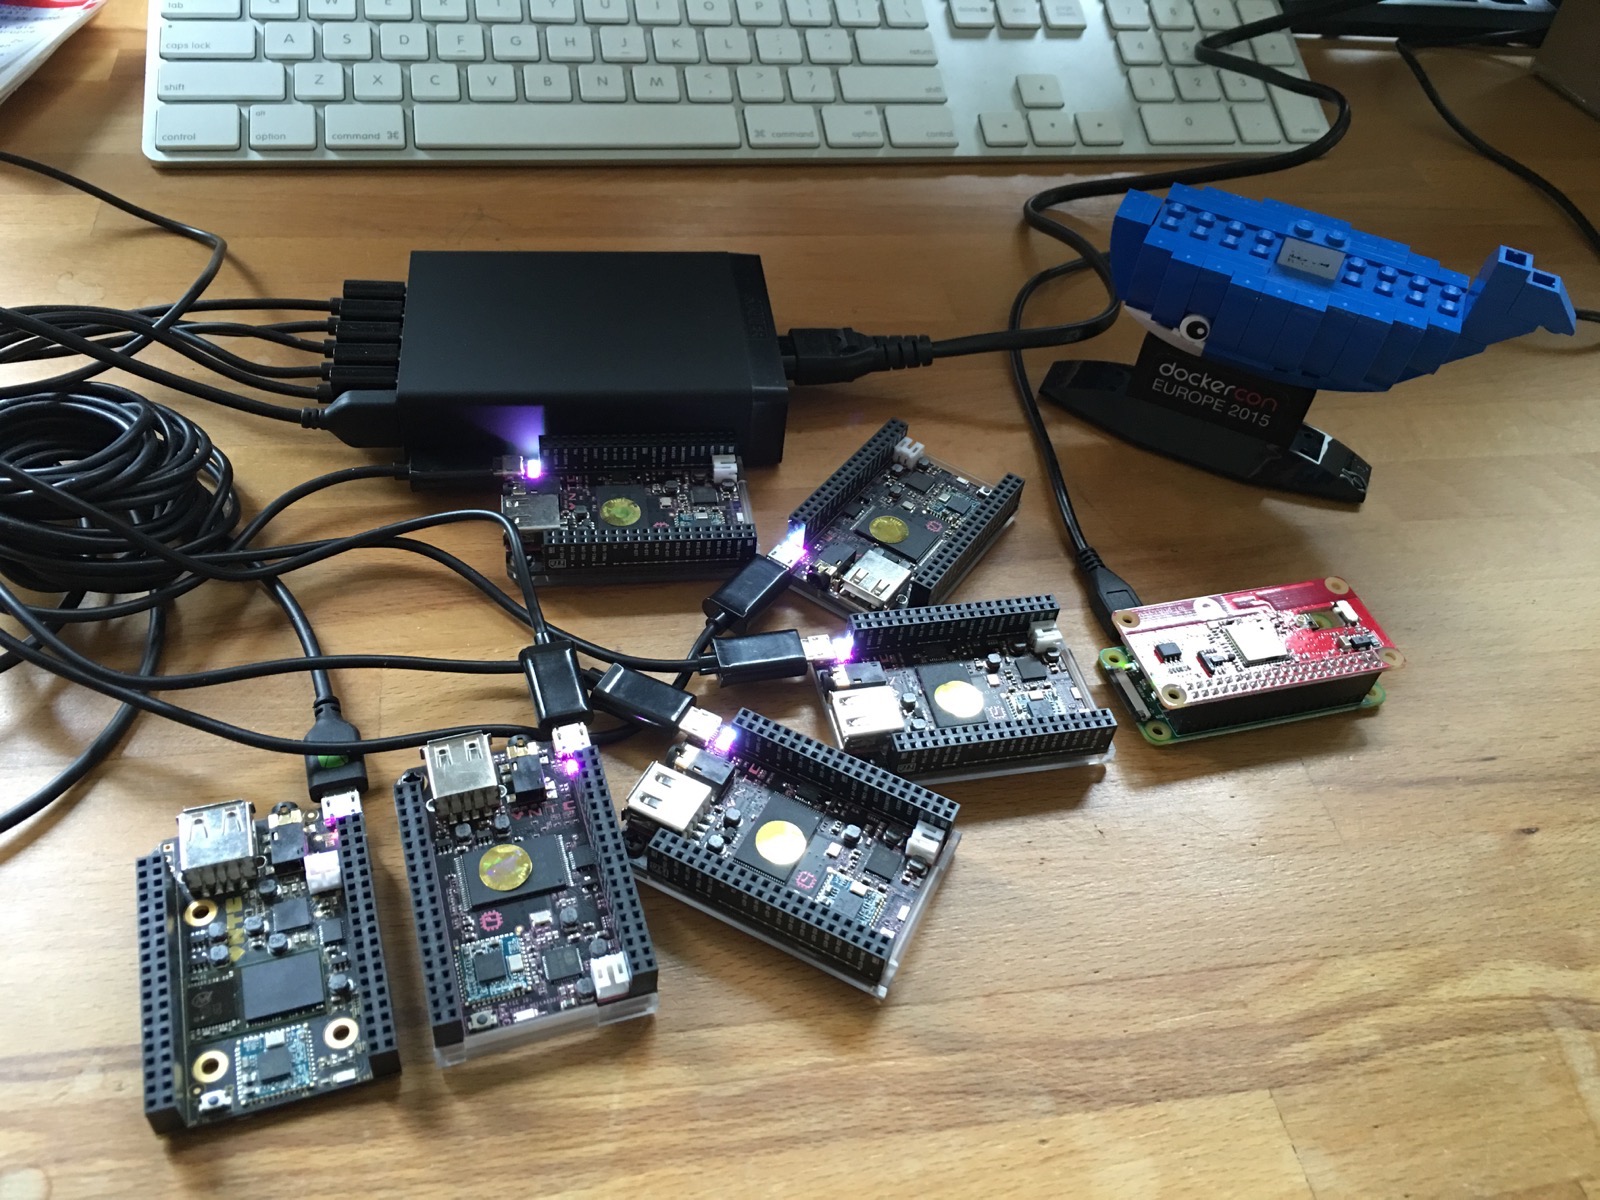
This is our newly created Swarm cluster, built with an USB power supply from Anker, 6x C.H.I.P. computers and a lonely Raspberry Pi Zero - all devices attached through a WiFi network and running Docker 1.12.1 with SwarmMode:
Next steps
With this hardware setup we’ve now built a network of seven ARM devices for IoT which are all connected through WiFi. All the control traffic between the nodes are secured be default and can be centrally controlled through the Swarm managers and we can connect them securely from a local computer via Docker Machine. The ARM boards can be spread out in your house and can run different tasks as Docker containers… but these details I’d like to cover in a future blog post.
Feedback, please
As always use the comments below to give us feedback and share it on Twitter or Facebook.
Please send us your feedback on our Gitter channel or tweet your thoughts and ideas on this project at @HypriotTweets.
Dieter @Quintus23M
comments powered by Disqus
 Edit this blog on GitHub